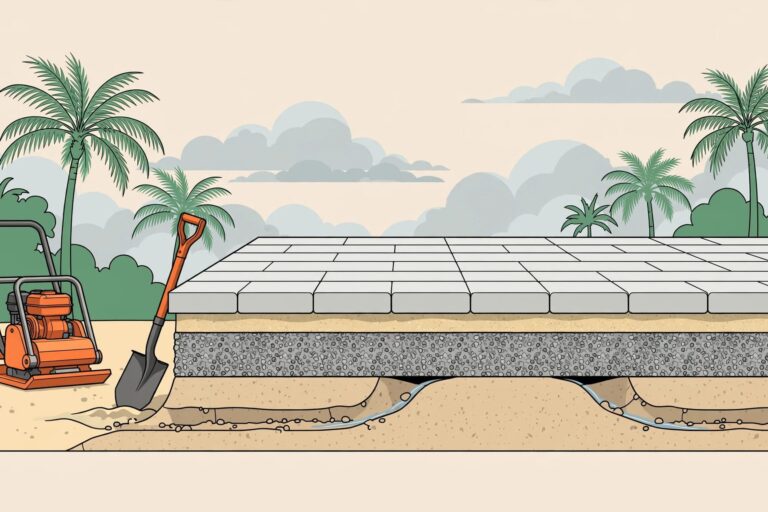
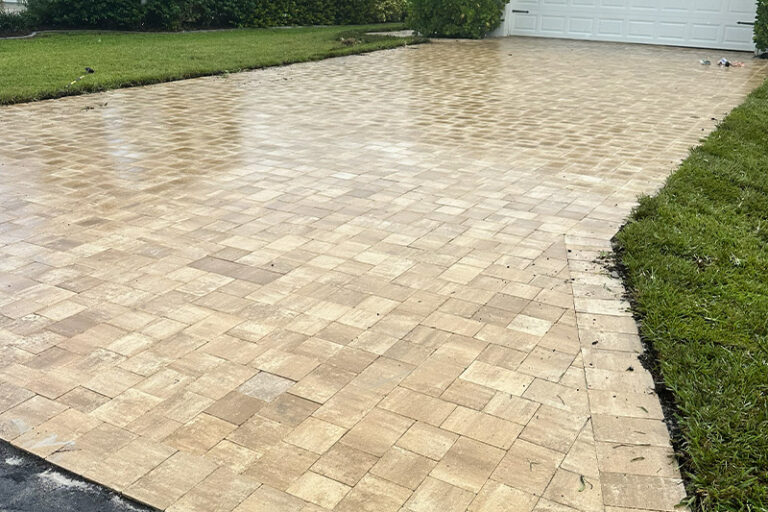
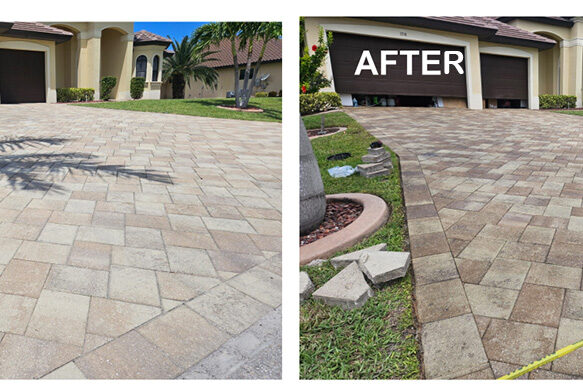
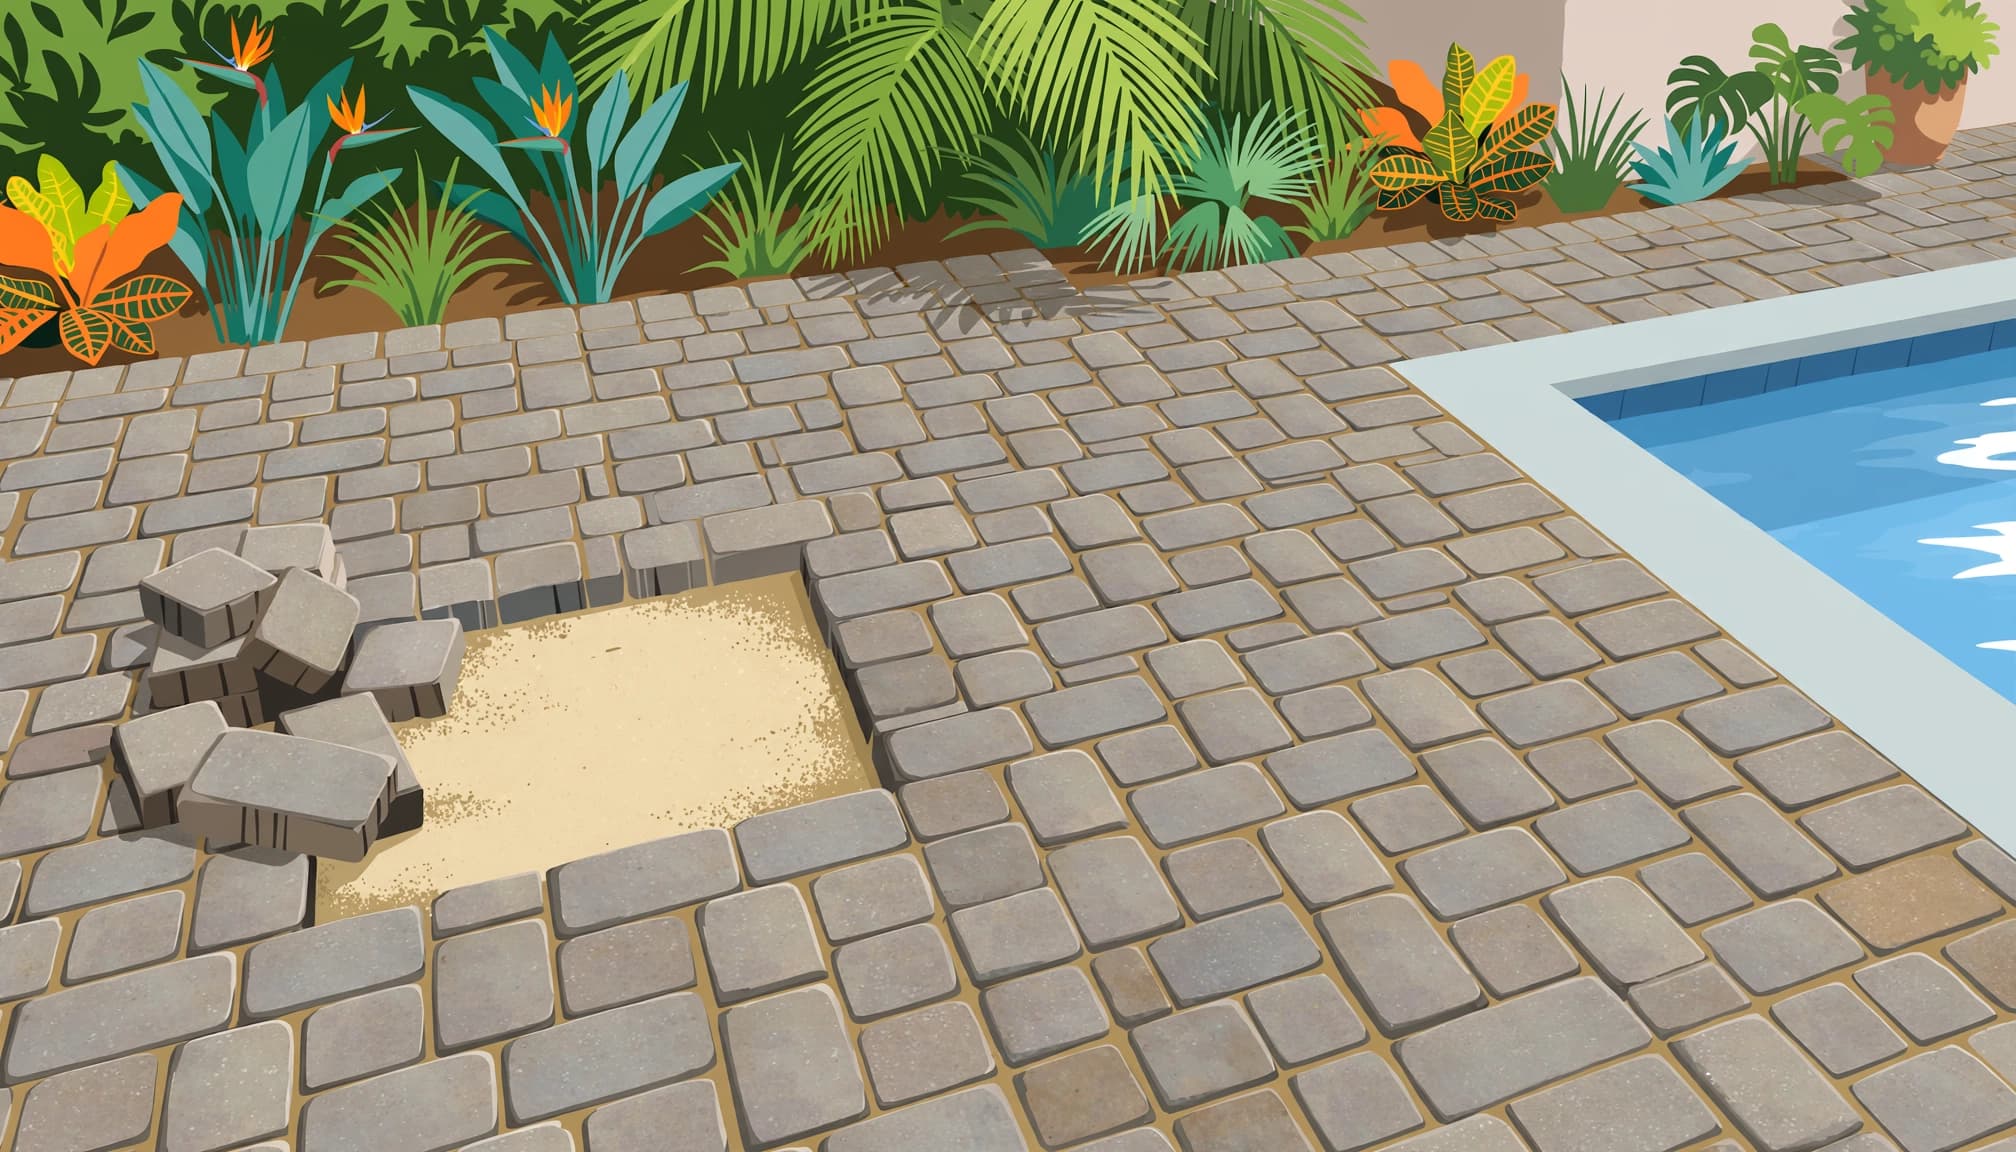
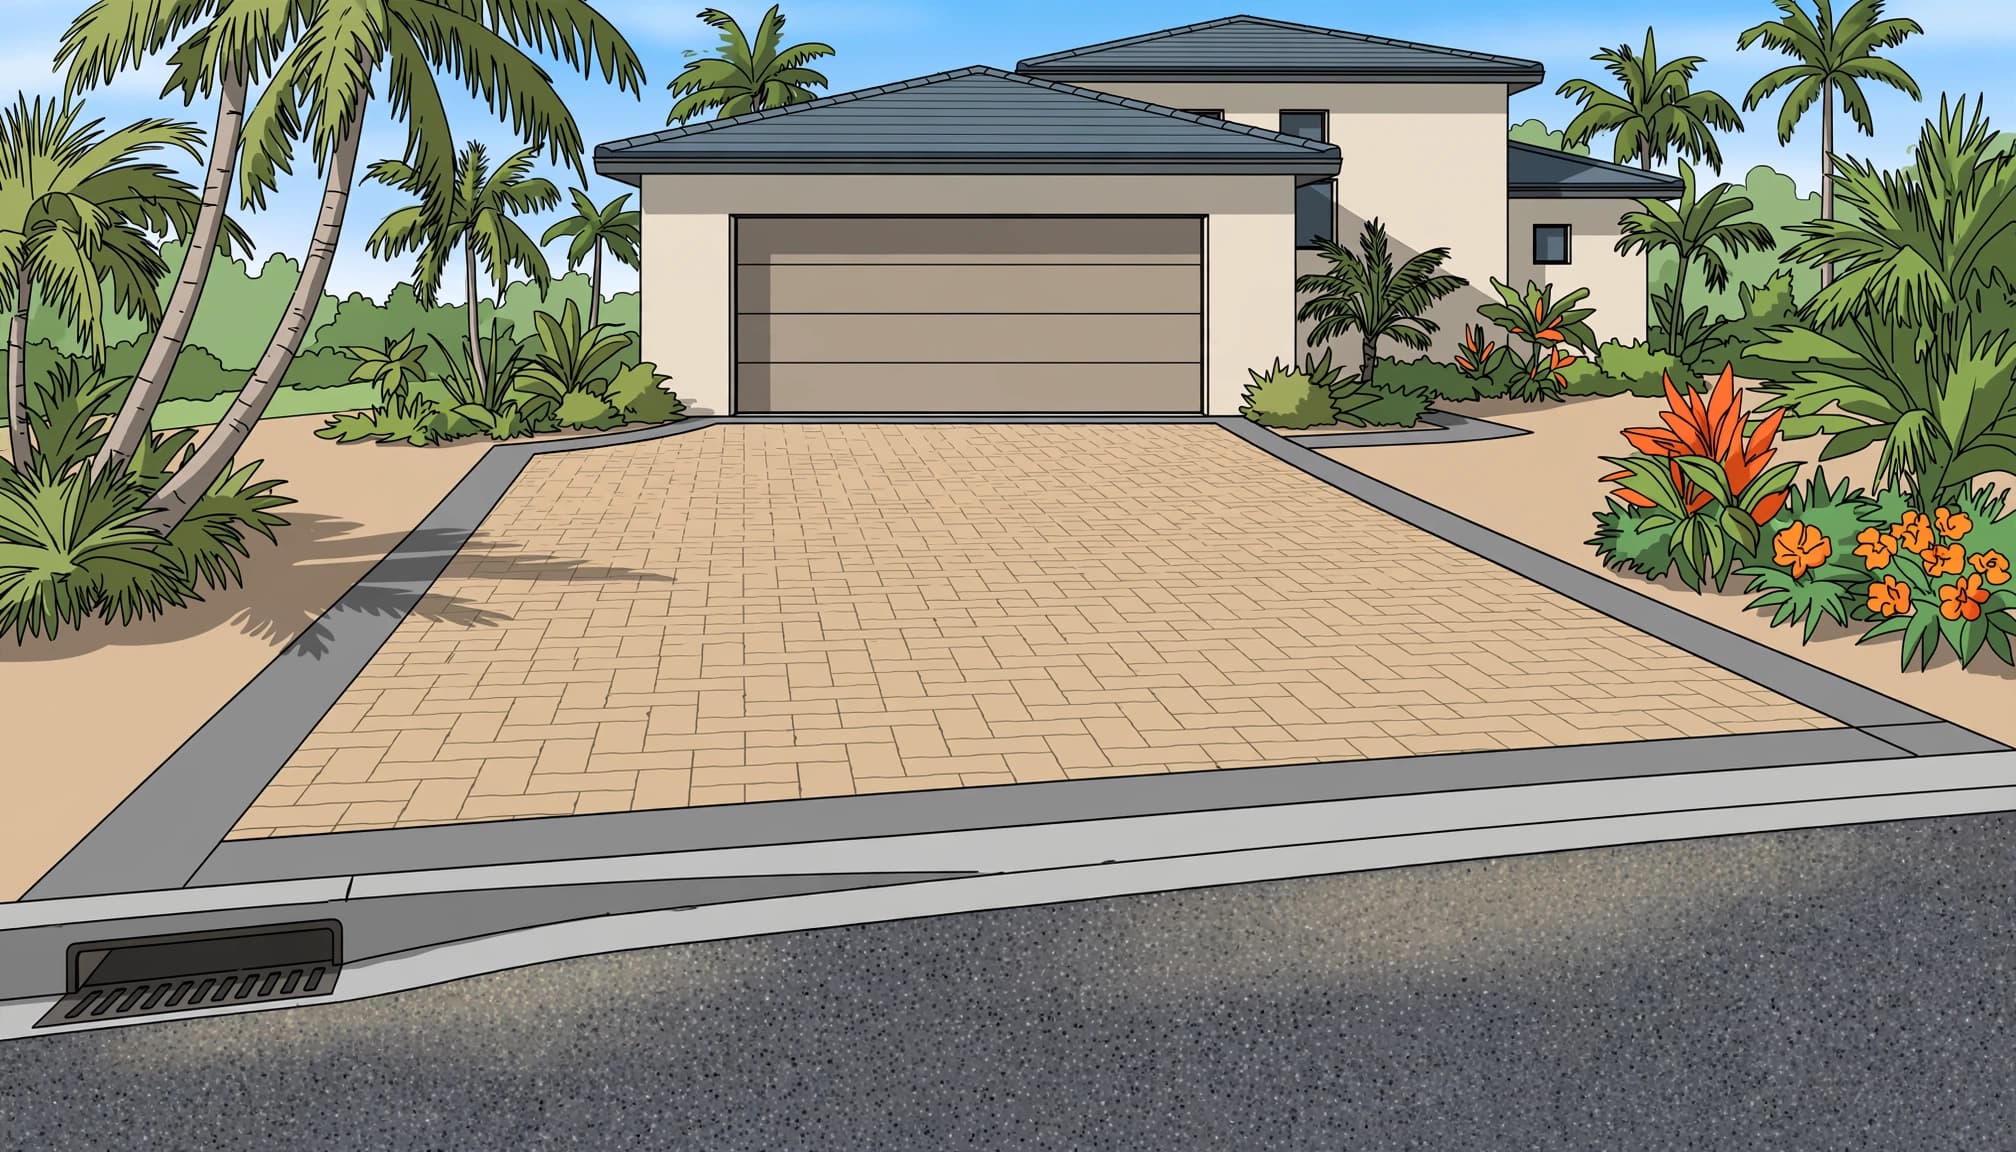
A paver patio or driveway can look perfect on day one and still suffer base failure after Florida’s wet season. In Southwest Florida, paver base depth Florida homeowners need depends on traffic loads, soil stability, drainage, and how the space is used.
I don’t like placing beautiful new pavers over loose sand, old fill, or a base that hasn’t been compacted properly. A quality paver job starts with excavation, drainage, and base preparation for a firm aggregate foundation.
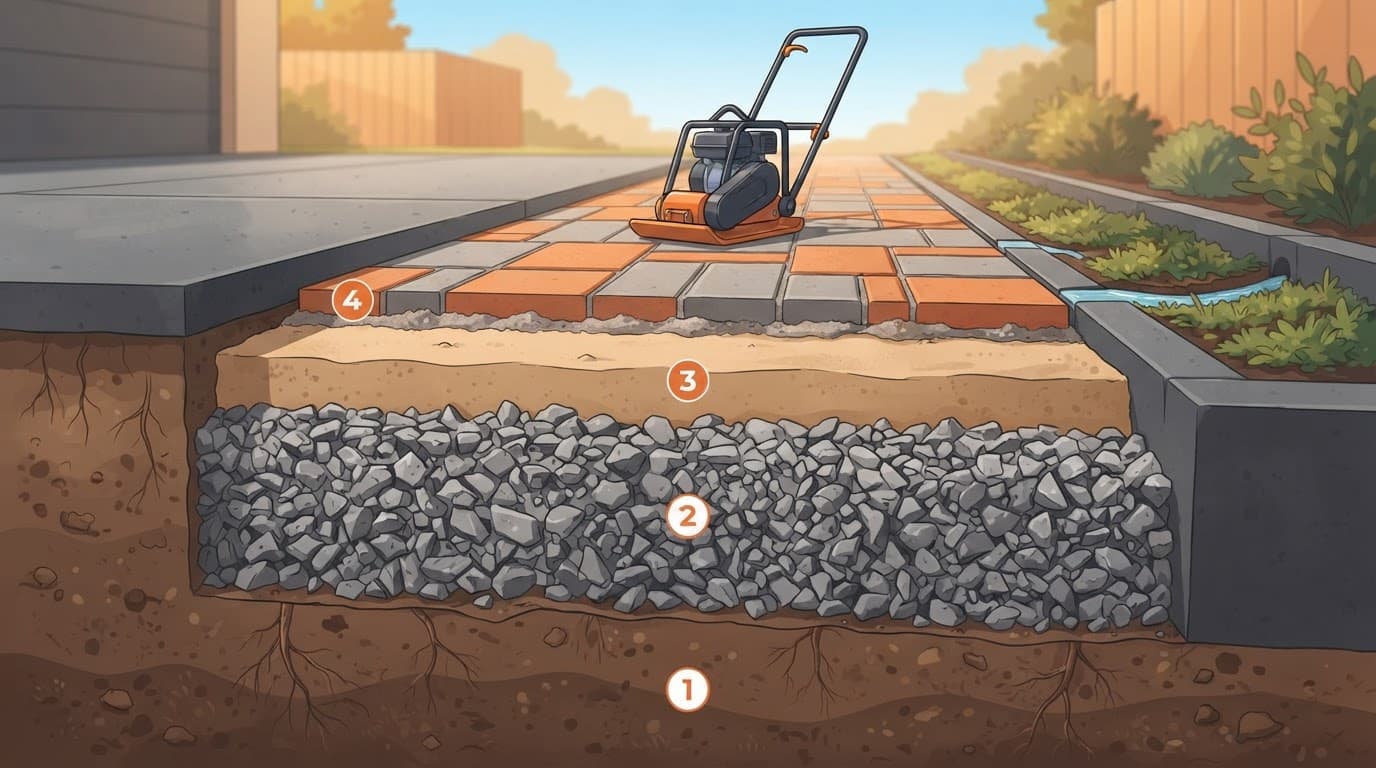
Recommended Paver Base Depth Florida Homeowners Need
There is no single depth for every patio, walkway, pool deck, or driveway. The base must match the load and the ground underneath it.
These are practical starting ranges, not universal requirements. Local code, engineering guidance, drainage, soil type, poor fill, clay, wet conditions, and site-specific loading can change them.
The table lists the compacted aggregate base only. It excludes the roughly 1-inch concrete sand setting bed and the thickness of the concrete pavers.
Project area
Compacted aggregate base
Bedding sand
Patio or pedestrian walkway
4 to 6 inches
About 1 inch
Residential driveway
6 to 8 inches
About 1 inch
Heavy vehicles or weak ground
8 to 12 inches or engineered design
About 1 inch
Patios and walkways need 4 to 6 inches
For most Florida patios, sidewalks, and walkways, I start with 4 to 6 inches of compacted crushed limestone, road base, or another approved aggregate. This range works well for typical patio pavers and pedestrian areas.
That measurement means compacted depth, not loose gravel dumped into a hole. Soft fill, roots, clay pockets, and wet areas may need more preparation. Insufficient depth can lead to settlement and base failure.
The CMHA application guide lists this range for pedestrian areas. This installation guide supports using site conditions to adjust the starting specification.
Driveways need a stronger foundation
Driveway pavers need a stronger foundation because vehicles create higher traffic loads than pedestrian areas. A typical residential driveway should begin with 6 to 8 inches of compacted base material.
The Concrete Masonry & Hardscapes Association lists a 6-inch minimum for well-drained residential driveway soil in its paver construction guidance.
For work vans, trailers, RVs, repeated turning, or weak ground, 8 to 12 inches may be better. A thicker paver won’t fix a weak base. The complete system has to carry the weight.
Calculate Excavation Before Ordering Materials
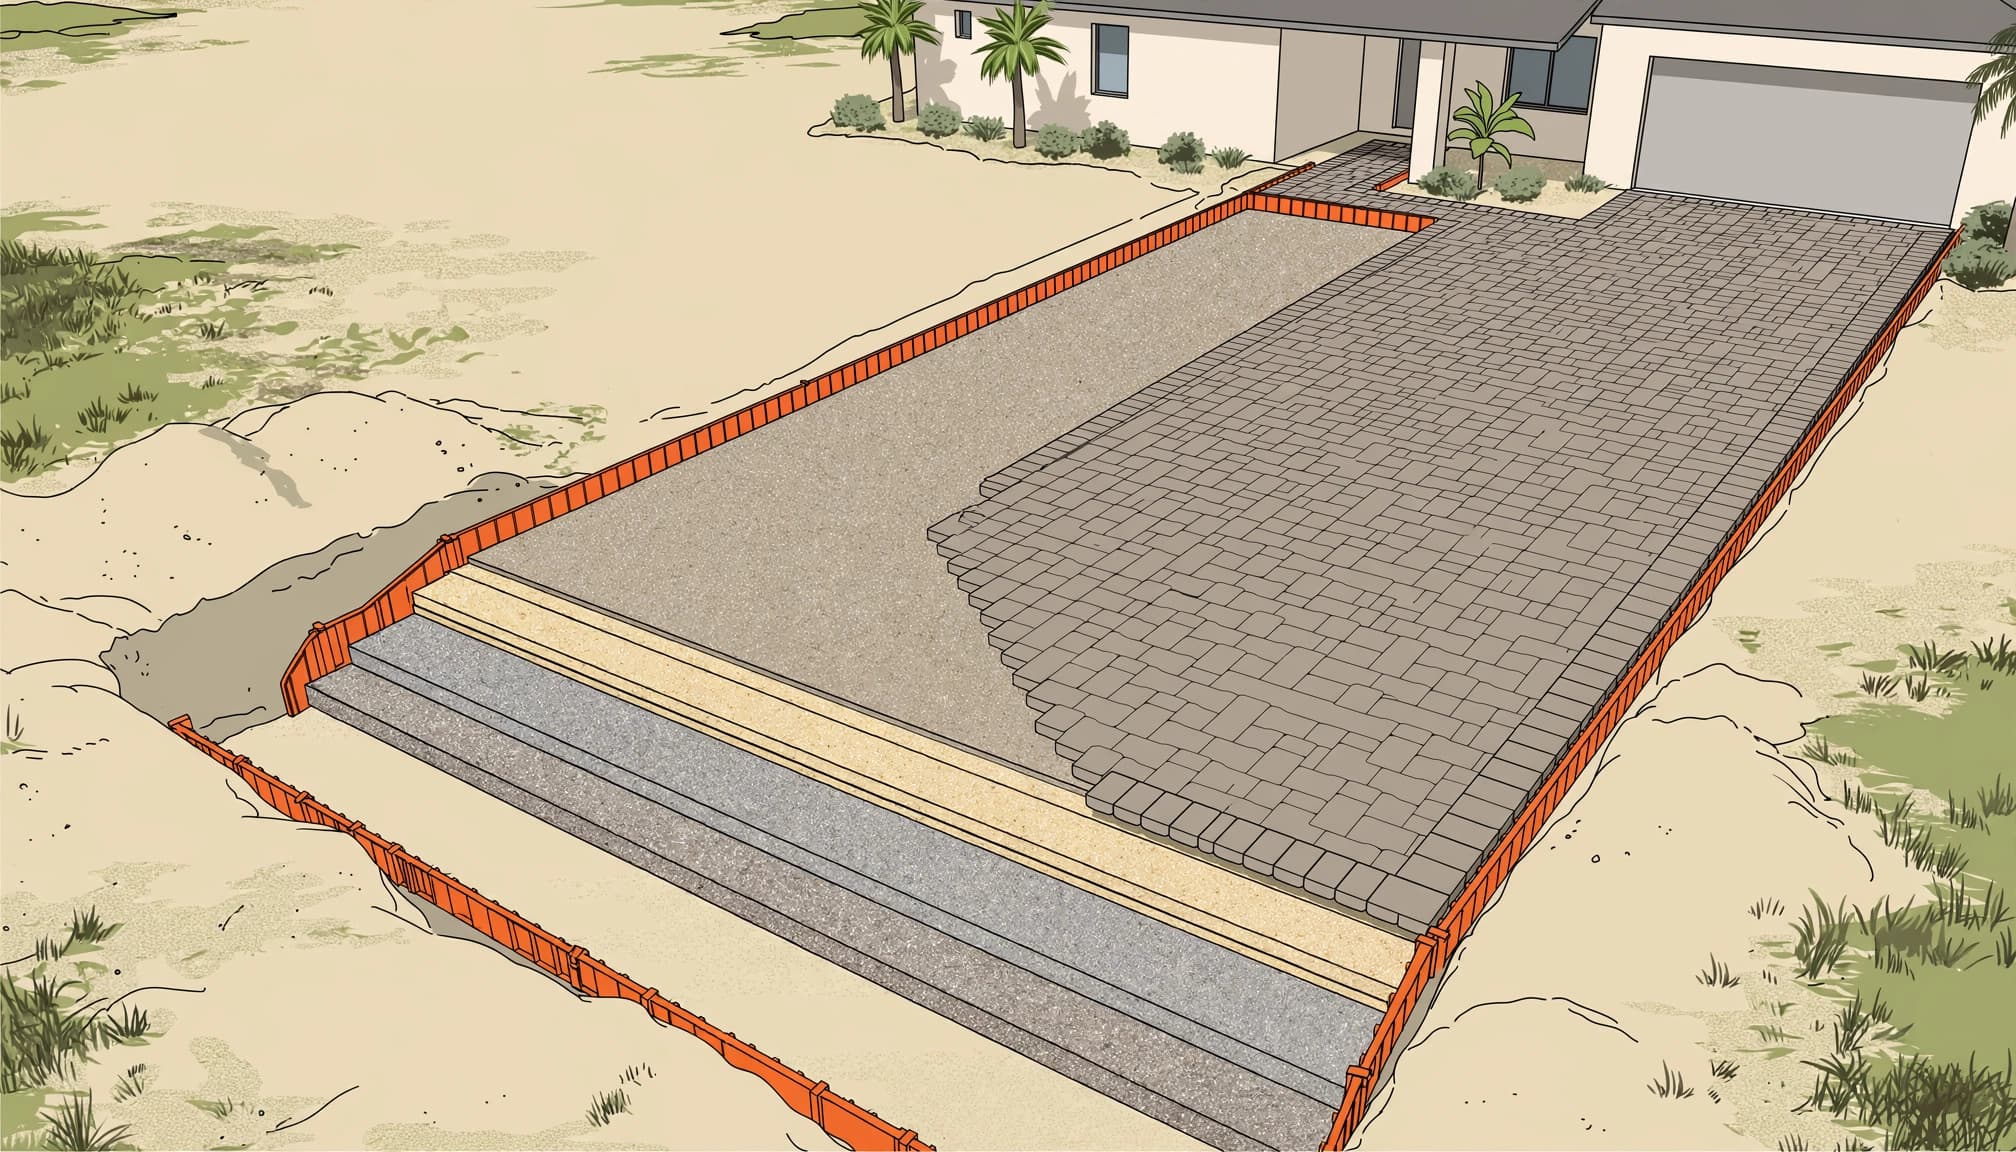
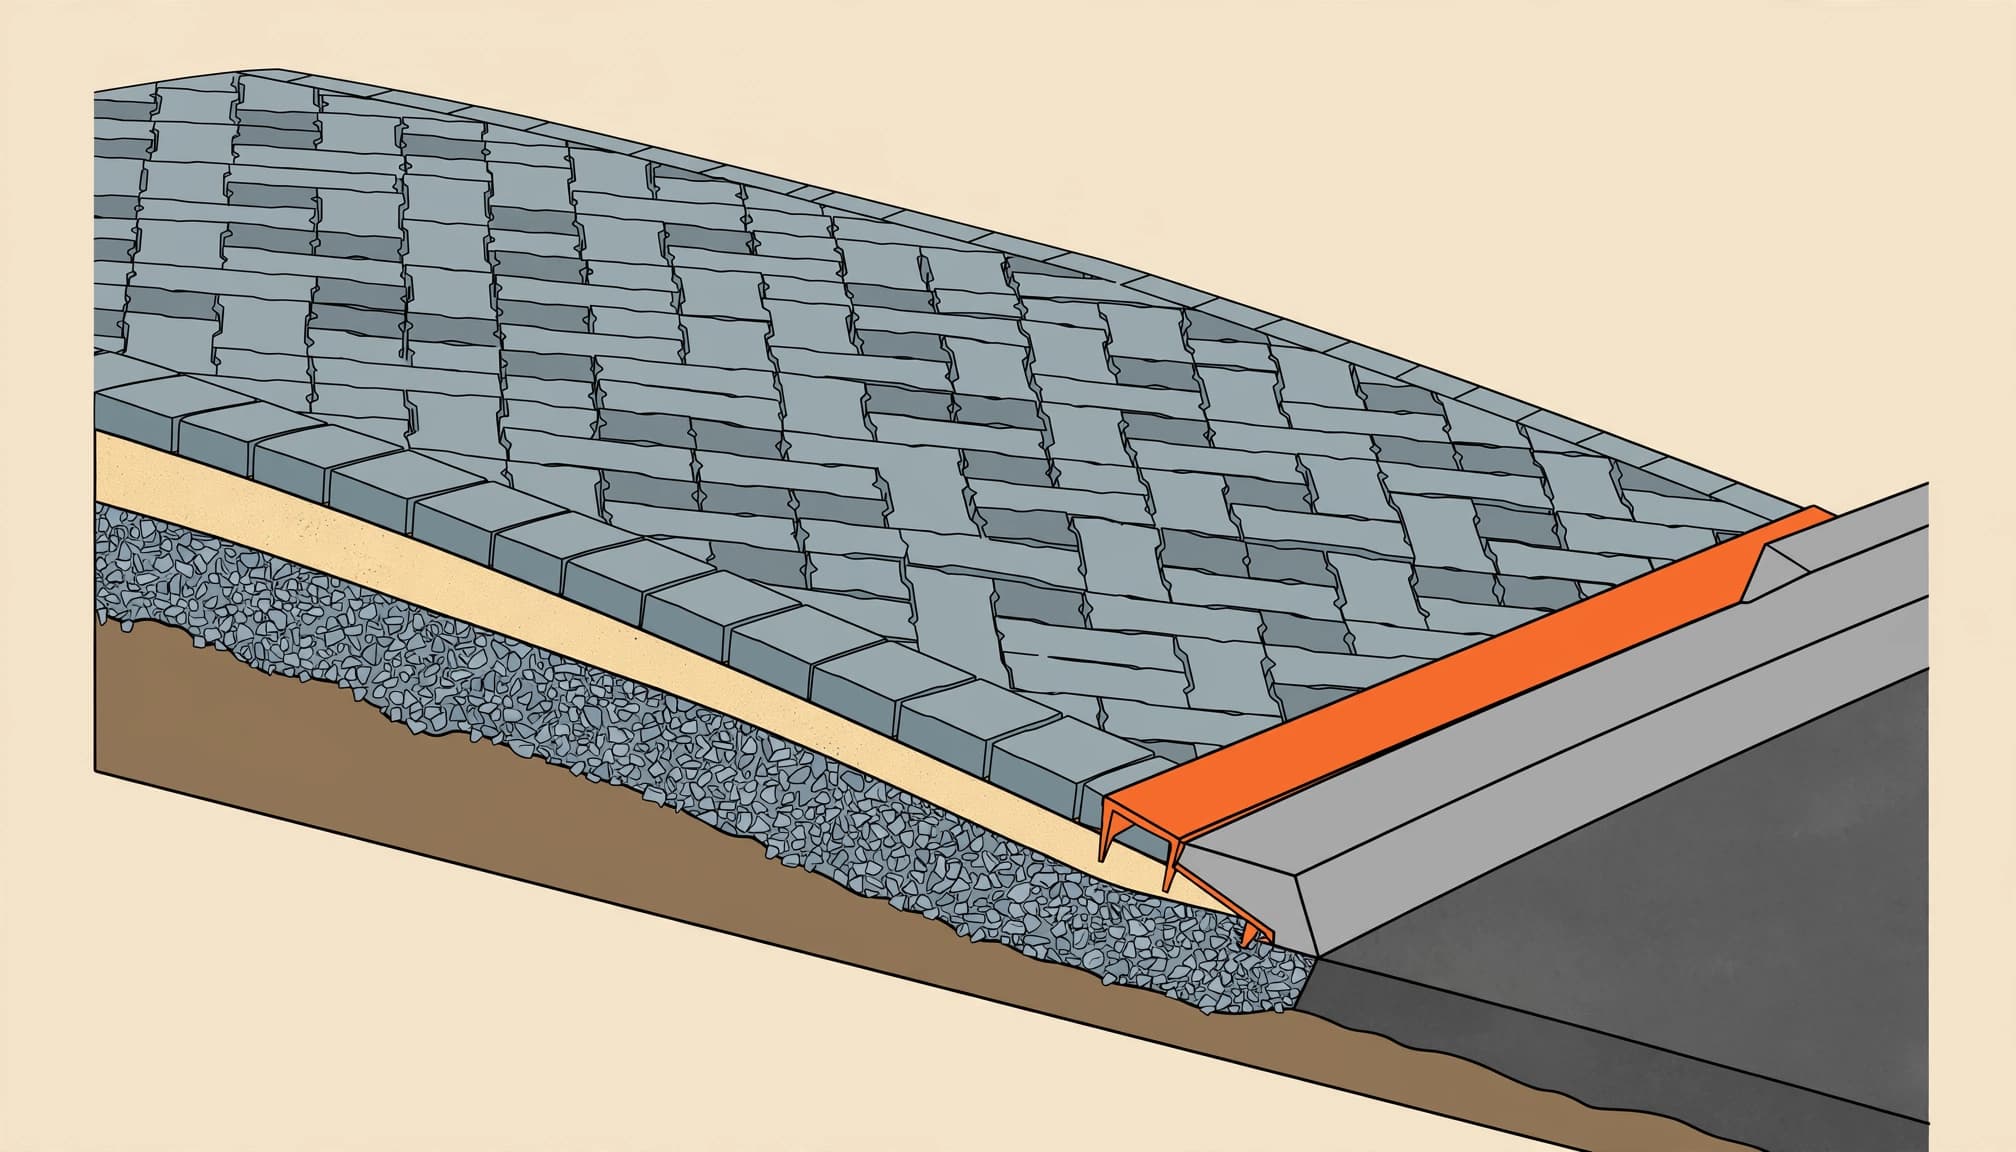
The excavation depth must include three distinct layers, not only aggregate: paver thickness, the approximately 1-inch bedding sand layer, and 4 to 6 inches of compacted aggregate base. The setting layer may be specified as a concrete sand setting bed, while compacted crushed limestone is one common aggregate example.
For a driveway with 60 mm concrete pavers, a 1-inch setting layer, and 6 to 8 inches of compacted aggregate, total excavation commonly reaches 10 to 12 inches. Final grade matters around doors, screen enclosures, pool areas, and garage slabs. Poor subgrade, wet areas, clay pockets, or inadequate drainage can require additional excavation or stabilization.
Build the slope into the subgrade
I establish finished elevations before excavation begins. Subgrade compaction should be complete before aggregate placement, with the grade directing water where it needs to go.
A 2 percent slope for drainage, approximately 1/4 inch per foot, is a dependable target. Local drainage design and site requirements may call for adjustments. Flat-looking pavers can still drain correctly when the grade is planned from the beginning.
Compact in controlled lifts
Base material should go in manageable lifts, often 2 to 3 inches at a time. Each layer gets compacted with a plate compactor before the next layer is added.
Every lift should reach consistent compaction density, rather than merely feeling hard at the surface. Dumping 8 inches of aggregate at once may leave loose stone underneath. That is where settling starts after traffic and summer rain.
Florida Sandy Soil Needs More Than Gravel
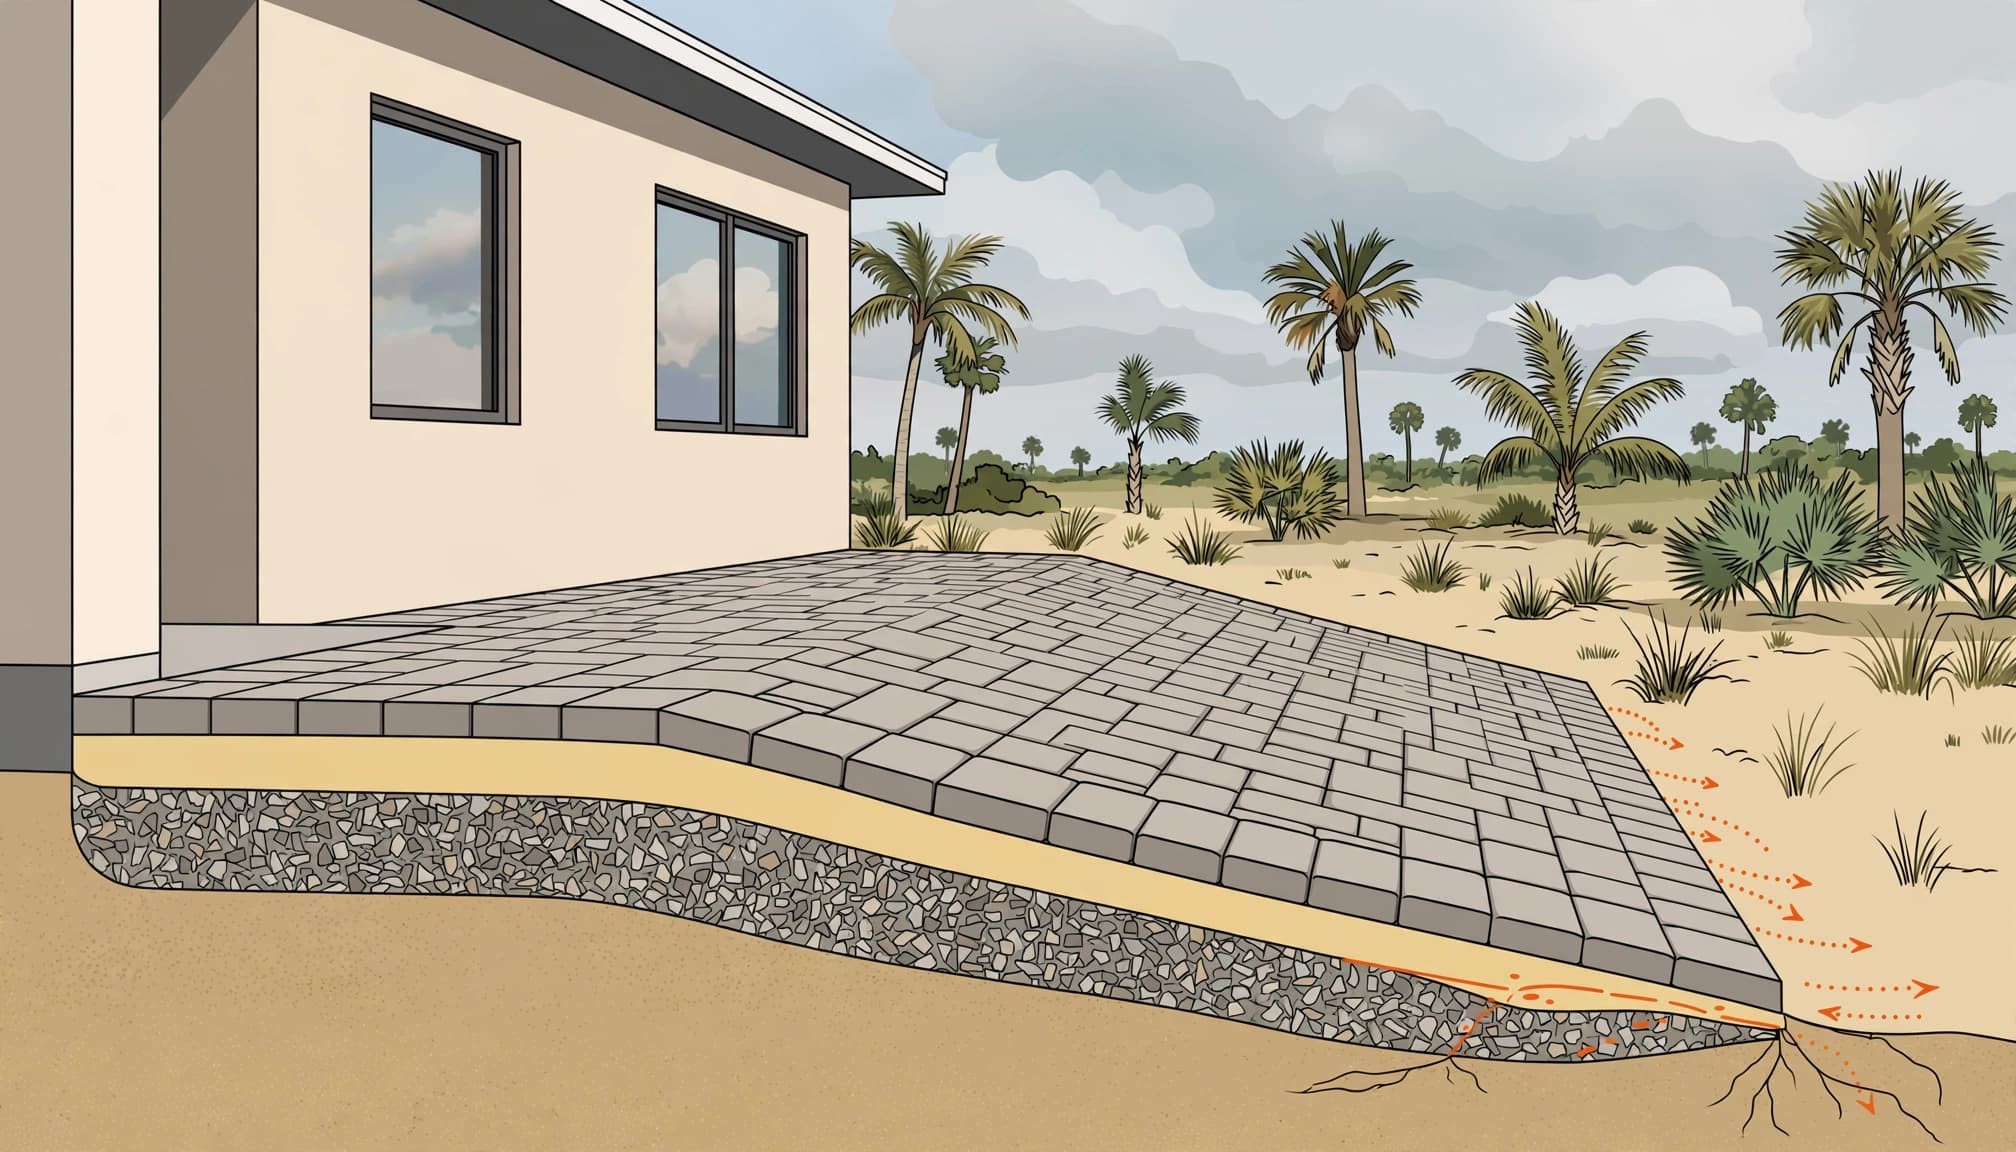
Florida sand can support interlocking pavers well when properly prepared. Loose sand, disturbed sandy subgrade, clay lenses or pockets, wet areas, and a poor subgrade can all threaten support. Base preparation should remove organic material and buried debris before aggregate is installed, while subgrade compaction helps create stable support. During the wet season, excess moisture can soften soil, cause migration, or reduce support under the finished surface.
Geotextile fabric has a specific job
Geotextile fabric may help separate sandy soil from the aggregate base where the subgrade is weak, mixed, or likely to migrate. It belongs over the prepared subgrade, below the aggregate base, not directly below the setting layer.
Its purpose is separation and soil stability, but it isn’t a substitute for excavation, drainage, or compaction. Fabric is helpful, but it isn’t magic. It cannot correct poor drainage, shallow excavation, or skipped subgrade compaction. Used alone, it can’t prevent every base failure.
Use the right sand for the setting bed
Bedding sand is a leveling layer, not a structural layer. For a concrete sand setting bed, I use clean concrete sand that meets the paver system requirements, then screed it to a consistent thickness.
The CMHA technical specification calls for bedding sand that conforms to ASTM C33 or CSA A23.1. Mason sand, stone dust, and limestone screenings are not good substitutes when they hold water or shift under the pavers.
Sand can make a base look level, but it cannot make a low or unstable base strong.
Drainage Stops Most Paver Base Failures
Florida’s wet season finds every weak spot, so drainage design matters as much as the aggregate beneath pavers. A planned slope for drainage directs surface runoff away from the home, pool deck, and driveway edges. Otherwise, water can soften soil, cause erosion, saturate the ground, and wash away aggregate support, leading to base failure.
Never use plastic sheeting beneath a normal paver installation to stop weeds. It can trap water below the surface. Proper grade, compacted aggregate, edge restraints, and filled joints create a complete system. However, polymeric sand and these restraints can’t repair a failed or washed-out base.
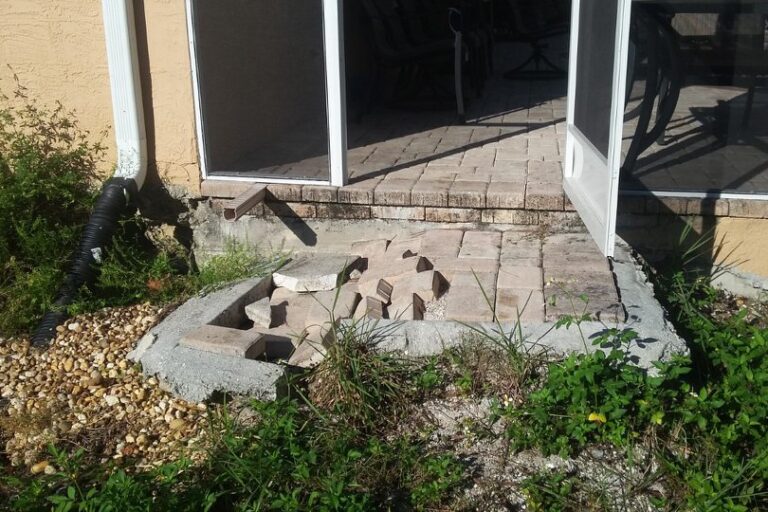
If you see low spots, rocking pavers, open joints, or water collecting after storms, don’t only add more sand on top. The affected pavers may need to be lifted so the base and drainage can be corrected.
Key Takeaways
Use 4 to 6 inches of compacted aggregate for most patios and pedestrian walkways.
Plan on 6 to 8 inches of compacted base for a residential paver driveway.
Add paver thickness and a roughly 1-inch leveling layer when calculating excavation.
Compact the subgrade and aggregate base in layers, not all at once.
Keep water moving away from the house with a planned slope near 2 percent.
Use geotextile fabric when sandy or disturbed soil needs separation from the base.
Frequently Asked Questions
How deep should a paver patio base be in Florida?
Most patio pavers need 4 to 6 inches of compacted aggregate foundation, plus the approximately 1-inch leveling layer. Local code, drainage, clay, wet areas, and poor fill may require a deeper design.
How deep should a paver driveway base be?
For a standard passenger-vehicle driveway, 6 to 8 inches of compacted crushed aggregate is a practical starting point. Heavy vehicles, turning stress, poor soil, and local conditions may call for 8 to 12 inches.
Can polymeric sand stop pavers from sinking?
No. Polymeric sand helps stabilize joints, but it can’t correct a failed, washed-out, or poorly compacted base. It works best after the pavers are level, restrained, and properly installed.
A Strong Paver Surface Starts Below Ground
The right paver base depth in Florida depends on prepared soil and the correct aggregate depth. Thorough compaction, drainage, and secure edge support also matter. Together, these elements help prevent base failure, while local codes and site conditions may require different specifications.
If you are planning a patio, driveway, pool deck, or walkway in Southwest Florida, Get a Free Quote for a site review and clear estimate. A solid foundation helps keep your pavers level, durable, and attractive through Florida’s wet season.
Meta Title: Florida Paver Installation Timeline: Prep to Cleanup
Meta Description: See how a Florida paver project moves from planning and base work to joint sand, cleanup, and long-term care.
A quality paver project in Florida depends on soil conditions, drainage, compaction, and strong edge support. Paver color and pattern matter, but they don’t keep the surface level through heavy rain.
I have seen patios and driveways look great at first, then settle after one hard rainy season because the base was rushed. This timeline covers planning, permitting, excavation, base preparation, drainage checks, paver placement, inspections, and cleanup. Here’s what homeowners should check before approving the work.
Key Takeaways
Sandy Southwest Florida soil can support concrete pavers, but loose, disturbed, or washed-out ground needs more attention before the base goes in.
The pavers are the visible layer. Excavation, compacted aggregate, leveling material, edge restraints, and joint sand hold the whole system together.
Drainage should be planned before demolition. Water needs a controlled path away from the home, garage, pool enclosure, and neighboring property.
A project may pause after rain. Wet soil that ruts, pumps water, or won’t compact shouldn’t be covered with pavers.
Cleanup isn’t the last detail. The final inspection should include slopes, joints, borders, cuts, drainage flow, and any areas that feel soft underfoot.
A low paver is rarely only a low paver. Water movement, weak compaction, or failing edges below the surface are often the real issue.
Site Planning Starts the Florida Paver Project
The first visit should focus on the property, not a paver sample board. The site plan should support outdoor living and identify whether the project involves paver patios, a pool deck, driveway pavers, or paver walkways. Access, use, and finished elevations must be resolved before paver installation begins.
Layout, access, and material choices
A driveway needs pavers rated for vehicle traffic. A pool area needs a finish that feels good under bare feet and offers dependable traction when wet. Natural stone can provide a different appearance when it suits the design.
Patio furniture, grill locations, gates, screen doors, landscape lighting, irrigation heads, and equipment access all affect the layout. These details also shape the broader hardscape installation and help define any custom paver services needed.
I also recommend homeowners check HOA requirements before materials are ordered. Driveway colors, borders, and layouts visible from the street can affect curb appeal and may need approval. Confirm material availability early, especially for selected colors, borders, coping transitions, and specialty patterns.
Permit rules can change from one municipality to another. A driveway expansion may have different requirements than replacing an existing surface. I tell homeowners in Fort Myers, Cape Coral, Bonita Springs, Punta Gorda, Sarasota, and nearby areas to confirm local requirements before demolition.
Call Sunshine 811 before deeper excavation or work near utilities. Also, don’t drill into screen enclosure footings or move pool-cage anchors without qualified guidance.
The finished paver height matters. New pavers should meet doors, garage slabs, walkways, drainage areas, and pool coping without creating a trip point or pushing water toward the home. Grade changes may also require coordination around retaining walls.
Excavation Reveals What Is Under the Surface
Excavation is where the true condition of the yard becomes clear. Clean sand, shell, construction fill, organic soil, clay pockets, utility trench backfill, and old concrete edges can all appear on one property. Areas near grade changes, retaining walls, pool structures, or property transitions may require extra care.
Removing weak soil and old materials
The crew marks the planned perimeter and finished elevation, then removes the old surface and unsuitable soil. The excavation depth depends on paver thickness, planned base depth, traffic rating, drainage, and soil stability. Heavier traffic and driveway pavers typically require a stronger, deeper section.
A patio or walkway may begin with about 4 to 6 inches of compacted aggregate and a thin bedding layer. A residential driveway often needs a deeper section. Our brick paver driveway installation guide discusses a common approach of about 12 inches of excavation, 6 to 8 inches of compacted gravel, and 1 to 2 inches of sand.
Those are planning ranges, not one-size-fits-all measurements. Custom paver services must account for mixed fill, old concrete, utility backfill, and organic or soft soil. Project size, vehicle loading, drainage, disturbed soil, and actual site conditions control the final excavation and base design.
Managing sandy soil and soft spots
Sandy soil drains quickly, but it does not always hold its shape. Heavy rain can move fine material, soften the ground, and wash support away from the aggregate base.
The quality of soil compaction determines whether the subgrade holds firm without pumping, rutting, or losing its shape. Where soil is loose, mixed, disturbed, or likely to blend into the stone, geotextile fabric may be used for separation and filtration. It is not required under every paver project, and it cannot fix a bad drainage plan.
The Crushed-Stone Base Does the Heavy Work
The aggregate base supports the leveling layer and pavers. This base preparation takes time because it must be placed, shaped, checked, and compacted in controlled lifts.
Building the base in compacted lifts
Crushed stone or base gravel should go down in manageable lifts, often around 3 inches at a time. Each lift must be compacted with a plate compactor before the next one is added. Dumping the full base depth at once and compacting only the top can leave weak material below.
For a well-drained residential driveway, the Concrete Masonry and Hardscapes Association lists at least 6 inches of compacted base as a starting point. The interlocking concrete pavement guide also notes that concrete pavers provide rapid drainage and good slip resistance, which is useful around pool areas.
The base needs a firm, even feel before the next layer begins. Deep footprints, tire ruts, smearing material, or water pumping to the surface are warnings that the area is too wet or unstable.
Setting drainage before the leveling layer
Florida rain tests every slope. Good drainage solutions account for finished slopes, downspouts, garage thresholds, and pool enclosures. They should also protect foundations and neighboring properties from concentrated runoff.
At grade transitions, check retaining walls and areas where runoff could collect behind or beside a wall. Large driveways, turning areas, pool surrounds, or difficult grades may need custom paver services with a site-specific base and drainage design.
The 2020 Florida Building Code, Building, 7th Edition, allows a minimum 1 percent grade for paver-type decks. Review the Florida Building Code slope guidance and confirm the rules that apply to your exact property.
A laser level helps the crew check elevations throughout base work. I don’t wait until pavers are laid to find out water is heading in the wrong direction.
Weather, project size, soil moisture, material availability, and inspection findings can extend this phase. Work should pause until unstable or overly wet areas are corrected.
Bedding Sand Makes the Final Surface Even
Bedding sand is a leveling layer. It is not there to make up for a low base, cover deep dips, or correct unstable soil. If the base is wrong, the sand will not make it strong. Ordinary masonry sand should not replace the specified bedding material when the paver system calls for a different product.
Screeding a consistent sand layer
After the base is compacted and graded, a thin, consistent layer is placed over it. Many projects use about 1 inch, although the correct depth depends on the selected system and site conditions.
Screed rails and a screed board bring the sand to an even plane. Once this layer is prepared, avoid walking across it or dragging materials through it. Footprints and tire marks can create uneven pavers later.
Checking the surface before pavers arrive
Custom paver services often include unique layouts, curves, borders, and transitions. Before disturbing the surface, the installer should check grade, width, edge locations, and the first pattern row. A clean layout can prevent unnecessary cuts.
If Florida rain hits after the surface is screeded, the crew should inspect it and confirm elevations before pavers arrive. Standing water, washouts, or disturbed sand may mean that section has to be reworked before pavers are installed.
Laying Concrete Pavers and Securing the Perimeter
Once the base and bedding layer are approved, paver installation moves faster. Still, the visible pattern deserves careful work. Small layout errors can become wide cuts or uneven borders at the far end.
Setting the field and making clean cuts
Pavers are placed from a stable starting edge, following the selected pattern and keeping joint spacing consistent. A herringbone pattern is often used in driveways because it handles vehicle movement well. Patios and pool decks may use more decorative layouts.
Custom paver services must account for curves, drains, steps, columns, coping, screen enclosures, and border widths. Cuts should be clean and properly fitted, with no narrow slivers along the edge.
Larger driveways or restricted-access pool areas may require staged material delivery and additional layout checks.
Edge restraints keep pavers from spreading
Secure edge restraints, anchored edging, curbs, or other approved support hold the outside units in place. Without a stable perimeter, pavers can creep outward, joints can open, and borders can separate.
This is one area I never treat as optional. Heavy turning traffic, slope, runoff, and tree roots can all put pressure on the outside edge.
Joint Sand, Compaction, and Cleanup Finish the Job
The final phase locks the surface together and leaves the property clean. It also shows whether the crew protected nearby landscaping, pool equipment, walls, and existing concrete.
Filling the joints the right way
Polymeric sand is swept into dry, clean joints after the pavers are set and compacted. It is then activated with water according to the product directions. The material hardens in the joints and helps limit weed growth, ant activity, debris, and washout. Masonry sand isn’t a substitute for the specified joint material in this application.
Don’t rush this step between storms. Polymeric sand needs dry pavers and dry joints before it is installed and activated. If pavers are rocking, the base needs repair first. Joint sand cannot correct movement below the surface.
Final compaction and site cleanup
A plate compactor, usually with a protective pad, seats the pavers into the bedding layer and helps settle the joint material. The crew should make the correct final pass with the plate compactor before checking for movement, open joints, chipped units, and uneven edges.
Cleanup should include removing extra sand, leftover stone, cut pieces, debris, and protective coverings. Nearby landscaping, pool equipment, walls, and existing concrete should remain protected throughout the process. Downspouts, drains, gates, doors, and irrigation should be checked before the project is signed off.
Weather Can Change the Installation Schedule
Florida’s subtropical climate brings intense sun, heavy rain, saturated soil, and fast-moving storms. The best schedule depends on weather and site conditions, not simply the month on the calendar.
Drying time matters after a storm
Light rain may slow material handling without stopping every task. Heavy rain is different. It can fill excavations, soften the subgrade, move bedding sand, and wash aggregate out of place.
I’d rather pause for a day than cover wet, unstable material with beautiful pavers. After a storm, the crew should inspect each layer before paver installation continues. Materials must be firm and dry enough to inspect and compact properly.
What homeowners should expect on timing
A straightforward patio may move through excavation, base preparation, paver setting, and cleanup without major delays. Project size, difficult access, demolition, drainage repairs, screened pool areas, and material availability can extend the schedule.
For larger or more complex work, custom paver services should include clear weather contingencies. Reworking washed-out sections can also add time before the crew resumes installation.
Ask your contractor what happens if a storm arrives after excavation. A clear answer should include site protection, drying time, subgrade and base inspection, drainage verification, and rework before pavers are installed.
Questions Homeowners Ask Before Work Starts
Can pavers be installed during Florida’s rainy season?
Yes, when the site is firm, drained, and dry enough for proper compaction. Work should pause if there is standing water, deep rutting, soft soil, or disturbed bedding sand.
How do I know the base is failing?
Watch for rocking pavers, low areas that hold water after storms, separating borders, open joints, or tire marks that sink. Adding loose sand under one paver is usually a temporary patch. The affected area may need to be lifted, rebuilt, compacted, and reset.
How often should pavers be sealed and maintained?
Sweep debris, manage stains early, and inspect the joints after major storms. Sealing schedules vary by traffic, sun, moisture, paver condition, and the sealer product. Driveways may need attention more often than a covered patio. These paver sealing and maintenance tips can help you spot wear before it becomes a larger repair.
A Strong Base Makes the Difference
A beautiful driveway, patio, walkway, or pool deck starts below ground. Proper excavation, compacted aggregate, controlled drainage, secure edges, and full joints give Florida pavers the support they need through rain, heat, and daily use. Durable construction also improves appearance and may support curb appeal and property value.
If you are planning paver walkways, driveways, patios, or pool areas, Get a Free Quote for a site review and clear estimate. Whether you need custom paver services or repairs for sinking pavers, I will review the base, drainage, access, material selection, project size, and desired finish before work begins.
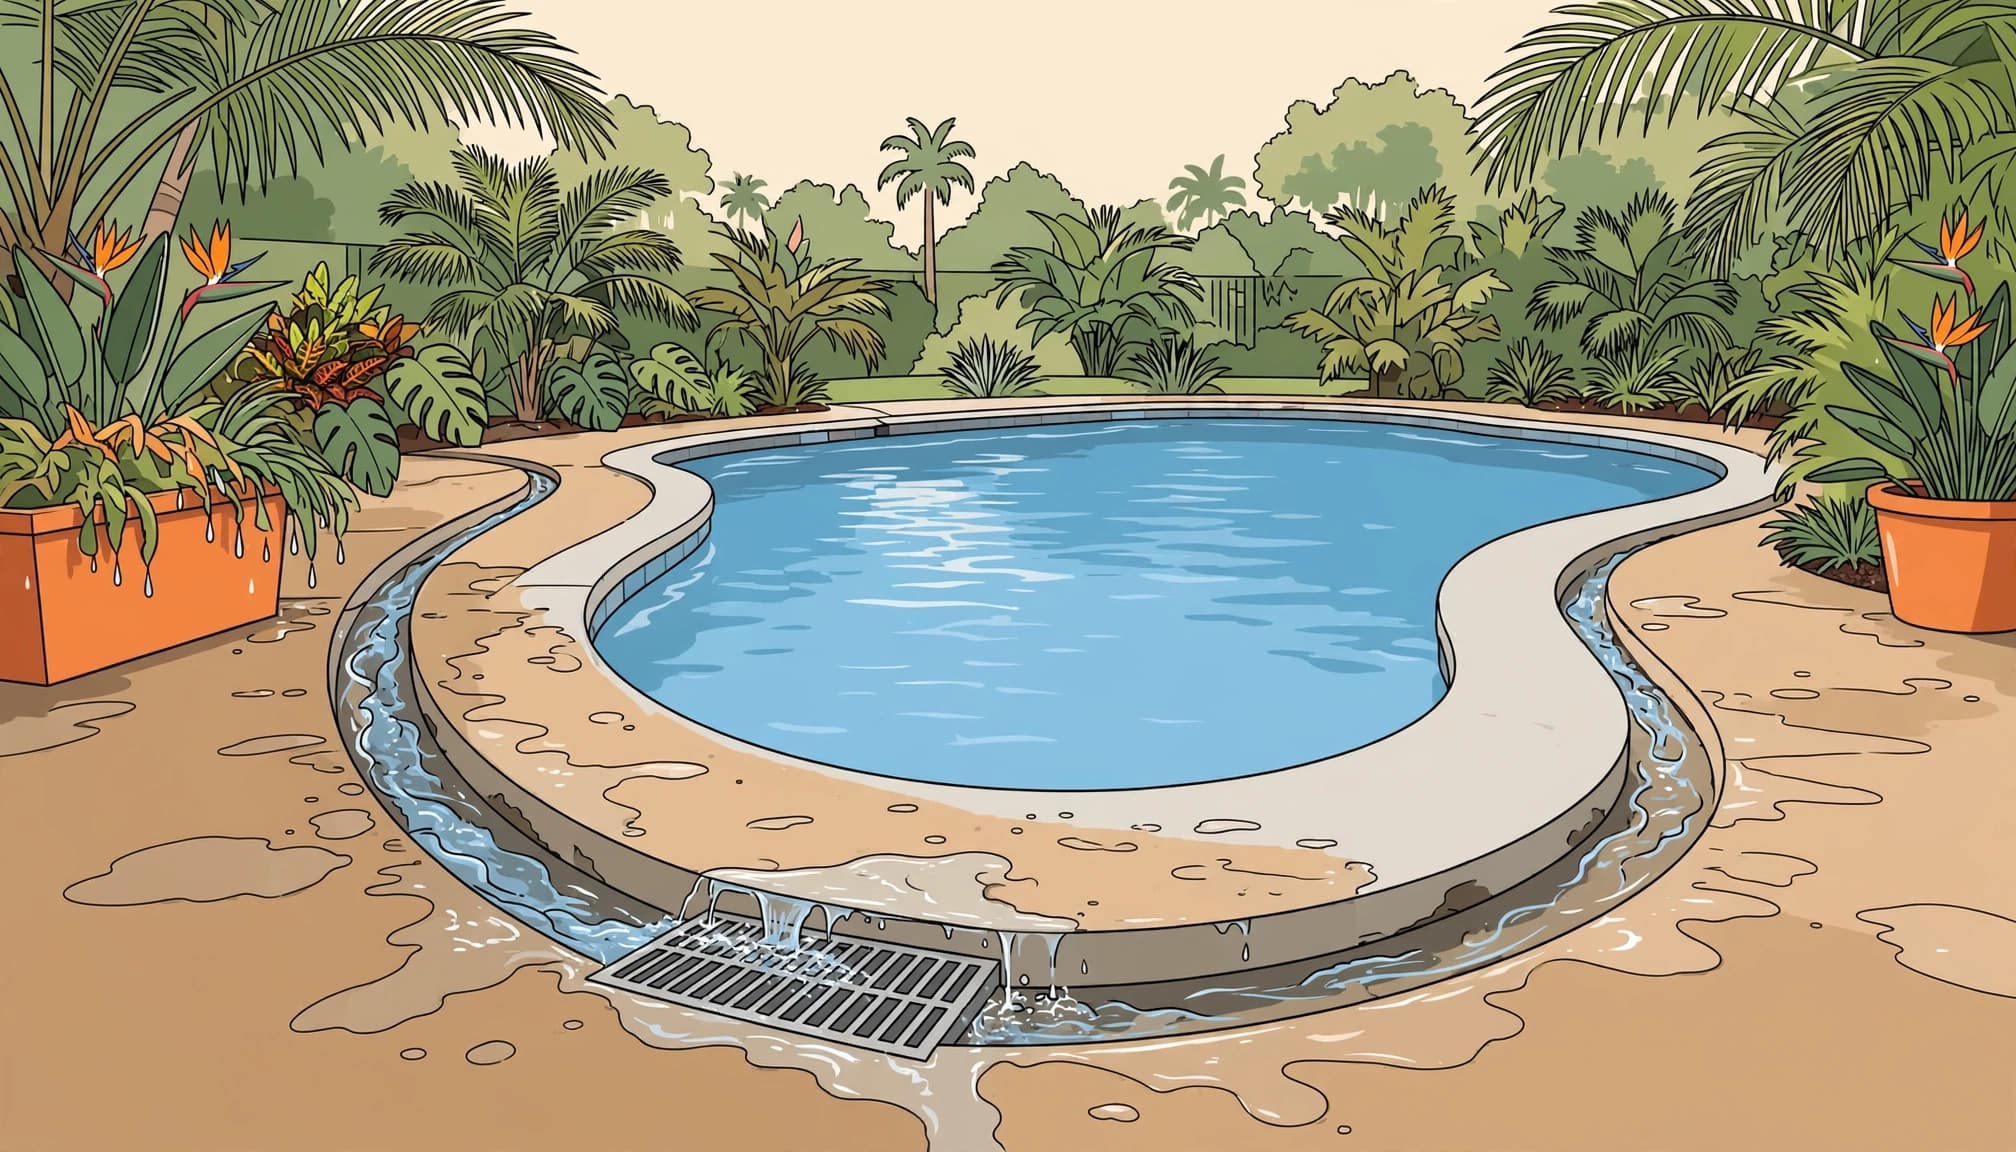
A pool deck can look clean and level, then one hard Florida storm shows where the real problem is. Pool deck drainage channels catch surface water before it can sit against coping, wash out paver bedding, or create slick walking areas around the pool perimeter. Finished decking should generally direct water away from coping and walking areas toward the collection channel, with the exact slope verified against the drain manufacturer’s instructions and applicable local building codes.
I have seen small gaps near a pool edge become loose pavers, standing water, and expensive repairs when ignored. The right drain is not only about moving water. A deck drain system works when the channel, slope, coping joint, waterproofing, and outlet work together. Surface drainage moves runoff, while waterproofing protects the coping and deck transition. A qualified pool or drainage professional should review unusual grading, structural movement, or code-sensitive work.
Why Water Around Pool Coping Causes Damage
The pool edge takes more punishment than almost any other part of the backyard. It gets pool splash, rain, heat, wet feet, furniture, cleaning chemicals, and irrigation runoff every day.
Water finds the weak spot
When the deck slopes toward the coping instead of away from it, water can collect beside the pool. A properly graded surface sends water runoff toward the channel before it reaches the coping joints.
Moisture can then work beneath the deck surface. On a paver deck, it may move joint sand and soften the bedding layer below.
The pavers may begin to settle while the coping stays in place. That is when you see a gap beside the pool, a rocking paver, or a low section that holds water after the rest of the deck dries.
Waterproofing and properly sealed coping transitions also help keep moisture out of vulnerable joints. Every transition should stay sealed as the deck and pool structure move slightly over time.
A drain grate only collects water. It can’t fix a failed base, blocked outlet, or poor grade beneath the deck.
A channel drain is different from a point drain
A point drain collects water at one location. It can work in the right spot, but a pool deck usually has long edges and several low points.
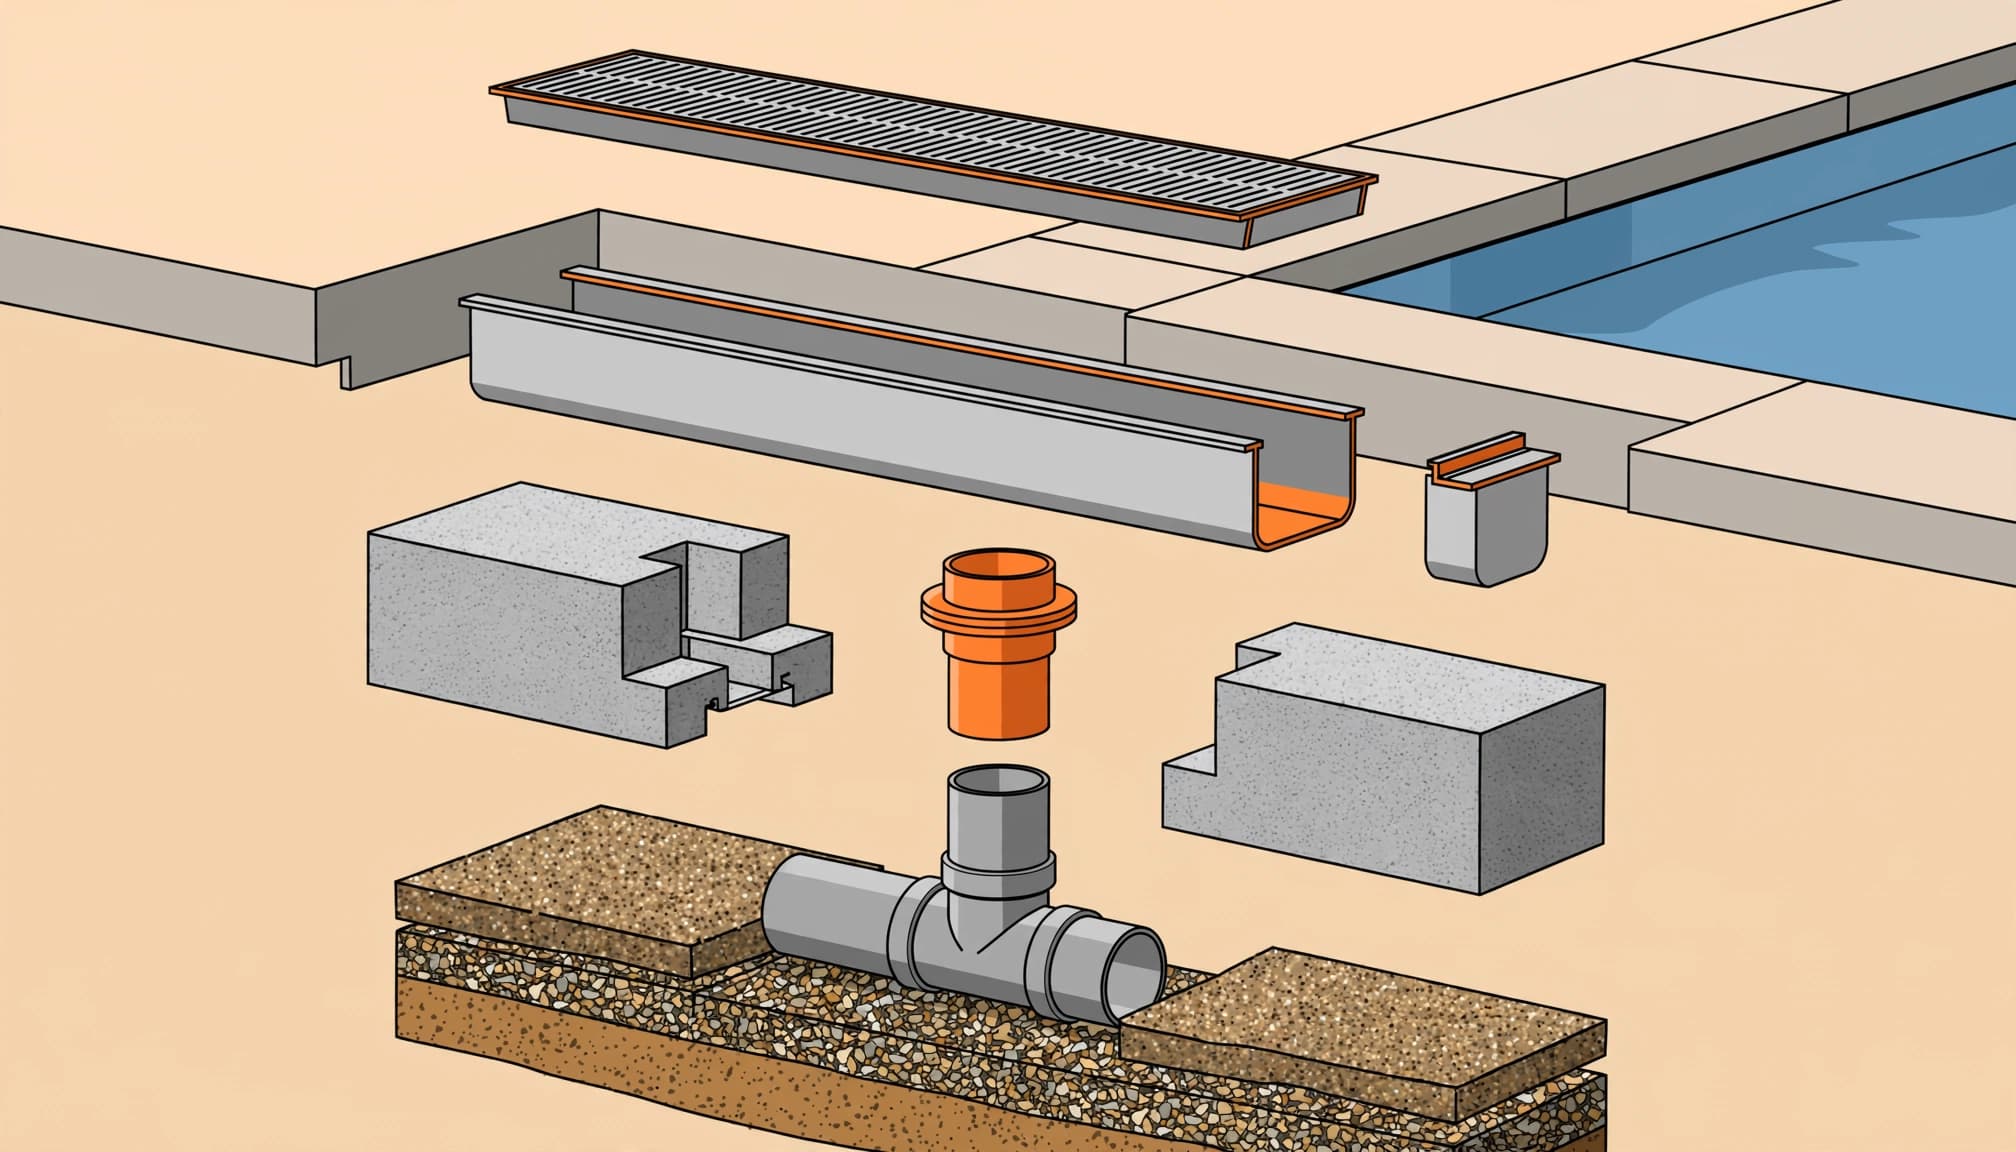
A deck drain system with linear collection catches water along a longer run. A trench drain can intercept runoff before it spreads across the deck, while a point drain depends on water reaching one opening.
That is why a linear channel drain beside coping, at a screen enclosure, or between a deck and landscaping can make sense. The layout may require an angle fitting at a corner or change in direction.
The drainage system must still direct water to a suitable outlet. Confirm that the outlet connection works with the selected schedule 40 pipe rather than assuming compatibility. Water can’t disappear because a grate is installed.
Choosing Pool Deck Drainage Channels That Fit the Deck
The best drain is not always the biggest or most expensive one. I look at the deck material, rainfall exposure, outlet location, pool shape, and whether the project is new construction or a repair.
Concrete decks need a formed-in system
For a newly poured concrete pool deck, a purpose-built PVC deck drain is a common channel drain choice. The drain body should also be sized for the expected flow rate.
The DECK-O-DRAIN PVC system is a practical deck drain system for concrete pool decks, with durable PVC construction. If the outlet changes direction, an angle fitting can simplify the connection.
The drain body has to be set at the correct elevation before the concrete pour. Before placement, confirm the outlet slope, down adapter, and compatibility with schedule 40 pipe. Once concrete hardens, correcting a low drain, high grate, or poor outlet connection becomes much harder.
Paver decks need stable edges and removable access
Pavers move differently than a concrete slab. They sit over a compacted base and bedding layer, so the drain frame and surrounding pavers need firm support. A low profile drain or channel drain can look great around a modern pool, but it cannot float over washed-out sand.
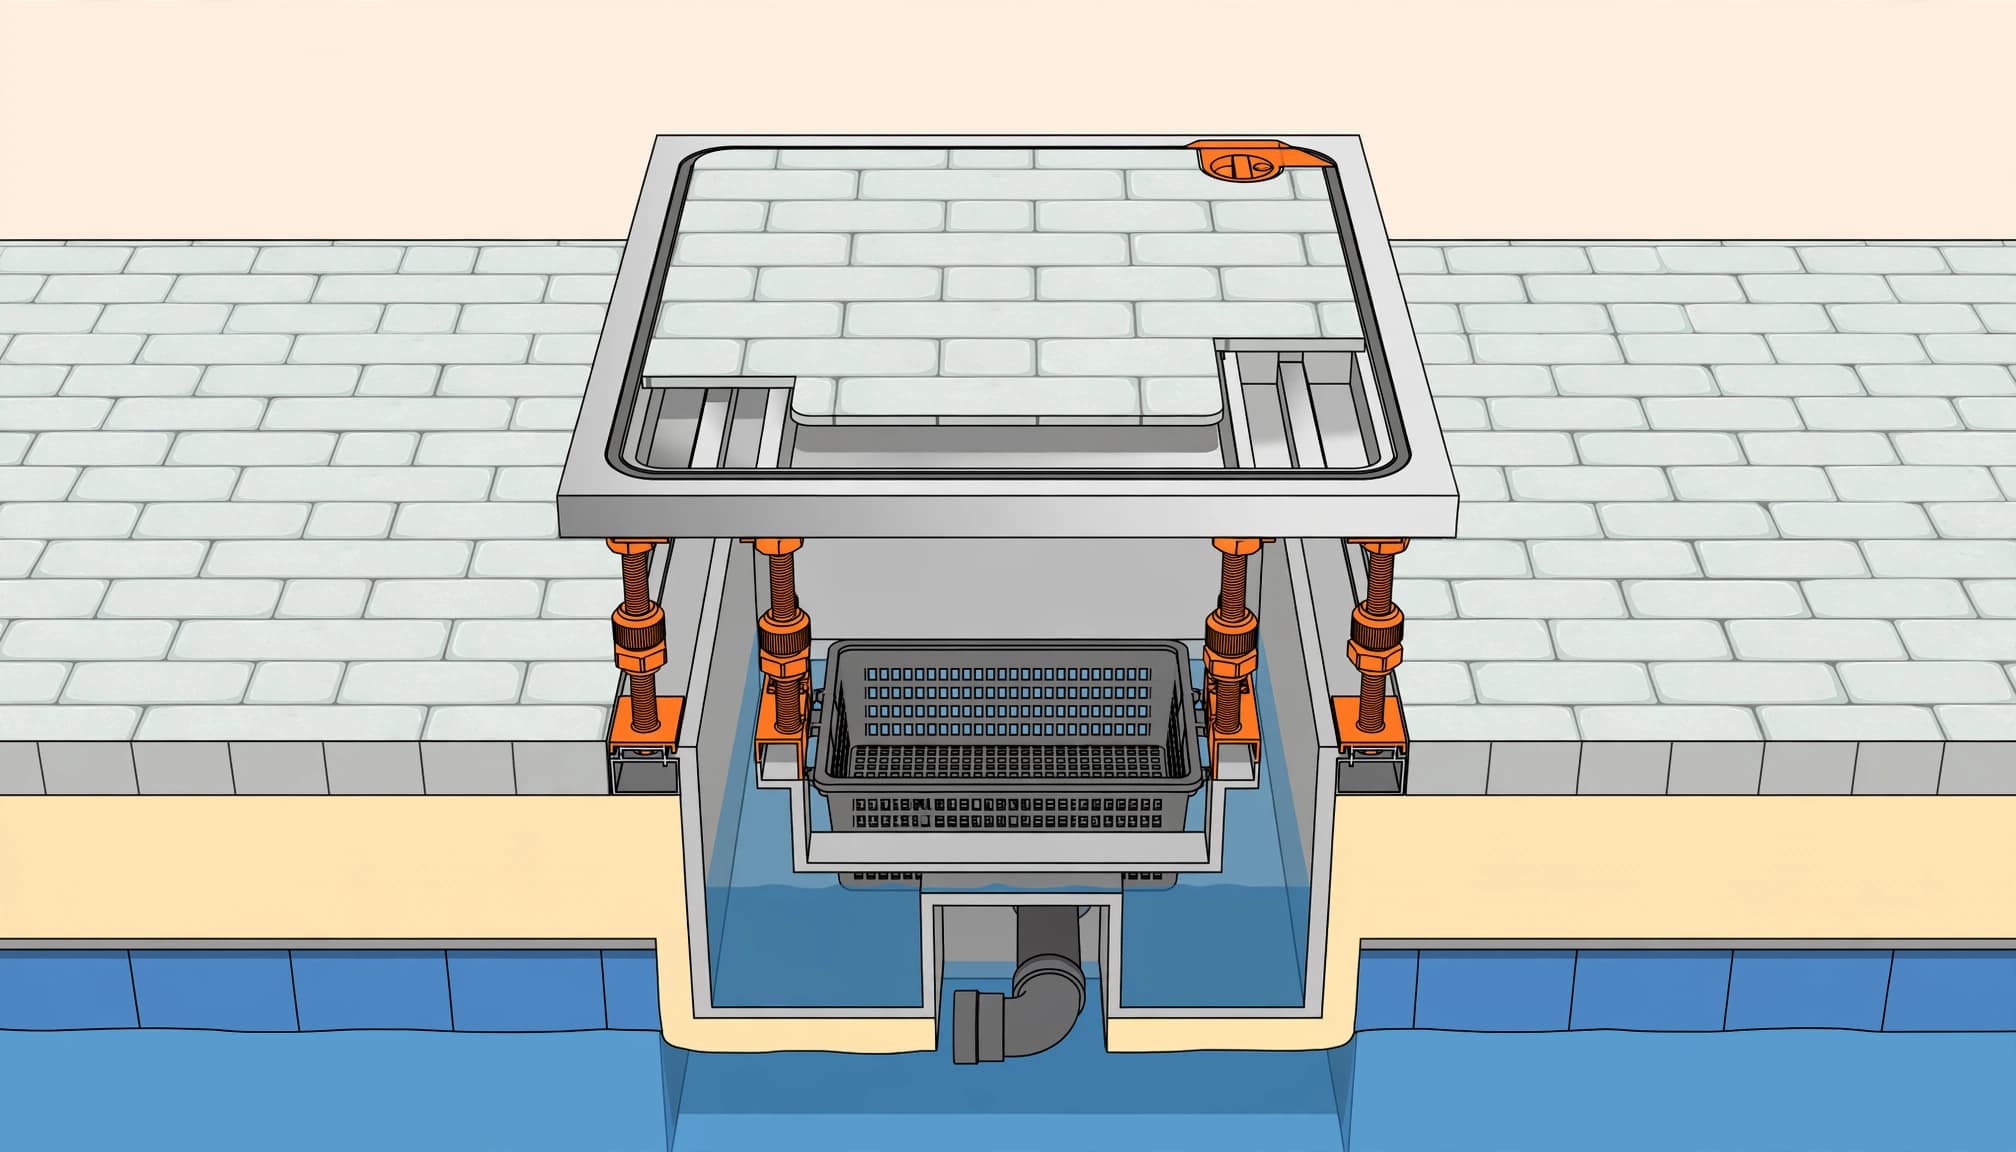
For a paver deck, I want a removable top, a drain detail that can be serviced, and clean transitions at coping and corners. At the coping, an angle fitting should preserve the slope and waterproofing at the deck edge.
If the deck already has low spots, consult a qualified local professional before installing new drainage pieces. Check the outlet path too, since a second angle fitting may be needed before the schedule 40 pipe connection.
PVC or stainless steel?
PVC is practical, proven, and often a good fit for concrete deck drainage. Stainless steel can give a more refined look, especially with stone, porcelain, or modern pool finishes.
Vodaland describes its pool and patio slot drains as low-maintenance drainage solutions for residential applications. Its 304 stainless steel products are described as corrosion resistant, but material alone does not make any drain maintenance-free. Salt air, debris, water chemistry, installation quality, and the placement of any third angle fitting still matter.
Flow Rate Is More Than a Number
Homeowners often ask about the maximum flow rate of a deck drain. That number matters, but I wouldn’t choose a system from one number alone. The channel size, outlet size, pipe run, slope, number of turns, and debris load all affect performance. The required flow rate also depends on rainfall intensity and the area draining toward the channel.
Match the drain to the water load
A narrow channel drain may be fine for a protected pool patio with light water runoff. A larger channel may be needed where roof runoff, long deck runs, or heavy storms send more water across the surface. Channel length and outlet capacity also determine the practical flow rate.
NDS channel and trench drains are listed for light-flow residential applications, including pools, spas, and patios. NDS also describes its Spee-D Channel Drains for moderate water flows around pool areas, concrete patios, paver patios, and walkways. A trench drain made for residential applications isn’t automatically suitable for commercial water drainage or heavier loading.
The outlet controls the real result
A high-rated channel can still fail when the outlet, down adapter, pipe sizing, or grade is inadequate. Before installation, identify where the collected water will go and confirm the underground pipe route. The outlet’s flow rate must match the pipe run, turns, and slope required to move water away.
Don’t assume every drain connects to standard schedule 40 pipe the same way. Some systems use a specific outlet adapter, down adapter, or angle fitting. Confirm whether the selected outlet accepts schedule 40 pipe and whether another angle fitting is required for the planned route.
Follow the manufacturer’s instructions for the drain body, outlet connection, schedule 40 pipe, down adapter, and approved fittings. Verify schedule 40 pipe sizing, the required slope, and local code with a qualified professional before installation.
Installing a Drain in a New Concrete Pool Deck
New pool construction is the easiest time to plan drainage correctly. The pool builder, concrete contractor, and drainage installer can coordinate the channel drain, deck elevation, and outlet before the finished surface is placed. Review local code and permit requirements where required.
Set the finished height before pouring
The channel top should finish flush with the deck surface or at the elevation required by the manufacturer. A grate set too high becomes a trip hazard. A grate set too low collects sediment and creates a narrow puddle beside the opening.
I check the coping line, continuous deck slope, drain outlet, and final surface height before concrete is placed. The pre-pour checklist includes the outlet connection, schedule 40 pipe, and down adapter. At corners, I dry-fit an angle fitting and confirm the layout before securing each section.
The channel needs a firm base and straight alignment. Use a second angle fitting where the run changes direction, and connect the outlet to schedule 40 pipe as specified. Installation brackets may help, but use them only when the manufacturer specifies them.
Seal and waterproof the coping and deck interface before the pour. A third angle fitting may be needed to keep corner transitions aligned and prevent water from bypassing the deck drain system.
Protect the channel during concrete placement
Concrete can push lightweight channel sections out of alignment if they aren’t braced correctly. Secure bracing keeps the grate flush while the deck is poured. Wet material can also enter the channel and block the interior if the opening is left exposed.
Protective tape or a manufacturer-approved cover keeps concrete out of the drain during placement. A removable top also protects the channel edge from scratches and splatter. Remove the protection carefully after the concrete has cured enough, then inspect the grate and channel for debris.
Corners, End Caps, and Coping Transitions Matter
Drain channels usually fail at the details, not the long straight runs. A pool channel drain must work around curves, steps, skimmer areas, and enclosure posts. Plan those areas before cutting any pieces.
Use the fittings made for the system
An end cap closes a channel where the run stops. A second end cap may be needed at another termination point. Angle fittings, tees, crosses, and outlet pieces direct water through the system. Don’t mix components from different brands unless the manufacturer confirms compatibility with the selected deck drain system.
Use this compatibility checklist before ordering:
Inside corners: confirm the angle fitting orientation and match it to the adjoining angle fitting.
Outside corners: choose the correct angle fitting and verify the adjoining angle fitting.
Direction changes: confirm the angle fitting angle and the next angle fitting in the run.
Outlet transitions: match the angle fitting, outlet piece, down adapter, and specified schedule 40 pipe.
Coping curves: select an angle fitting that matches the system’s curve or flexible transition.
If the manufacturer lists them, a tee fitting, cross fitting, or side adapter can extend the layout. Confirm whether the outlet accepts schedule 40 pipe or requires a proprietary connection. Some drain systems use non-directional sections, while others need left or right fittings for corners. Check the selected product guide before ordering. The wrong corner piece can slow the job down and create a poor-looking transition around the coping.
Keep service points accessible
A removable grate is important because leaves, mulch, sand, and sunscreen residue eventually find their way inside. Keep a removable top, cleanout, outlet, skimmer lid, and drain access point accessible. Don’t bury any of them under pavers, mortar, or a permanently glued cover.
If you’re working near an older pool skimmer or equipment line, inspect before digging deeper. Older plastic collars may be cracked or poorly supported. Call 811 before excavation near utility areas, and remember that utility locating doesn’t shut down pool plumbing or equipment. Confirm local requirements before cutting or excavating near the pool structure.
Paver Deck Drainage Needs More Than a New Grate
A channel drain can improve water control, but it cannot stabilize pavers that have lost their base. The deck drain system also needs the right outlet, corner connections, and supporting grade. I look for the cause of movement before recommending a surface repair.
Watch for early warning signs
Loose or rocking pavers, missing joint sand, open seams near the coping, and puddles after rain are signs worth checking. A damp or soft area beside the deck can mean water is getting underneath the surface.
I inspect downspouts, irrigation, pool overflow paths, nearby soil grade, and the slope toward the drain. I also check whether coping has moved and whether water enters through an unsealed coping transition. Waterproofing or sealed joints may be needed where moisture is getting beneath the edge.
At corners, an angle fitting should keep the channel aligned without forcing the paver edges apart. At the outlet, a second angle fitting may help direct flow into schedule 40 pipe when the layout changes direction.
Repair the base before resetting pavers
Loose sand under one low paver is not a lasting repair. The affected pavers and base must be lifted, inspected, re-compacted, and restored to the correct grade before the drain frame or pavers are reset. Then the joints can be refilled with the right sand.
If coping is moving, cracked, or separating from the deck, it needs attention too. The pool edge is connected to the pool structure, while the paver deck relies on the supporting base underneath. Settlement, continued movement, or structural cracking requires evaluation by a qualified pool or deck professional.
Keeping a Pool Deck Drain Clean and Working
Maintenance is simple, but it needs to be regular. A deck drain system that is ignored through wet season can fill with leaves, sand, mulch, and algae before you notice a problem.
Clean debris without damaging the drain
Sweep the deck often and inspect the removable top before lifting it carefully. Clear leaves and sediment from the channel drain and angle fitting area without disturbing the drain connections.
Use a garden hose to rinse loose debris toward the outlet. Don’t blast the drain with extreme pressure, which could dislodge fittings or force debris deeper into the line.
Control algae and sediment buildup with regular cleaning, especially where moisture creates a slip hazard. Avoid harsh cleaners unless they’re approved for the grate and drain material. For pavers and natural stone, use cleaners suited to the surface. Acidic products can damage calcium-based stone such as travertine.
Know when a professional inspection is needed
After heavy storms, check whether the schedule 40 pipe outlet is draining freely. Persistent standing water may indicate a blocked outlet or a drain that is out of level.
If pavers keep sinking beside the drain, the problem may be below the surface instead of inside the channel. Recurring settlement or movement at the coping also warrants a qualified professional inspection.
A professional can check drainage, bedding, joint sand, coping movement, and deck elevation before recommending repairs. Depending on the property and drainage changes, a local code review may also be appropriate.
Key Takeaways
Pool deck drainage channels should collect surface water before it sits against coping, paver borders, or screen enclosure footers.
Plan the drain channel, outlet pipe, deck slope, and finished elevation together. Maintain a positive slope toward the collection channel.
Seal or waterproof the coping and deck transition where appropriate. PVC drains suit many concrete decks, while stainless steel and slot drains fit some modern finishes.
Paver decks need a stable base and solid edge support. A new grate won’t correct settlement below the surface.
Keep grates, end caps, outlets, and cleanouts accessible. Check local building codes or consult a qualified professional for new construction, excavation, structural movement, or unusual drainage conditions.
Frequently Asked Questions
Can stainless steel drains handle pool chemicals?
Many stainless steel systems are built for wet, chemical-exposed areas. Vodaland states that its 304 stainless steel drainage systems resist acids, corrosion, and chemicals. Stainless steel channels still need regular care. Rinse debris away, maintain balanced pool water, and inspect drains near coastal salt air. This guidance also applies to stainless steel grates and other stainless steel components.
Are paver deck drains different from concrete deck drains?
Yes. Concrete drains are usually set and supported before the concrete pour. Paver deck drains need stable frame support, correct bedding, and pavers cut neatly around the channel. A third-party paver deck layout should also preserve access for cleaning and repairs. Both systems must stay accessible for maintenance.
Do I need separate left and right corner fittings?
That depends on the drain system. Some products are non-directional, while other systems use specific left and right fittings. Confirm the complete fitting schedule before ordering materials. A removable top helps with inspection, but it doesn’t replace a correctly sloped channel, stable base, or suitable outlet.
Can every drain connect to schedule 40 pipe?
Not automatically. Some channels connect to schedule 40 pipe through a compatible outlet adapter. A down adapter may be required for a vertical connection. For horizontal outlets, confirm the fitting size and installation method before joining schedule 40 pipe. Don’t force a connection that wasn’t designed for the channel.
Does a pool deck drain need a specific slope?
Yes. The surrounding surface should direct water toward the channel without creating standing water. The channel itself also needs the slope specified by the manufacturer.
How should coping waterproofing meet the drainage channel?
Coping waterproofing should direct water away from the pool shell and toward the drainage path. Seal transitions carefully, but don’t block the channel opening or maintenance access.
How much maintenance access does a deck drain system need?
Leave enough room to lift the grate or removable top and clear sediment from the channel. Restricted access can make routine cleaning difficult, even in residential applications.
Should local code requirements be reviewed?
Yes. Local code review can confirm requirements for discharge, pool-deck drainage, accessible surfaces, and connections to existing plumbing. Requirements may vary by jurisdiction and project type.
When should I call a qualified professional?
Call a qualified professional when the deck has persistent standing water, damaged coping, unclear outlet connections, or structural movement. Professional help is also wise when the installation must connect to existing plumbing or schedule 40 pipe.
A Dry Pool Deck Starts Below the Surface
The best pool deck drainage system does its job without calling attention to itself. Water moves where it should, the coping stays tight, the pavers stay level, and the deck stays safer after a hard rain.
I always look past the visible puddle. Proper drainage depends on slope away from the coping, a waterproofed transition, a supported channel, an unobstructed outlet, and safe walking surfaces.
I also check local building codes before work begins. If the project affects the pool structure, permits, underground utilities, or recurring settlement, I consult a qualified pool, drainage, or concrete professional.
Backing into a busy Florida street is not a small inconvenience. For many narrow lots, a paver driveway turnaround is the practical answer, giving you a safe place to exit forward without paving the entire front yard.
I have worked on Southwest Florida paver projects for more than 20 years. A practical driveway design should address traffic flow, vehicle clearance, grading, and drainage first. If you’re connecting to an existing asphalt driveway approach, that tie-in also needs careful planning before selecting pavers or colors.
Key Takeaways
A compact turnaround can make it safer to leave a narrow driveway facing forward.
The right shape depends on your vehicle, garage location, property lines, and street access.
Driveway pavers need proper excavation, compacted aggregate, solid edge restraints, and controlled drainage.
Permeable pavers can help with ordinary rainfall, but they do not fix poor grading or high groundwater by themselves.
Herringbone patterns and strong borders handle turning tires better than a decorative layout with weak edges.
Why a Turnaround Makes Sense on a Narrow Lot
A paver turnaround does not need to be a huge circle in the middle of your lawn. Unlike a full circular driveway, a compact extension beside the driveway can preserve usable yard space.
On many Florida properties, this layout gives you enough room to pull in, turn, and leave facing the road. That matters more when your home sits on a busy street, a curve, or a road with limited visibility.
It also helps if you have a long garage approach where backing out feels awkward every day.
A teardrop layout saves valuable yard space
A teardrop-shaped paver area can widen the driveway where the vehicle needs it most, then taper back toward the garage or street. This keeps the front yard from looking like one oversized parking lot and helps protect curb appeal.
I like this option when space is limited on both sides. A planted border can support the landscape design, but shrubs should stay clear of the vehicle path and sight lines.
A natural stone border can define the edge, provided it doesn’t create a sharp obstruction or block drainage.
Hammerhead turnarounds work for straight driveways
A hammerhead adds a cross-shaped section at the end or side of a long driveway. You pull in, back once, and leave forward.
This can work well when a circular turnaround won’t fit. Allow enough room for your vehicle’s turning radius, garage alignment, and property-line constraints.
The important part is planning for your actual vehicle, not the smallest car that might use the driveway.
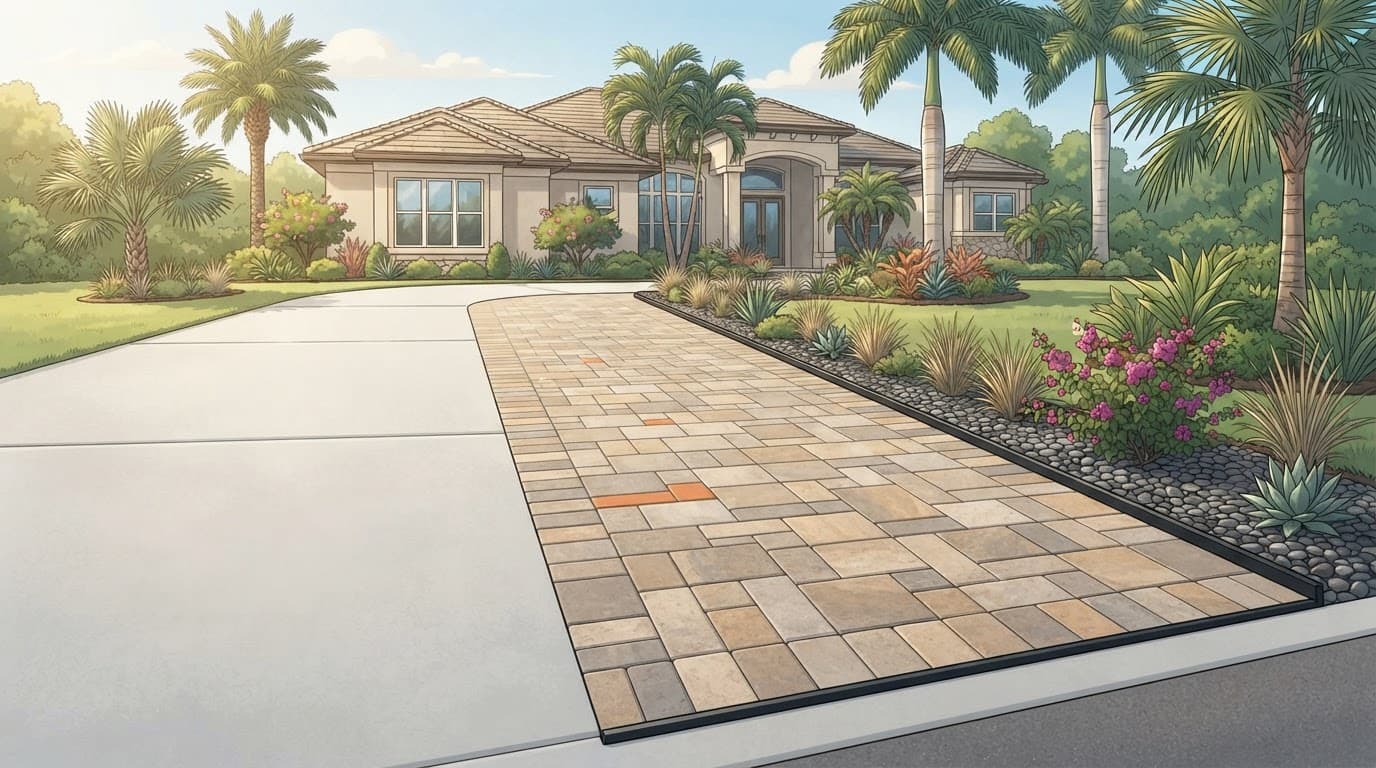
Compact paver turnaround design for a narrow Florida home.
Start With Your Vehicle and Daily Traffic
The first question I ask is simple: what needs to turn here? A compact sedan, full-size pickup, SUV, work van, or boat trailer all need different space.
Your driveway design should follow vehicle dimensions, turning radius, mirror clearance, trailer tongue length, and nearby obstructions.
A small turnaround that looks good on paper can become frustrating if you have to climb a curb or cut across landscaping every time you leave.
Leave room for a real turning movement
A single-car turnaround pad may begin around 10 by 20 feet, but that is not a universal design rule. Many midsize vehicles need more width, especially near walls, hedges, mailbox posts, or parked cars.
Measure from the tire path to each obstruction, not just to the visible paver edge. Fixed features, including natural stone borders and landscape walls, can narrow the usable turning path.
Turning tires put heavy side pressure on pavers and edges. Choose the driveway material only after confirming the maneuvering envelope, expected load, and drainage conditions.
Think about guests, deliveries, and garage doors
Your everyday vehicle is only part of the picture. Delivery trucks may not use the turnaround, but their wheels can damage a tight apron if they cross it often.
Look at garage-door swing space, trash collection, guest parking, and future vehicle changes. A quality driveway design should work now and still make sense years later.
For a site visit, measurements, and a clear plan for your property, Get a Free Quote before you order materials or start excavation.
Build the Base for Vehicle Loads
Driveway pavers are only the visible top surface. Most driveway failures begin below them, where the soil was not prepared, the base was too shallow, or water moved through loose material.
The base layer carries much of the load and must handle turning, braking, parked vehicles, Florida rain, and site soil conditions. A paver driveway turnaround is tougher than a walkway.
Excavation and compaction cannot be skipped
Organic soil, roots, loose fill, and wet pockets need to come out before the aggregate base goes in. The finished depth depends on soil support, groundwater, drainage needs, paver thickness, and vehicle loads.
For a conventional concrete paver driveway, a compacted crushed stone base often falls in the 6 to 12-inch range. The paver and bedding layers add to that depth. Some homeowners call this compacted gravel, but the specified aggregate, lift thickness, and compaction method matter more than the label. A heavier vehicle, weak soil, wet area, or local requirement may call for more.
The base should be installed in controlled lifts and compacted as work continues. Proper paver installation includes excavation, lift-by-lift compaction, grade checks, and drainage planning. It isn’t simply placing pavers over loose soil.
Edge restraints lock the field together
Strong edge restraints keep outside pavers from moving outward when tires turn. Perimeter support is especially important where turning tires push outward, because joints can widen, pavers can spread, and the center of the turnaround can shift.
Bedding sand helps set the pavers to grade. It isn’t there to hide an uneven base. The same is true for joint sand, which helps interlock the surface but cannot repair failed soil below.
The strength of a paver turnaround comes from the full pavement system below.
Choose a Stable Paver Pattern
A narrow-lot driveway design must account for turning forces, vehicle clearance, and the shape of the available area. The laying pattern shouldn’t be based on color preference alone.
For a paver driveway turnaround, I usually recommend a laying pattern that interlocks in several directions and a border that frames the whole area.
A herringbone pattern handles turning tires well
A 45-degree or 90-degree herringbone pattern is a dependable choice for interlocking pavers. The layout helps distribute traffic forces across the field instead of letting rows shift in one direction.
Running bond can look clean on a narrow drive, but it needs solid edge support and careful placement. I wouldn’t use a simple pattern only because it costs less if the turnaround will see daily vehicle traffic.
Borders add definition and support
A contrasting soldier-course border can improve curb appeal and create a deliberate transition between the turnaround, house, and planting beds. A natural stone accent can also add texture, though its irregular edges and color variation may require more precise layout planning.
Border width and planting placement should support the landscape design without narrowing the turning envelope. Products such as unilock pavers and techo-bloc pavers offer different appearances, but the selected product must be rated for driveways. Brick pavers provide another material comparison, while natural stone may need extra attention around vehicle clearance.
Pattern direction, borders, and planting can make a narrow driveway feel more balanced.
Plan Drainage Before Picking Colors
Florida rain exposes weak driveway planning fast. Surface drainage should move water away from the house, garage, screen enclosure, neighboring property, and public drainage features through an approved path.
A low spot at the turnaround can hold water, soften the base, and eventually create rocking pavers or settlement.
Permeable pavers can help manage runoff
Permeable pavers have wider joints filled with washed angular aggregate instead of ordinary fine sand. Rain passes through the joints into open-graded stone below, where it can temporarily store and release water.
This system isn’t a cure for poor grading, saturated soil, or a high seasonal water table.
A proper design may need an underdrain, overflow route, or drainage improvement. Ordinary pavers with open-looking joints are not automatically a permeable pavement system.
Check local permits and right-of-way rules
Driveway expansions can require local review, especially near a swale, sidewalk, culvert, road apron, or public right-of-way. Check setbacks, lot coverage limits, roadside swales, sidewalk crossings, culvert requirements, and any HOA approval before expanding the turnaround.
A natural stone border, raised edge, or landscape feature must not dam runoff or redirect water onto a neighboring lot. Lee County, for example, requires residential driveways to maintain existing roadside drainage conveyance.
Call 811 before excavation. Irrigation, water, electric, cable, and drainage lines are often closer to the driveway than homeowners expect.
Why Pavers Beat a Solid Slab in Many Cases
Poured concrete and asphalt can provide a usable driveway, but pavers offer more flexibility when small sections settle or need repair. Individual units can often be lifted, the base corrected, and the same pavers reset. An asphalt driveway can be harder to reshape later, while heat and appearance may affect comfort and curb appeal.
Concrete pavers give you more control over color, texture, borders, and shape than a stamped concrete surface that can’t be lifted and reset after localized settlement. Brick pavers offer another comparison, while natural stone can create a higher-end look that coordinates with a patio, pool deck, or landscape feature. That coordination can improve curb appeal, though irregular natural stone pieces are less predictable for tight turning geometry.
A properly built paver driveway does cost more than simply laying pavers over loose ground. A concrete driveway may have a lower surface price, but comparing any driveway material alone can be misleading. Excavation, base preparation, drainage, and edge support matter more than surface costs, and none should be skipped.
For homeowners planning a full replacement or extension, paver driveway installation services can serve as a reference for design, installation, and repair questions across Southwest Florida.
Keep Florida Pavers Clean and Secure
Paver maintenance is simple when it is handled before small issues grow. Sweep debris, watch for missing joint material, and inspect the turnout after heavy rain.
Leaves, mulch, sand, and grass clippings can collect in joints. Natural stone borders can weather, stain, or hold organic debris differently from concrete pavers, so they may need a separate cleaning approach.
Seal only when the surface needs it
Sealing is optional, not a substitute for good installation. A compatible sealer can help protect against stains and weathering, but sealant application is product-specific and won’t correct failed joints, poor drainage, or a weak base.
Some driveways may need attention around every two years, while others can go longer. I recommend inspecting the surface instead of using one fixed schedule for every home.
Watch for signs below the surface
Loose pavers, widening joints, low areas, and water that stays after a normal storm are warnings. Resetting one paver may help the appearance, but recurring movement usually points to a base or drainage issue.
Can concrete pavers create a safe turnaround by a busy road?
Yes, concrete pavers can create a durable turnaround when the area fits your vehicle, has a properly prepared base, and includes strong edge restraints. The design should let you exit facing forward without moving vehicles too close to the road.
How deep should a paver driveway base be?
There is no single depth for every property. Many residential driveways use about 6 to 12 inches of compacted aggregate beneath the bedding layer. An asphalt driveway specification shouldn’t replace a paver base design, since paver thickness, bedding, jointing, and edge support work together differently. Soil conditions, groundwater, vehicle weight, drainage, and local requirements can also change the design.
Do permeable driveway pavers prevent flooding?
They can reduce runoff and puddling during ordinary rainfall when permeable pavers use a properly designed open-graded base, grading, and overflow plan. They can’t correct severe grading problems, saturated soil, roof runoff, or water flowing in from a neighboring lot.
A Turnaround Should Feel Easy Every Day
The right paver driveway turnaround gives you more than curb appeal. It gives you safer daily access, a clean traffic path, and a surface built for Florida weather.
A narrow lot can still have a beautiful driveway when the pavers, drainage, base, and turning space all work together.
A paver driveway or patio can look perfect when it is new, then begin spreading at the edges after heavy rain and regular use. Paver edge restraints are what keep the outside row from moving and provide the lateral support that interlocking concrete pavements rely on. Natural stone pavers can require different thickness, base, and restraint details.
After more than 20 years working with Florida pavers, I have seen small gaps turn into uneven borders, loose joint sand, and sinking areas. Florida heat, intense rain, saturated or shifting sandy soil, and runoff can expose weak perimeter support faster than northern freeze-related conditions. A strong base, proper drainage, and a solid edge must work together, because the edge alone won’t fix settlement.
How paver edge restraints keep a Florida surface locked
Interlocking concrete pavements push outward under vehicle traffic when vehicles turn or brake. Shifting furniture and foot traffic add pressure near the perimeter, so the pavers need a firm frame to keep their shape.
The CMHA edge-restraint guidance explains that exposed edges need restraint to hold the pavers tightly together. That applies to a small walkway, but it matters even more at a driveway apron or busy patio.
A border is part of the support system
A decorative border can look great, but it also helps support the surface. The outside pavers carry pressure from the field behind them. When the restraint is weak, joint sand escapes, joints open, and the paver field starts moving toward the edge.
I pay close attention to driveway aprons, sides of garages, pool deck edges, steps, and transitions beside concrete. These are the areas where problems often show first.
Florida rain can expose a weak perimeter fast
Southwest Florida doesn’t deal with regular frost heave or repeated freeze thaw cycles like northern states. Our bigger concerns are hard rain, runoff, saturated soil, shifting sand, roots, and poor grading.
Water that reaches an unprepared edge can wash away the base below the pavers. The surface may still look level for a while, but the base can be failing underneath. That differs from ordinary surface weathering, which can discolor or roughen the surface without washing out the base.
A clean-looking paver edge may still have failed support below it. The restraint needs firm support below it, not loose soil or bedding sand.
Choosing paver edge restraints for the job
There is no single best restraint for every Florida project. Curves, paver thickness, expected loads, coastal exposure, drainage, soil, and the planned base material all affect the choice.
Straight runs, clean borders, and low-profile edges
Paver thickness and anchor spacing
Steel edging
Heavy-duty designs and straight edges
Product coating and local exposure
Concrete edge restraint
Designs that call for a permanent formed edge
Properly supported base and careful drainage planning
The best material is the one that fits the complete pavement design without creating a raised trip point or leaving outside pavers unsupported.
Interlocking concrete pavements and natural stone pavers can require different edge details because their thickness and bedding may vary. A concrete option needs a properly supported base and careful drainage planning.
Flexible plastic edging works well around curves
Purpose-designed plastic edge restraints, unlike thin landscape borders, are common around freeform patios, circular sitting areas, and curved walkways. They follow curved runs and help avoid a patchwork of short, rigid pieces. When the curve is a whole driveway rather than a walkway, my curved paver driveway planning guide covers the layout, cuts, and edge support those runs need.
Plastic does not mean light-duty by default. The quality of the restraint, the base below it, and the anchoring method decide how well it performs. A thin landscape border pushed into soil is not the same thing as a paver restraint.
Metal paver edging gives straight lines a clean finish
Aluminum edge restraints suit straight runs where you want low profile edging along a driveway or patio. Aluminum does not rust like bare steel, which can be useful in Florida’s humid and coastal conditions.
Still, metal paver edging isn’t automatically stronger because it’s metal. It must sit against the paver edge, be anchored into a stable base, and match the paver system. I also check cuts, connectors, and transitions near concrete slabs before the first paver goes down.
Dense-graded and open-grade bases need different details
The edge restraint has to match what lies below it. Conventional interlocking concrete pavements and permeable driveways may look similar from above, but their base material and drainage paths work differently. Natural stone pavers may have different structural and drainage specifications, so don’t assume they use either assembly.
Conventional paver installations need a compacted base berm
For most standard driveways and patios, the dense graded base extends beyond the outside pavers. That extra berm provides compacted base material for anchoring the restraint.
The PAV-TEC-018-22 installation bulletin shows restraints spiked into dense-graded base berms, while bedding sand sets pavers to final grade. As an anchoring substrate, bedding sand can’t correct a soft, washed-out, or uneven base.
Aggregate should be placed in controlled lifts and compacted as work progresses. Dumping all the stone at once and compacting only at the end leaves too much room for settlement.
Permeable pavers need open-grade edge planning
Permeable paver systems use clean, open-graded stone to form an open grade base, allowing water to move through joints and into the layers below. Fine sand can clog that system, so materials and installation order must follow the approved design.
Some permeable edge systems call for excavation beyond the paver field, soil-separation fabric, open stone layers, and a setting bed of ASTM No. 8 or No. 9 aggregate. The fabric may wrap or fold along the perimeter before the edge is completed.
I inspect the full drainage path before recommending permeable pavers. Sandy or shifting subgrade, seasonal saturation, high water tables, roof runoff, swales, and adjacent grades all matter. A permeable surface isn’t a fix when water lacks a viable discharge or infiltration path.
Installing paver edge restraints the right way
Good paver work starts below ground. For interlocking concrete pavements, edge support depends on excavation, correction of weak or wet soil, lift-by-lift compaction, finished elevations, and drainage. The restraint comes later, after those details are correct.
The edge restraint system must match the selected product, paver thickness, base, and anchor method. Natural stone pavers may require different thicknesses and a separate, approved installation system.
Set finished height before placing the restraint
I check where water needs to flow before establishing the finished paver height. That includes the garage, street, pool deck, screen enclosure, downspouts, and low areas around the property.
CMHA guidance recommends at least 1 inch of vertical restraint against the side of the paver; this isn’t a universal code requirement. Set the restraint to the correct elevation according to current product instructions and project design. Too high creates a trip edge; too low leaves pavers unsupported.
Anchor into base material, never loose bedding sand
A standard paver installation follows a practical order:
Excavate to the required depth and correct weak or wet soil before placing the base stone.
Place and compact the aggregate base in lifts, extending it beyond the paver perimeter.
Install the restraint against the planned paver edge and anchor it into compacted base material.
Screed the bedding sand, set the pavers, compact the surface, then fill joints with the specified material.
Many restraint products use landscape spikes that must penetrate firm, compacted support. Spike spacing varies by product and loading, and curved runs may require different anchoring details than straight driveway edges.
A loose border is usually a symptom, not the whole problem. Replacing one paver or adding more bedding sand may improve the appearance briefly, but it won’t restore the surface’s structural integrity. A failed base needs inspection, not another surface patch.
Open joints and moving pavers need inspection
Watch for pavers that rock under your foot, widened joints near the border, missing joint sand, or a border pulling away from the main field. On a driveway, inspect areas exposed to vehicle traffic, especially where cars enter at an angle or turn near the street.
The repair may require lifting affected pavers and inspecting the base material and aggregate layers. Drainage, soil, or grading problems may also need correction before compacting the area and resetting the restraint. For natural stone pavers, approved bedding and restraint details may differ, so the same reset method may not apply. I’d rather repair the cause once than keep patching the same edge.
Low spots after rain are not a sealing problem
Sealer can help protect the surface from stains and weathering. It can’t repair settlement or restore support below the pavers.
Heavy pressure washing can also remove joint material if it is done too aggressively. Regular care matters, but it shouldn’t hide a structural issue. Our paver sealing and maintenance tips can help you spot routine issues before they grow.
Key Takeaways for Florida Homeowners
Paver edge restraints hold the outside pavers in place and protect the interlocking pattern.
The restraint must anchor into a properly compacted aggregate base, not loose soil or bedding sand.
Plastic edging can suit curves, while aluminum and other metal systems often work well along straight borders.
Heavy rain, runoff, sandy subgrade, and poor grading are bigger Florida concerns than freeze-thaw cycles.
Permeable paver systems need open-graded stone, compatible joint-fill material, and edge details that protect drainage.
If your driveway edge is spreading, your patio has low spots, or pavers are separating near the border, inspect below the surface. A qualified local professional can evaluate the base, drainage, and edge installation.
Common Questions About Paver Edging
Can standard landscape edging replace a paver restraint?
No. Standard landscape edging separates mulch, grass, or planting beds. It isn’t designed to hold interlocking concrete pavements against vehicle traffic, foot traffic, and the outward pressure of a full paver field.
Use a restraint made for the paver system and install it over a prepared base. An existing concrete curb or properly supported border may also serve as part of the design, but only if it is stable and the adjacent base isn’t failing.
How many spikes does paver edging need?
The answer depends on the product and the project. Some systems use spikes around 8 to 12 inches apart, but homeowners shouldn’t treat that as a rule for every installation.
Curved runs, driveways with turning traffic, and long straight walkways can require different anchoring details. Follow the manufacturer’s instructions, account for site conditions, and make sure every spike reaches firm, compacted base material.
What happens when a patio has no edge restraint?
The outside pavers can shift outward over time. Joints begin opening, joint sand can wash away, and nearby pavers may loosen or settle.
A patio may not carry car traffic, but furniture, foot traffic, rain, and soil movement still put pressure on the perimeter. The missing restraint often becomes visible first at corners, steps, and curved borders.
Strong Paver Edges Start Below the Surface
The right paver edge restraint isn’t the most visible part of a driveway or patio. It helps hold the complete installation together. A stable aggregate base, proper drainage, filled joints, and secure edges help protect the surface through Florida rain and daily use.
A beautiful pattern needs more than attractive pavers; it needs support below the surface and around every exposed edge.
A paver driveway or patio can look perfect on day one, then start sinking after hard rains. In Florida, sandy soil may shift after excavation, while clay pockets or imported fill can drain differently. Intense rainfall can also increase runoff and erosion, so the site deserves inspection before installation.
I use geotextile fabric under pavers when a property needs separation or stabilization below the supporting layers. This paver underlayment fabric is site-specific, not a universal requirement. On the right project, it can help a paver patio, walkway, pool deck, or driveway stay level for years.
The decision depends on the soil, drainage, rainfall exposure, traffic, prior settlement, and proposed paver use. It may be useful on one Southwest Florida property and unnecessary on another.
Key Takeaways
Geotextile fabric under pavers is site-specific, not a universal requirement. It is most useful where Florida soil is loose, disturbed, soft, variable, or prone to mixing with the aggregate base.
Non-woven fabric commonly supports separation and filtration, while woven fabric may be appropriate for some soft or weak areas. Geogrid serves a different reinforcement function and may be used alongside separation fabric on heavier projects.
Fabric cannot replace proper excavation, drainage, base depth, compaction, sand, edge restraint, or joint maintenance. For many patios and walkways, 4 to 6 inches of compacted base is a common starting point; driveways often begin around 6 to 8 inches.
Proper installation places the fabric directly over the prepared subgrade, below the aggregate base, with suitable overlaps and full coverage. Persistent ponding, erosion, settlement, or drainage problems must be corrected rather than covered with fabric.
Florida Soil Conditions That Call for Fabric
Florida has plenty of sandy soil, and sand can drain well. That useful permeability doesn’t mean every area is stable. Compacted fill, localized clay lenses, organic soil, and trench backfill can settle differently or drain poorly.
The University of Florida explains that much of the state’s surface soil is sandy, but construction can leave behind disturbed areas, trenches, fill, and drainage concerns. A Florida residential soil assessment is a good reminder that the soil below your landscape may not be the same across the whole yard.
Loose fill and disturbed ground
I strongly consider fabric when I see loose fill, soft spots, organic soil, or an area that has already settled. This is common around newer construction, pool enclosures, lanais, downspouts, and areas filled during pool construction.
The fabric separates native soil from the crushed aggregate base. Without that separation, aggregate can press into weak soil and contaminate the base material with subsoil. Soil can also work its way up into the stone. Once those materials blend together, the base loses its strength.
Water problems after heavy rain
Southwest Florida rain can hit hard and fast. If water puddles next to the house, runs toward a pool deck, or gathers at the end of a driveway, I don’t treat it like a small detail.
Geotextile fabric can help maintain layer separation where water moves through the base, but it won’t stop erosion from a larger problem. It can’t correct a flat grade, undersized drainage, concentrated downspout discharge, or persistent ponding. I check the property’s drainage system, roof discharge, swales, pool runoff, and low points after rain.
A paver surface can look level while the base underneath is slowly washing out. The first sign may be one low paver, but the problem can extend much farther.
How Geotextile Fabric Under Pavers Supports the Base
This layer sits at the bottom of the paver system, over prepared soil and below the aggregate base. It isn’t a substitute for base gravel, the sand beneath pavers, edge restraint, or compaction.
It is one layer in a full system that also depends on proper grading and drainage. Every layer has a job.
Separation keeps the base clean
The primary role of non woven geotextile fabric in this application is separation. It keeps the base material above the soil and helps prevent the layers from mixing as weight and weather affect the surface.
Think of the aggregate base as the foundation below the pavers. In plain language, it is often called base gravel, though materials can vary by project. If aggregate mixes with weak soil and fines, it may not compact or drain as intended. That can lead to ruts, rocking pavers, open joints, and low areas.
The CMHA guide to geosynthetics for segmental pavement describes these materials’ different roles, including separation, filtration, drainage, and reinforcement. No single product performs every function equally, so the right choice depends on site conditions.
Fabric is not a complete weed barrier
Many homeowners ask if fabric stops weeds. The honest answer is no, not completely.
Weeds often start from seeds that land in the joints with dust, mulch, leaves, grass clippings, and organic debris. Those seeds don’t need to grow up from the native soil. Underlayment may reduce some growth from below, but it isn’t a replacement for routine joint cleaning and properly installed joint material.
Polymeric sand can help lock pavers together and support stable joints, but it only works as intended when the pavers and foundation are properly prepared. Clean surfaces, full joints, and routine maintenance matter more than treating underlayment as weed control.
Choosing Non-Woven or Woven Fabric
Not all paver underlayment fabric is the same. A lightweight landscape fabric sold for garden beds isn’t automatically suitable beneath a driveway or patio.
The fabric must handle construction traffic, stone placement, soil contact, and moisture, but a heavy duty label alone isn’t a performance specification. It needs suitable permeability for Florida rainfall while limiting soil migration and matching the property’s conditions.
Non-woven fabric for separation and drainage
Non woven geotextile fabric is often the best fit for residential hardscape work when separation and filtration are the goal. It’s commonly made from polypropylene fibers, but polypropylene fabric construction and product specifications matter more than the material name alone.
I use non woven geotextile fabric when Florida soil is sandy, variable, or prone to movement, with separation as the main concern. Florida’s sandy native soil, compacted fill, clay pockets, pool-construction disturbance, and driveway traffic can create different needs on one property. It works like a filter fabric, allowing water to pass while holding soil and stone in proper layers.
Woven fabric generally offers greater tensile strength. It may support soil stabilization in soft, disturbed, or moving areas, but fabric alone won’t stabilize every site. Selection still depends on site loads, drainage, and installation.
For a regular patio on firm, well-drained native sand, woven fabric may be more than the project needs. For a driveway over questionable fill or a section that has repeatedly sunk, woven geotextile fabric may be worth considering.
Geogrid is different again. It can reinforce aggregate through interlocking, supporting aggregate stabilization, while separation fabric keeps soil and stone apart. It isn’t automatically a replacement for that separation layer, and some heavier projects need both. A qualified site review is smart when the site has severe settlement, a retaining wall, heavy delivery trucks, or major drainage issues.
Base Depth Matters More Than Fabric Alone
The geotextile fabric supports the base system, but it can’t make a thin base carry a heavy load. Fabric labeled heavy duty still can’t replace proper design, adequate depth, or compaction.
I always look at how the space will be used before deciding how deep the excavation should go.
Patios and walkways need a compacted foundation
For many Florida patios and walkways, a common starting point is 4 to 6 inches of compacted aggregate base, commonly called base gravel.
About 1 inch of bedding sand follows as a leveling layer, not the structural base, before the pavers are placed.
Actual depth depends on traffic, soil strength, clay or fill layers, and drainage. Grade, erosion exposure, local requirements, and the condition of the prepared ground matter too.
In Southwest Florida, freeze thaw cycles are generally less central than heavy rainfall, saturated soil, erosion, and soil disturbance.
I don’t want to place beautiful new pavers over a base that will settle during the first wet season. The fabric, aggregate base, leveling sand, pavers, and edge restraint each serve separate roles.
Aggregate should go down in manageable lifts and be compacted with a plate compactor. Lift thickness and compaction depend on the aggregate, moisture, equipment, and site conditions. Dumping the entire base in at once and hoping it gets tight isn’t professional preparation.
Driveways need more support for vehicles
Cars can safely drive over a properly built paver driveway with a driveway underlayment below the base. The underlayment is buried, not the driving surface, and it doesn’t carry the car by itself. It is one part of a complete layered system, not a substitute for adequate base depth.
For residential driveways, 6 to 8 inches of compacted base is a common starting range, not a universal specification.
Weak soil, clay or fill layers, poor drainage, grade changes, and erosion exposure can change the design. Heavier vehicles, repeated traffic, local requirements, and the condition of the prepared ground may call for 8 to 12 inches.
A driveway isn’t a patio with cars parked on it. Paving stones handle foot traffic, while vehicle loads concentrate where tires turn, brake, or sit in the same spot.
Proper Installation Keeps the Layers Working
Good material can still fail when the installation process puts it in the wrong place. I have seen fabric laid directly under sand, which does little to protect the actual base from mixing with the soil below.
Geotextile fabric belongs at the bottom of the excavated paver structure, directly over the prepared subgrade.
Start with the subgrade, not the pavers
First, excavate to the needed depth and establish the intended drainage slope. Correct soft or pumping areas before compacting the prepared ground. Don’t cover wet, unstable soil until it has been corrected.
The basic order is straightforward:
Excavate, remove unstable soil, and create the intended drainage slope.
Correct soft or pumping areas, then compact the prepared ground before covering it.
Lay the fabric across the full prepared area.
Overlap fabric seams according to the product specifications and site conditions.
Place and compact base gravel in manageable lifts with a plate compactor, following equipment and material guidance.
Add the sand layer, install pavers, secure edges, and fill joints.
Don’t stretch the fabric tight like a drum. It should lie flat against the prepared ground without large wrinkles or exposed gaps. Keep it protected as base material goes down, because exposed fabric can tear or shift under equipment.
Seams and edges deserve attention
Seams are not a place to rush. Fabric sections need enough overlap so soil cannot push between the panels when the base is compacted. The required overlap depends on the material, ground conditions, slope, and manufacturer guidance.
I also extend the fabric far enough to cover the full prepared footprint. Southwest Florida rainfall can expose weak edges or create erosion paths, so the finished drainage path must remain functional. An unprotected side can become the weak area where material starts moving.
Edge restraint is another detail that matters. Even a strong base can fail at the perimeter if the pavers have nothing holding them together. Good compaction, secure borders, joint sand, grading, and fabric work together. Fabric alone can’t prevent perimeter movement.
When Fabric Is Optional in Southwest Florida
On a small walkway or patio over firm, undisturbed, well-drained native sand, paver underlayment fabric may be optional. I do not tell homeowners they need it on every project because that is not honest.
Still, it can be affordable insurance on jobs with disturbed fill, clay pockets, repeated settlement, erosion, intense runoff, soft spots, or past base contamination. A non woven geotextile fabric may help separate layers when site conditions justify it, but it should not be prescribed automatically.
The cost of quality fabric is small compared with lifting a sunken patio later and rebuilding the base.
Warning signs before a rebuild
If you already have paving stones that are sinking, rocking, cracking, or holding water, do not assume loose joint sand is the only problem. I inspect the pavers, base, edges, and water flow together. A geotextile fabric layer may support separation, but it cannot correct every grading or drainage problem.
Pay close attention when you see:
Pavers that move underfoot or wobble when you drive over them, which may indicate weak support, edge movement, or trapped water.
Low areas that hold water after rain, possibly from grading problems, uneven support, or restricted runoff.
Joint sand washing out in the same location, which may signal concentrated flow, open edges, or erosion. Polymeric sand maintenance cannot correct a failed base or drainage problem.
Borders spreading apart or pavers pulling away from a screen enclosure, which may indicate edge failure, footing movement, or poor restraint.
A driveway repair beside a downspout, swale, or pool drainage area, where concentrated runoff may be affecting the base.
Pool decks and screen enclosures need extra care. Enclosure footings and adjacent paver areas are separate structures, so they can settle or move differently. Do not drill into footings or move screen anchors during a paver project without qualified guidance.
For larger excavation, driveway changes, or work near utilities, call Sunshine 811 before digging and confirm any local permit requirements. Fort Myers, Cape Coral, Bonita Springs, Punta Gorda, and Sarasota can have different rules for drainage and driveway work.
If the base has failed or you are planning a new project, have a qualified local professional review the soil, water flow, base depth, and nearby utilities before work starts.
Frequently Asked Questions
Is geotextile fabric required under pavers in Florida?
No, geotextile fabric is not required for every Florida paver project. It may be worthwhile over disturbed fill, soft spots, clay pockets, organic soil, erosion-prone areas, or ground that has settled before.
What type of fabric should go under pavers?
Non-woven geotextile fabric is often used when separation and filtration are the main goals. Woven fabric may be considered for some soft or weak areas where greater tensile strength is useful, but the choice should match the soil, drainage, traffic, and product specifications.
Where does geotextile fabric go under a paver system?
The fabric belongs at the bottom of the excavated paver structure, directly over the prepared and compacted subgrade. The aggregate base goes above it, followed by the leveling sand and pavers.
Can fabric prevent pavers from sinking?
Fabric can help prevent soil and aggregate from mixing, which may support a more stable base. It cannot correct inadequate base depth, poor compaction, improper grading, concentrated runoff, or a drainage system that is washing out the foundation.
How much base is needed under pavers?
A common starting range is 4 to 6 inches of compacted aggregate base for many patios and walkways, and 6 to 8 inches for residential driveways. Weak soil, heavy vehicles, poor drainage, fill, grade changes, and erosion exposure may require a deeper or specially designed base.
A Stable Paver Surface Starts Below Ground
The right fabric can’t fix every Florida paver problem. It can protect a properly built base when sandy or disturbed soil, erosion, or site drainage creates a need. Separation, compaction, drainage, correct base depth, and secure edges keep paving stones clean and level.
I’ve seen how fast a small low spot can spread after heavy Florida rain. Geotextile fabric under pavers can help protect the base when the ground is weak, disturbed, or likely to mix with it. It isn’t needed on every project, and it can’t correct a failed drainage design.
A lasting paver job is built from the ground up, not covered up at the surface.
A Florida patio has to deal with much more than patio furniture and weekend cookouts. It faces hard sun, heavy rain, pool water, settling soil, and plenty of foot traffic.
When homeowners ask me about pavers vs stamped concrete, I tell them the better choice starts with the look they want upfront. It also depends on drainage, maintenance, future repairs, and performance in Florida heat and heavy rain. Pool safety, HOA approval, and coastal or hurricane-prone conditions matter, too.
Before choosing a color or pattern, look at both the visible surface and the base below it. That foundation affects drainage, movement, cracking, and repair needs over time.
Key Takeaways
Stamped concrete offers a continuous decorative look and often a lower upfront cost, but cracks, fading, and repairs can be difficult to hide.
Pavers cost more in some projects but allow individual units to be lifted, repaired, and reset after settlement or drainage problems.
Proper grading, compaction, edge restraint, base preparation, and drainage matter more than the surface pattern alone in Florida conditions.
Around pools, choose textured finishes, avoid overly glossy sealers, and manage algae and standing water to improve traction.
Check HOA rules, local permit requirements, screen enclosure details, and the full contractor scope before choosing a patio system.
How Florida Weather Affects Each Patio Surface
Southwest Florida generally doesn’t deal with regular freeze thaw cycles or frost heave like northern states. Heavy rain, saturated or sandy soil, runoff, strong sun, and settlement are bigger concerns here.
Stamped concrete is one continuous concrete slab. It’s poured, colored, stamped, and cut with control joints. It can give you the look of slate, stone, brick, or wood without installing individual stones.
Pavers are separate concrete pavers installed over a prepared base, bedding layer, edge restraint, and joint sand. Their interlocking design distributes movement across connected units instead of behaving like one rigid slab.
Rain and soil movement tell the real story
When water gets under a patio, poor support below the surface becomes a problem. A shifted concrete slab may need a visible repair. Matching old color and texture is difficult.
With pavers, a low or settled area can usually be lifted, rebuilt, compacted, and reset. I see this often around lanais, pool decks, and screen enclosures where water has washed material out from below.
A paver patio isn’t maintenance-free, but its modular layout gives you repair access that a continuous surface does not.
A new surface over a weak base is still sitting on a weak base. The repair has to start underneath.
Drainage needs more than a nice slope
Both materials need proper grading. Water should move away from the home, pool enclosure, and patio edges. A stamped patio sheds water across the surface, so its finished slope, control-joint layout, and expansion joints must suit the design before concrete is poured.
Standard paver joints can help move water through the surface, but they still need a stable base and a planned drainage path. If drainage is the main concern, permeable pavers are a separate system built to let water pass through designed joints and aggregate layers. The Florida Department of Environmental Protection’s green stormwater guidance explains how interlocking pavers can be part of permeable pavement design.
Upfront Cost and Long-Term Patio Value
Stamped concrete often costs less at the start. It uses less hand-setting labor than a paver patio, though decorative stamping and color can raise the price. A useful cost comparison considers more than the initial bid.
In Southwest Florida, a basic stamped concrete patio often falls around $10 to $18 installed. A paver patio commonly runs about $9 to $24 installed. These planning ranges are quoted per square foot. Actual pricing varies with access, demolition, soil conditions, drainage, pattern complexity, and base work.
Here is a practical planning comparison for a typical patio project.
Demolition, deeper base work, borders, many cuts, drainage repairs
Permeable pavers
Often higher than standard pavers
Engineered stone base, excavation, drainage requirements
A lower installation cost doesn’t always mean the lowest lifetime cost. A stamped slab can be a smart choice for a simple, budget-conscious patio with stable conditions. But a crack across a decorative pattern isn’t an easy fix. Matching an older decorative slab’s color and pattern can make crack repair conspicuous.
Read the quote before comparing totals
I recommend asking every contractor what the number includes. Compare scope rather than credentials alone, and ask a qualified concrete contractor to explain unclear items.
A clear proposal should cover:
Removal and disposal of the existing surface, if needed.
Aggregate base depth, bedding material, joint sand, and edge restraint.
Cuts around the house, pool, drains, lanai, and screen enclosure.
Drainage corrections, downspout extensions, and final grading.
Cleanup, sealing options, and warranty terms.
Two patio quotes can look close on paper but include very different base preparation. Insufficient compaction, poor grading, or omitted drainage work can lead to settlement in either system.
Pool Safety, Rain, and Surface Traction
A patio beside a pool gets wet. Sunscreen, algae, leaves, wet feet, and summer rain make texture, traction, and slip resistance more important than a showroom sample.
Stamped concrete can be textured during installation, which helps. The concern comes when a smooth or glossy topical sealer is used, since a shiny finish may become slick when wet. For better slip resistance, choose a textured finish, avoid overly glossy sealers, and monitor algae and standing water.
Pavers offer natural joint texture
Interlocking pavers can offer more texture underfoot through their faces and joints, which may improve traction. Light-colored, textured pavers are often a good fit around Southwest Florida pools, patios, and walkways.
Still, neither material replaces cleaning, proper slope, or drainage. No surface stays reliable with algae or standing water, so I tell homeowners to look for low spots after a hard rain. If one section remains wet long after the rest of the patio dries, the issue may be slope, runoff, or settlement below the surface.
For patios that need a water-management plan, UF/IFAS information on permeable pavement systems is useful reading. Permeable pavers can reduce runoff, but open joints alone don’t make ordinary pavers permeable. A working system needs a designed aggregate base, correct excavation depth, and a maintenance plan.
Heat is affected by more than the material
I do not promise that one surface will always feel cooler than another. Direct sun, color, finish, shade, surface exposure, and surrounding pool water all change how a patio feels under bare feet.
In my experience, light colors and textured finishes usually make more sense for exposed pool areas than dark, heavily sealed surfaces. Before making a final choice, place real samples outside and walk on them at the time of day you use the patio most.
Repairs and Maintenance Over the Years
The repair process is often where homeowners notice the biggest practical difference.
Concrete pavers can be removed individually when one unit settles, cracks, or stains. I can inspect the bedding layer and base, correct the problem, then reset a matching unit.
Stamped concrete has no individual units to reset, so it can feel low maintenance. Damage or movement in the concrete slab is harder to correct invisibly. Crack repair may leave visible patching when pattern or color matching is difficult, while color fading can change the finish over time.
Joint sand keeps pavers locked together
It helps stabilize the paver field and limits open gaps where weed growth and insects can move in. Polymeric sand can be a suitable replacement after cleaning, but it can’t repair a washed-out base.
Polymeric sand helps stabilize joints only when it’s installed under appropriate moisture and weather conditions.
Pressure washing also needs care. A hard, narrow nozzle can chip paver faces and blow sand from the joints. After cleaning, the patio may need fresh sand before sealing.
Regular sweeping, controlled cleaning, and checking the drainage path after storms will go a long way.
Sealing is protection, not a repair
Stamped concrete usually needs periodic resealing to help protect its color and finish. The timing of each sealer application depends on exposure, traffic, product quality, and installation conditions. I would not rely on one fixed schedule for every patio.
Pavers may also be sealed, especially when homeowners want deeper color, easier cleaning, or added stain resistance. A proper sealer needs a clean, dry, stable surface. I never seal a surface with loose pavers, missing sand, trapped moisture, or drainage problems. Sealer does not fix movement underneath.
Design Choices That Change the Look of Your Home
Stamped concrete offers broad design versatility. It can mimic flagstone, brick, wood planks, slate, or natural stone while remaining a concrete surface. It works well when you want decorative continuity across a large patio, while pavers offer more modular changeability.
Pavers are hardscape materials with pattern, border, and color options that fit the home’s exterior, pool coping, walkway, or driveway. A simple running bond, basket weave, or herringbone interlocking design can look clean and timeless. Borders can frame the patio and make the layout feel more finished.
Pavers make later changes easier
Outdoor spaces change over time. A homeowner may add a grill area, extend a patio, install artificial grass, repair a pool deck, or widen a walkway. A nearby paver driveway may also influence the patio’s colors and borders.
Pavers are easier to open and rework when plans change. For irrigation, electrical, drainage, or pool deck work below the surface, they can be lifted and reinstalled. A concrete slab normally requires cutting and patching to reach those areas.
The EPA’s permeable pavement fact sheet also shows why engineered paver systems are different from simply leaving wide gaps between ordinary patio stones. The base materials and joint design matter.
Installation Time, Curing, and Screen Enclosures
A typical paver patio and stamped concrete patio can both take several days. Local weather and rain, site access, demolition, drainage work, patio size, and enclosure details can extend either schedule.
Pavers can be used once the base, bedding layer, joint sand, and compaction are complete. Weather delays, excavation, disturbed soil, incomplete base preparation, and poor compaction can affect both installation timing and long-term performance. Concrete needs curing time. It may be ready for light use after about a week, but concrete continues gaining strength for roughly 28 days.
Screen enclosure footings need special attention
I pay close attention to pavers near pool cages and screen enclosures, especially in Florida’s hurricane-prone areas. The enclosure footing and paver field are separate systems. They can settle differently after excavation, heavy rain, disturbed soil, or poor compaction.
Don’t drill into the enclosure footing, move screen posts, or alter anchors during a patio repair without qualified guidance. These connections help the enclosure handle high wind loads.
Minor paver resetting may not require a permit in many areas. Changes to grade, drainage, structural footings, electrical systems, or wind-related enclosure components may trigger different permit requirements. Fort Myers, Cape Coral, Bonita Springs, Punta Gorda, Sarasota, and nearby communities can all have different rules. Check with the local building department before the work starts.
Which Patio Surface Fits Your Property?
Choose a stamped concrete patio when lower initial cost and a continuous decorative appearance matter most, especially on a stable, well-drained site. Plan joints carefully, and accept that future repairs may remain visible.
Choose pavers if you want selective repairs, future utility access, and flexible appearance. Their interlocking design lets individual units be reset after localized settlement or drainage adjustments, making them useful around pools, lanais, and screen enclosures.
After more than 20 years working with Florida hardscapes, I have learned that the best choice depends on the property and its conditions. Neither system is automatically superior during extreme heat, heavy rain, coastal salt exposure, or hurricane-prone weather. Installation quality, drainage, edge restraint, grading, and maintenance remain decisive.
Before ordering materials, check HOA rules for approved colors, patterns, and visible changes from the street. Also confirm drainage impacts, pool-deck alterations, and permit documentation. For a patio, pool deck, driveway, or walkway, ask appropriately licensed and insured local professionals for itemized evaluations covering layout, drainage, access, and existing conditions, rather than choosing from a basic Get a Free Quote estimate.
Frequently Asked Questions
Is stamped concrete or pavers better for a Florida patio?
Neither material is automatically better for every Florida property. Stamped concrete can suit a stable, well-drained site where a continuous look and lower initial cost matter, while pavers offer easier repairs and future access.
Which patio surface costs less in Florida?
Stamped concrete often costs less at the start, although decorative patterns, colors, removal, and difficult access can raise the price. Pavers may have a wider installed price range because of base work, borders, cuts, drainage repairs, and demolition.
Are pavers safer than stamped concrete around a pool?
Both can work around a pool when they have proper texture, slope, and drainage. Pavers may provide useful texture through their faces and joints, while stamped concrete should have a textured finish and should not rely on a glossy sealer for protection.
Can pavers be repaired more easily than stamped concrete?
Yes. Individual pavers can usually be lifted, the base can be corrected, and matching units can be reset after localized settlement or utility work. Stamped concrete is a continuous slab, so cracks, movement, and color-matching issues can make repairs more visible.
Do pavers or stamped concrete handle Florida rain and soil movement better?
Both systems depend on a properly prepared base and planned drainage. Pavers generally provide more flexibility when a localized area settles, but neither surface will perform well over weak soil, poor compaction, or unresolved drainage problems.
A Patio Should Be Built for Florida
The pavers vs stamped concrete decision comes down to how much flexibility you want after installation. Stamped concrete offers a continuous look and lower upfront cost. Pavers provide easier access for localized repairs when Florida rain, soil movement, or future damage appears.
Proper grading, compaction, edge restraint, and a well-built base and proper drainage matter more than a decorative pattern alone. Get those details right, and your patio will stay attractive, safer, and easier to maintain for years.
A driveway can look beautiful all the way to the street, then fail where cars cross it every day. That street connection handles tire pressure, rain runoff, heat, and roadway movement. It can’t be treated like an ordinary patio border.
A well-built front apron gives your home a clean finished entrance and supports its broader outdoor living presentation. It also protects the base underneath and keeps water moving in the right direction. I have seen many driveways where the pavers looked fine at first, then the front row started sinking, spreading, or holding water after one wet season.
The best design begins with the street, the drainage, and the property line, not with the color of the paver.
Key Takeaways
A driveway apron handles turning tires, braking, rain runoff, heat, and roadway movement, so it needs stronger planning than a typical patio edge.
Confirm property lines, right-of-way rules, drainage paths, swales, culverts, and permit requirements before ordering materials or beginning street-side work.
Traffic-rated concrete pavers, a properly excavated and compacted base, suitable joint sand, and firm edge restraint work together to prevent shifting and settlement.
Plan the finished grade and water flow before installation, and inspect the apron regularly for loose pavers, missing joint sand, low spots, and washed-out areas.
What the street connection must handle in Florida
The paver driveway apron is the transition area between the street and your private driveway. On many Florida properties, part of that area may sit inside a public right-of-way, a swale area, or near a curb, sidewalk, culvert, or drainage inlet.
That means the apron has a harder job than the rest of the driveway. It must carry regular vehicle traffic without letting the pavers shift, while respecting the existing slope and drainage path.
Street traffic puts pressure on the front edge
Cars don’t roll straight into a driveway every time. They turn, brake, accelerate, and sometimes enter at an angle. Those forces push outward on the pavers at the front of the driveway.
A weak edge restraint can start opening up. Once joints widen, sand escapes, water gets below the pavers, and the problem keeps growing. The outer border needs firm support, not a few loose pavers sitting against asphalt.
I look closely at the existing street edge, curb condition, driveway width, and how vehicles enter. A narrow entrance with sharp turns needs more attention than a wide, straight driveway connection.
Florida rain can expose poor design fast
Southwest Florida rain doesn’t always come down slowly. A short storm can send a lot of water across a driveway, through a swale, and toward the road.
If an apron is set too low, water can collect at the garage side. If it’s raised too high or built across a drainage route, water may back up in the swale. Both situations can lead to erosion below the pavers.
The surface can be level and still be wrong if the base is washing out below it.
Check right-of-way rules before choosing materials
I never recommend ordering pavers until the homeowner confirms where private property ends and public right-of-way begins. A driveway connection may be allowed on your lot but restricted at the street. Before ordering, confirm the property line, easements, swale, culvert, sidewalk, and drainage path.
The City of Fort Myers states that residential driveway construction requires an Engineering Division permit. This jurisdiction-specific example shows that the street connection isn’t always a simple cosmetic upgrade.
Rules change by city, county, and road owner
Fort Myers, Cape Coral, Bonita Springs, Punta Gorda, Sarasota, and unincorporated Lee County can all have different requirements. Requirements can vary by city, county, state agency, roadway classification, and project location.
For projects near a state-maintained route, review the FDOT permitting process before work begins. This is a state-agency process, not a universal rule for every Florida road. If the driveway connects to a county road, the county may have its own application, drawing, inspection, or drainage requirements.
Some jurisdictions allow architectural pavers in the right-of-way under strict conditions. Others only allow them behind the property line. I always tell homeowners to get the local answer for their address, rather than rely on what worked for a neighbor.
Drainage drawings may be part of approval
A permit review may require a survey or site plan showing property lines, swales, easements, drainage direction, sidewalks, culverts, and proposed connection dimensions. Ask the reviewing authority what documentation applies before work begins.
This isn’t paperwork for paperwork’s sake. A driveway connection can block the route where water is supposed to travel. In Florida, drainage problems can lead to standing water, soft soil, mosquito concerns, or disputes with the city.
As one jurisdiction-specific example, Lee County’s driveway administrative code says pavers placed next to flexible pavement require a concrete header curb. That local rule isn’t universal, but it shows why the asphalt edge alone may not provide stable restraint.
Choose pavers made for driveway use
A driveway apron needs pavers rated for vehicle traffic. Thin decorative units that may work for patios and walkways are not the right product at a street connection.
Concrete pavers are the most common traffic-rated choice for Florida driveways because they come in many colors, shapes, and finishes. Concrete pavers are practical to repair after utility work or settlement, with design flexibility for many paver styles. Porcelain pavers may suit some driveways, but their traffic rating, installation system, base, and local approval must support vehicle loads.
A practical choice for most aprons
Modern pavers often have small nubs on their sides. These create consistent joints between units, leaving space for joint sand and helping the pieces interlock.
For a driveway, I like pavers with a shape and thickness made for traffic. Follow the manufacturer’s traffic classification and approved local design, rather than choosing only for the home’s exterior color. A wide driveway with trucks, trailers, or frequent service vehicles may need a stronger design than a two-car household driveway.
Florida sun will cause some color fade in colored pavers over time, especially with darker paver styles. That is normal weathering. I tell homeowners to choose a blend that suits nearby outdoor living spaces and the home’s broader hardscaping plan.
Brick and stone have different tradeoffs
A clay brick paver system has a classic look, holds color well, and may limit choices or cost more. It also needs the same strong base and edge support as other driveway materials.
Natural stone can look elegant, but bluestone and granite are usually more expensive and may need more cutting. With bluestone, check thickness, finish, and slip resistance for driveway use, since requirements may differ from pool decks.
Good paver durability depends on the entire system, not only the surface material. For most Southwest Florida homes, a quality concrete system gives the best balance of appearance, repair access, and cost control. The best-looking material won’t stay beautiful if the base below it is weak.
Build the base before laying a single paver
The visible paver is only the top layer. Proper paver installation begins with a prepared base, not the visible unit. Long-term strength comes from excavation, stable soil, compacted aggregate, bedding sand, joint sand, and proper edge restraint.
A front apron is not the place to save money by reducing base depth or skipping compaction. That mistake may not show right away. It usually appears after rain, traffic, and time.
Compaction happens in layers
The old surface and unstable soil should be removed to the planned depth. The required base depends on soil conditions, traffic, roadway conditions, the approved design, and local requirements.
Aggregate is installed and compacted in controlled lifts. It should not be dumped in all at once and pressed down at the end.
Bedding sand is used to set the pavers to final grade. It is not a fix for a soft or uneven base. Adding loose sand under a sinking paver may make it look better for a short time, but it does not replace compacted aggregate that has washed out.
Geotextile fabric can help separate sandy subgrade from the base on certain properties. It is useful where soil conditions call for it, but it is not a substitute for excavation, proper stone, or compaction.
Edge restraint keeps the pattern locked
Every paver field wants to move outward under vehicle traffic. A solid perimeter restraint holds the layout together, especially at the street-facing edge and both sides of the apron.
The appropriate restraint depends on soil, traffic, roadway conditions, paving material, the approved design, and local requirements. Where applicable, an approved design may call for a concrete header curb or another heavy-duty edge restraint.
I also check utility locations before digging. Call 811 before excavation. Irrigation lines, electric, cable, water, and drainage pipes can all be close to a driveway connection.
Use a pattern that can take turning tires
Paver patterns are not only about style. They affect how traffic loads move across the surface and how many cuts are needed at the edges.
For a driveway apron, I usually favor an interlocking layout over a simple straight-running pattern. Interlocking pavers suit turning tires and braking forces. Performance also depends on the product, base, edge restraint, joint condition, and installation quality.
Herringbone pattern suits many driveways
A 45-degree or 90-degree herringbone layout locks pavers together in several directions. With a proper base, edge restraint, and sound joints, a herringbone pattern can resist shifting under braking and turning.
A running bond pattern can look clean and require fewer cuts in a straight driveway. Still, its long continuous joints may not be my first choice at a busy street connection. A basket weave pattern can create a traditional appearance, though its performance depends on the paver product and installation details.
Curves, circles, and decorative borders can connect the driveway to the home’s exterior and outdoor living areas. They also increase cutting, labor, and material waste. I like using a border where it frames the driveway without making the street connection too busy.
Order enough pavers for cuts and future repairs
Measure the apron’s length and width, then multiply them for square footage. For illustration only, a 14-foot-wide apron extending 8 feet deep equals 112 square feet. That example isn’t a required apron dimension.
The cutting allowance varies with the layout, borders, curves, edge cuts, and supplier packaging. Confirm the coverage guidance with your supplier before ordering, especially for detailed designs.
Layout type
Cutting allowance to confirm
Straight running bond
Often lower, depending on edge cuts
Herringbone with straight edges
Moderate, depending on the layout and product
Curves, borders, and detailed cuts
Often higher, depending on the design
Keep a few unopened pavers for later repairs. Color batches can vary, and an exact match may be difficult years down the road.
Plan water flow before the finished grade is set
A well-planned apron should direct water away from the house without creating a dam at the curb or swale. That depends on accurate elevations and a clear drainage route.
I inspect the driveway after rain when possible. Standing water, worn soil, algae marks, exposed roots, and washed-out joints show where water already wants to go.
Don’t block a swale or culvert
Many Florida homes depend on front-yard swales to move surface water. Filling, flattening, or bridging one carelessly can stop drainage and create trouble for the whole lot.
Coordinate the apron with the existing swale, drainage route, and surrounding yard through landscape design. Landscape design can’t override a required drainage path.
The driveway may need a culvert or a permitted connection detail. It may also need to tie into an existing sidewalk or curb at a required elevation. Make these decisions before the base is installed.
A county right-of-way permit example shows how driveway work, utilities, and public property can fall under one review process. It illustrates a permitting concept and may not represent Southwest Florida requirements. Confirm local rules before street-side work begins.
Keep roof water away from the paver edge
Downspouts shouldn’t dump directly beside the apron. Fast roof runoff can carve channels into the sand and base, causing low spots near the house or driveway edge.
Extensions, gutters, drains, or a revised grading plan may be needed before the pavers are set. If water is already sitting near the driveway after storms, fix that condition first. Proper drainage also helps keep outdoor living areas usable after rain.
New pavers shouldn’t cover an old drainage problem.
Maintain the apron without damaging the joints
The street-facing apron doesn’t need complicated care, but regular paver maintenance helps protect the appearance and usability of your home’s outdoor living areas. I recommend looking at the front edge after heavy rain and a few times each year.
Watch for loose pavers, missing joint sand, widening gaps, low spots, moving borders, and water that remains after the surrounding pavement dries.
Clean carefully and replace lost joint sand
Pressure washing can remove dirt, algae, and stains, but excessive pressure can chip the paver face and blast sand out of the joints. That sand helps keep the pavers locked together.
After cleaning, replace missing joint material with the right polymeric sand when appropriate. It helps stabilize sound joints and reduce weed growth, but it can’t correct a failed base, washed-out bedding layer, or broken edge restraint.
If a section keeps sinking, I lift the affected pavers, inspect the base, correct the cause, compact the area, and reset the surface. Replacing only the top paver is often a temporary patch.
Frequently Asked Questions
What is a driveway apron?
A driveway apron is the transition area where a private driveway connects to the public street. It carries vehicle traffic while also managing the change in grade, drainage, and edge conditions near the roadway.
Do I need a permit for a paver driveway apron in Florida?
Permit requirements vary by city, county, road owner, and project location. The work may involve a public right-of-way, swale, culvert, sidewalk, or drainage route, so confirm the requirements with the local authority before construction.
Which pavers and patterns are best for a driveway apron?
Use pavers rated for vehicle traffic rather than thin decorative units intended for patios or walkways. Interlocking layouts such as 45-degree or 90-degree herringbone can suit turning and braking forces when installed over a proper base with adequate edge restraint.
How do I prevent driveway apron pavers from sinking or spreading?
The installation needs stable soil, a properly excavated and compacted aggregate base, suitable bedding sand, sound joints, and firm perimeter restraint. Correct drainage is also essential because water washing through the base can cause settlement even when the surface initially looks level.
How should I maintain a paver driveway apron?
Inspect the front edge after heavy rain and watch for loose pavers, missing joint sand, widening gaps, low spots, and standing water. Clean carefully, replace lost joint material when appropriate, and correct the base or drainage problem instead of only resetting the visible paver.
A strong street connection starts below the surface
The street connection should look welcoming, but it must work harder than the rest of the driveway. The correct permit path, drainage plan, traffic-rated pavers, compacted base, and firm edge restraint all matter.
After more than 20 years working with Florida pavers, I know the small front section near the street can decide whether a driveway stays level or starts failing early. A solid base and proper drainage are never optional details. Together, drainage, appearance, and access support outdoor living around the property.
If you are planning a driveway in Fort Myers, Cape Coral, Bonita Springs, Punta Gorda, Sarasota, or nearby areas, Get a Free Quote and I can review the street connection, drainage, layout, and paver options before the work begins.
A pool deck can look finished and beautiful, then one plastic cover catches your eye every time you walk outside. A flush paver insert can blend it into the deck while keeping the cover lift-out and serviceable. Never glue it, bury it, cover it with loose material, or permanently obstruct access.
I have seen homeowners set the cover too tightly, glue pavers where they should not be glued, or level the surface with loose sand. Any retrofit must be compatible with the existing pool system, skimmer basket, and surrounding deck. A low, loose, or raised cover can create trip and slip hazards, making pool safety a concern.
The right approach keeps the skimmer housing accessible while making it blend into the rest of your pool deck.
Key Takeaways
Use a purpose-built removable access cover with a supported paver or tile insert instead of placing pavers directly on a plastic skimmer lid.
Measure the actual clear opening, support ledge, finished deck elevation, insert thickness, tray dimensions, and required lifting clearance before ordering a system.
Set the frame and insert flush with the surrounding deck, while keeping the lid stable, level, clean, and easy to remove with the supplied tool.
Correct settling, drainage, loose bedding, and unstable support around the skimmer before installing the cover.
Never permanently obstruct the skimmer lid, and call a qualified professional when the box, base, utilities, drainage, or structural support are uncertain.
Never Pave Over the Skimmer Access
The pool skimmer needs regular access for cleaning, inspections, basket removal, and repairs. A paver installation should hide the lid, not trap it beneath a permanent surface.
A standard plastic lid isn’t structural support for a heavy paver. It can flex, crack, or settle low under repeated foot traffic. I recommend a purpose-built access cover with a removable insert system for a clean, durable finish.
Start With the Skimmer Box Size
Measure the pool skimmer box from the actual clear opening inside the deck, not from the old lid alone. Record the support ledge and finished deck elevation too, since both affect the final fit.
Measure these areas before ordering anything:
The actual clear opening length and width.
The depth from the support ledge to the finished deck elevation.
The thickness of your paver, stone, tile, or concrete insert.
The dimensions of the frame or collar.
The clearance around coping, plumbing, waterline tile, and curved deck borders.
The space required to lift the cover clear and use the supplied tool.
Check the surrounding coping, plumbing, and deck borders before finalizing the layout. Tight cuts near pool coping, waterline tile, and curved edges need more planning.
Do Not Block Pool Service
The finished cover must lift out with the supplied tool, without chipping adjacent pavers or scraping the deck. A flush finish doesn’t mean the opening is sealed or permanently trapped; it should still open in seconds.
A hidden skimmer lid is only a good installation when a pool technician can remove it and reach the basket quickly, without pulling up surrounding pavers.
If the basket is hard to reach now, fix that problem before the pavers go in. A raised edge or uneven cover can create a trip point and compromise pool safety. I do not want to see a homeowner forced to pry against a brand-new travertine deck just to clean the skimmer.
Measuring Pool Skimmer Lid Pavers for a Flush Finish
The biggest mistake is ordering a cover tray from paver dimensions alone. The required tray size, support depth, and finished elevation matter just as much. Measure the full recess, then match the insert to that inlay depth. It should sit level with the surrounding deck, never above it or in a low pocket that holds dirty water.
A quality access cover needs an adjustable tray that supports the insert at the right height. Don’t assume every kit offers the same adjustment range. Use the selected manufacturer’s current documentation, such as the HIDE skimmer cover installation instructions, before choosing a kit or starting a retrofit.
Add Up the Full Material Stack
I measure the actual tile thickness or paver thickness with a tape, even when the supplier lists a standard size. Stone products can vary. Tumbled travertine and shellstone often have more variation than manufactured pavers.
Your total stack includes:
The measured thickness of the paver or tile.
The adhesive or mortar thickness below the insert.
The metal tray base.
The support hardware below the tray, including a height adjuster when specified.
The available adjustment range in the tray and supports.
Leave enough adjustment range to set the insert level with the finished deck after the whole deck is laid. Excessive mortar can’t substitute for an accurately measured inlay depth. Too much material can crack, hold moisture, and make the cover hard to remove.
Match the Cover to the Surface
A stainless steel skimmer cover works with many finishes, but the tray must match the insert material and depth. Stone pavers, a tile insert, timber decking, artificial turf, porcelain tile, and natural stone can work when the chosen tray, adhesive, weight limit, and existing pool system support them.
For a cohesive pool deck design, I prefer an insert cut from the same material and pattern used around it. Match the paver direction and joint layout to the surrounding field. If the field pattern runs straight across the deck, the insert should continue that line, and the cover can disappear into the design when the joints line up well. Confirm unusual materials with the manufacturer before cutting.
Choose a Cover That Can Handle Pool Conditions
A cheap plastic lid may work as a temporary replacement. A stainless steel skimmer cover is a load-supporting insert system, not simply a decorative replacement.
Many premium systems use 316L marine-grade stainless steel. It helps resist humidity, salt air, and chlorinated water. The complete system should also handle routine wet-foot traffic around Southwest Florida pools. Still, confirm the exact model suits your pool and deck conditions.
Why Stainless Steel Frames Matter
The metal tray supports the insert. The frame protects the surrounding paver edge, where chipping is most likely.
A well-made access cover includes adjustable supports and a removal tool, so you can lift the lid without wedging a screwdriver into the stone. The full assembly normally includes a tray, outer frame, and an edge protector that shields the paver or stone edge from chipping. Check that it fits the existing skimmer box, is rated for pedestrian pool-deck use, and supports the insert’s stated weight rating.
Confirm that the exact model and finish carry a written 10 year warranty before buying.
You can review the typical cover parts and purpose of the HIDE safety key for safe removal before deciding which system fits your deck.
Plastic Lids Still Have a Place
Not every pool needs a removable concealed system like hidden skimmer covers. If the lid is outside the main deck area, in a utility corner, or your budget is tight, a good replacement plastic lid can be practical. It shouldn’t be sealed, obstructed, or used as a structural base for pavers.
But when you are resurfacing a pool deck, installing travertine, or repairing a visible section of pavers, a supported insert looks much more complete. It also contributes to pool safety by creating a stable, walkable surface. I see it as a finish detail, much like matching a new paver repair to the existing color and texture.
Prepare the Deck Base Before Setting the Frame
A skimmer cover is only as stable as the surface around it. Loose pavers, washed-out bedding sand, poor drainage, or a shifting concrete collar can throw off the finished height.
Before I set the access cover frame, I inspect the whole section around the skimmer opening. The frame needs a firm, even perimeter, and nearby pavers should feel solid underfoot. Look for rocking, open joints, soft spots, or puddles after rain.
Correct Water Problems First
Water is a major reason pavers settle around pools. Check runoff, low spots, washed-out bedding, soil movement, and puddling where the deck meets the pool coping. Where surface water keeps pooling, pool deck drainage channels can carry it away before it reaches the base. A drainage cover isn’t a substitute for the skimmer’s removable service lid, and it shouldn’t be used to block or redirect the opening.
Don’t rely on loose sand under one low paver to correct the height. Reset the surrounding pavers, correct the base, and restore joint sand before fitting the lid. The frame needs stable, even support on all sides.
If you have travertine or another natural stone, use a pH-neutral cleaner. Vinegar and acidic products can etch calcium-based stone. Follow the selected tray and adhesive manufacturer’s installation instructions. The Skimmer Lids installation guide explains how to bond an inlay to a stainless steel tray.
Dry-Fit Every Piece
Place the frame, tray, paver insert, supports, and any adjustable collar in position before applying adhesive. Check the joint lines from several angles, then stand over the lid and look across the deck surface.
Confirm the lid lifts freely, sits level, and has a small, even reveal around the frame. It shouldn’t rattle or bind, and loose sand shouldn’t be used to correct its height.
Install Pavers Around the Pool Skimmer Lid
Once the base is stable and the cover depth is set, installation becomes more straightforward. Take your time around this small area. One rushed cut can make a high-quality pool deck look unfinished.
Treat the complete frame-and-tray assembly as a removable access cover, not a permanent deck fitting. It must lift out cleanly for future inspection and maintenance.
Set the Outer Frame Level
Install the edge frame for the stainless steel skimmer cover level with the completed deck for a flush finish. It must sit square over the opening and remain compatible with the existing skimmer system.
The frame should stay stable when pressure is applied around its perimeter. A slightly irregular opening may need an adjustable frame, collar, or support hardware approved for the system.
Don’t use surrounding pavers to force the frame into position. Correct a seriously out-of-square or unstable opening before installation.
A frame that is twisted or low will keep causing trouble. You may see chipped corners, a wobbly lid, or joints that open after a season of traffic.
Cut and Bond the Insert
Measure and mark the actual material for the tile insert before cutting. Preserve the surrounding pattern and joint direction, then dry-fit the piece in the tray.
Leave enough clearance for the insert and tray to lift out without catching. Timber decking may require a different support or tray detail, so don’t substitute it without checking the system’s rating.
Concrete covers weigh more than ordinary paver inserts. Confirm that the frame, tray, and box can support the added load.
Use the adhesive approved for the material and cover system. The tray also acts as an edge protector for the cut edges.
Keep adhesive out of the lifting path, and never bond the assembly to surrounding pavers. Let it cure fully before opening and closing the lid repeatedly.
Before installation, check the kit documentation for its 10 year warranty. Eligibility may depend on the approved adhesive, insert material, installation method, and local conditions.
For a visual walk-through, compare each part with your kit using the manufacturer’s access-cover installation directions. Then follow the selected kit’s installation instructions.
Concrete Decks and Older Pool Retrofits
A new pool build is the easiest time to plan a hidden skimmer cover. The pool contractor, deck crew, and paver installer can set the box height before the final surface goes down.
Still, existing pools can be retrofitted. I have found that older skimmer boxes may not be level, square, or adequately supported.
Before changing the deck, confirm local pool and building requirements. The work must preserve removable service access and proper drainage, not merely create a level-looking surface.
When a Conversion Pack Is Specified
Wet-pour concrete decks need a different recess and support detail than paver decks, so the insert can sit flush.
Use a concrete conversion pack only when the selected cover system specifies it. The measured inlay depth must meet the manufacturer’s requirements, often at 1.6 inches or greater.
Don’t pour concrete directly into a tray unless the system is expressly engineered for that application. Concrete covers can be heavy. The tray, frame, support point, and pool skimmer box must all be rated for that load.
Watch for Non-Standard Skimmer Boxes
Older pools may have cracked plastic collars, irregular openings, corrosion, nearby plumbing, or inadequate support. Stop and inspect the pool skimmer box before cutting deeper into the deck.
I also recommend calling 811 before digging near any pool equipment area. Calling 811 locates utilities, but it doesn’t shut down the pool system. Irrigation, electrical lines, and plumbing can be closer than expected. Have a professional inspect any uncertain electrical, plumbing, structural, or drainage conditions. A clean lid isn’t worth damaging a pipe or wire.
Opening, Cleaning, and Maintaining the Cover
Hidden skimmer covers blend into the deck, but they still need routine attention. Keep the safety key where the pool owner and service technician can find it, and show family members or your pool service company how the lid opens.
Insert the correct key into the lifting point and raise the removable access cover evenly. Don’t pry with a screwdriver, chisel, or knife. These tools can scratch the frame or break the stone insert.
Never permanently obstruct the lid with grout, sealant, adhesive, furniture, a planter, or another object. For pool safety, keep the cover stable, level, and free of debris in this wet-foot area.
Keep the Frame and Joints Clean
Even when you hide skimmer covers within the deck, inspect them routinely for movement or damage. Check the edge protector and frame for loosened edges, chipped insert corners, corrosion, or movement.
Sweep sand, leaves, and debris away from the narrow gap around the cover. If grit packs into the reveal, it can affect drainage around the frame and prevent the lid from lifting evenly.
First sweep the area clean, then use moderate pressure away from the joints if pressure washing is needed. Keep the wand moving, and never spray directly into the skimmer opening. Don’t use a cleaner that could damage the insert, frame, or surrounding pool finish.
If joint sand is missing after cleaning, replace it with a compatible product. Joint sand helps interlocking pavers stay locked together and keeps debris out of the base.
When Professional Installation Is the Better Call
A small lid replacement can be manageable DIY work when the deck is stable, the opening is square, and measurements are accurate. Before starting, check the frame or collar support, drainage, nearby utilities, insert weight, and compatibility with the existing pool system.
I recommend professional help when the skimmer box is cracked or the surrounding base has settled. It’s also wise when water collects on the deck, the opening needs structural correction, or local pool and building requirements apply. Pool equipment access needs to remain safe, easy, and reliable.
A qualified pool-deck or pool-service professional can inspect the pavers, base, joints, drainage, opening measurements, and frame support. They can also confirm the insert weight and existing system compatibility before recommending a repair. If you’re unsure about the work, consult a qualified local professional for a site assessment and estimate.
Frequently Asked Questions
Can I place pavers directly over a plastic pool skimmer lid?
No. A standard plastic lid is not designed to support a heavy paver and may flex, crack, or settle. Use a purpose-built access cover with a removable tray and supported insert instead.
How do I measure for pool skimmer lid pavers?
Measure the actual clear opening inside the deck, the support ledge, and the finished deck elevation. Also record the insert thickness, tray or frame dimensions, surrounding clearances, and the space needed to lift the cover out.
Should the skimmer cover be glued in place?
The paver or tile insert may be bonded to the approved tray with the manufacturer’s recommended adhesive. Do not glue the complete access cover to the surrounding deck or permanently obstruct the skimmer opening, because the lid must remain removable for cleaning and service.
How can I keep the skimmer lid flush with the pool deck?
Use a tray, adjustable supports, or collar that matches the measured inlay depth and the full material stack. Dry-fit the frame and insert first, then adjust the assembly so it sits level with the surrounding deck without relying on loose sand or excessive mortar.
When should I hire a professional to install a concealed skimmer cover?
Professional help is recommended when the skimmer box is cracked, the opening is unstable or out of square, the deck has drainage or settlement problems, or utilities and structural conditions are uncertain. A qualified pool-deck or pool-service professional can also confirm system compatibility, insert weight, and local requirements.
Final Thoughts
A good skimmer cover should blend into the deck while preserving safe lift-out access. The strongest result comes from accurate measuring, verified inlay depth, stable support, proper drainage, and careful cutting. Use an adjustable frame or collar where needed, and confirm compatibility with the existing pool system.
Pool skimmer lid pavers should conceal the cover without compromising serviceability, pool safety, or local pool and building requirements.
A driveway can feel too small overnight. A new driver, a work truck, visitors, or a boat trailer can turn one tight parking spot into a daily headache.
A paver driveway extension adds usable parking without pouring a solid slab across the whole yard. Built with the right foundation, drainage, edges, and pavers, it can help protect the home from settlement and drainage problems.
I have seen good-looking extensions fail because the work below the pavers was rushed. Start with the ground, not the color sample.
Key Takeaways
Plan the paver driveway extension around vehicle movement, finished heights, drainage, property lines, and local requirements before digging.
Build the foundation carefully by removing soft soil, using vehicle-rated pavers, installing the correct aggregate in thin lifts, and compacting each layer thoroughly.
Provide a deliberate transition to the existing driveway, durable edge restraints, and a suitable drainage route so water and lateral movement don’t damage the extension.
Finish with properly filled joints, controlled cleaning, and regular inspections after storms to catch settling, erosion, or loose edges early.
Plan the paver driveway extension before digging
A paver extension should solve a parking problem without creating a water problem. Start with these design considerations before materials arrive. Decide how cars will enter, turn, and park on the new area.
Mark the footprint and finished height
Draw the layout before digging. Include the existing driveway, proposed edge, finished height, nearby structures, and intended drainage direction.
Use marking paint, a garden hose, or stakes and string to lay out the extension. Stand at the street and view it from different angles. A simple rectangle often works, but a soft curve or border can help the parking area blend with the existing driveway.
Leave room for doors to open, map turning paths, and provide enough turnaround space for vehicles. Keep the edge away from grass and landscape beds where possible. If the extension meets a garage approach, sidewalk, screen enclosure, or pool deck, the finished height needs extra attention.
I also check the existing driveway for low spots, cracks, and settled areas. New pavers beside a sinking slab won’t stop old movement. The surfaces need a deliberate, clean transition, but they don’t have to be rigidly locked together.
Give rainwater a clear place to go
In Southwest Florida, heavy rain exposes every shortcut. Plan the slope so water runoff moves away from the house, foundation, garage, and other structures. Direct it toward a suitable swale, planted area, or approved drainage route, away from the property line and neighboring lots.
Where soil, groundwater, local rules, and site design allow, permeable pavers may help manage runoff. The EPA explains that permeable pavement can reduce runoff by moving water into the base below. They still need a properly graded base and an approved drainage route.
Water sitting on top of pavers is not always a paver problem. It can be a slope, base, edge, or drainage problem underneath.
Check permits, HOA rules, and underground utilities
Paperwork isn’t exciting, but fixing an unapproved driveway after the work is complete is worse. Local requirements can change by city, county, lot type, drainage district, and whether the work reaches the right-of-way.
Confirm local driveway requirements first
Call your local building or zoning department before you order pavers. Ask whether the widening affects the right-of-way, setbacks, stormwater management, driveway width, or impervious-surface limits. Also ask whether a permit, site plan, stormwater review, or right-of-way approval is required before ordering materials. If you have an HOA, get its approval in writing before work starts.
Terminology varies, so ask how the municipality’s current zoning by laws and building codes govern grades, drainage, materials, and construction details.
For example, Lee County states that a residential driveway permit application must be submitted through its Development Services Division. Cape Coral, Fort Myers, Bonita Springs, Punta Gorda, and Sarasota can have different rules, so don’t assume a neighbor’s project followed the same requirements. The linked example isn’t a substitute for confirming current requirements with the relevant city or county office.
A site sketch and any required drainage plans should show property lines, the existing driveway, the new paver area, and where water will go. That simple drawing can prevent a lot of back-and-forth later.
When grading, drainage, or right-of-way issues are complicated, a local unilock authorized contractor can review the proposed layout. You still need confirmation from the permitting authority.
Call 811 before excavation
Never assume you know where utility lines run. Irrigation lines, electrical lines, cable, gas, and water lines may be much closer to the driveway than expected.
Use the free 811 before-you-dig service before excavation. Allow enough time for markings, and keep those markings visible during the job. Hand-dig carefully near marked areas.
I don’t treat this as optional. A damaged utility line can turn a simple parking extension into an expensive emergency.
Build a sub-base that can carry vehicles
The pavers are the finished surface, but the compacted sub-base carries repeated vehicle loads. If the soil is soft or the stone base is thin, pavers can sink, spread, or become uneven.
Excavate to the correct depth
For a typical driveway extension, calculate the excavation from the planned finished grade and existing driveway. Allow room for paver thickness, about 1 inch of bedding sand, and a compacted crushed-stone base. Many residential builds need roughly 6 to 8 inches below the planned finished surface. Weak soil, poor drainage, heavy vehicles, or a required finished elevation may call for more.
The goal isn’t one magic depth. Set the final depth from the finished grade and existing driveway, not a universal rule.
Remove roots, loose organic soil, and soft spots first. Shape the native soil to the intended slope, then compact it before base stone goes down. Install aggregate in thin lifts, compacting each one thoroughly. If the ground feels spongy under equipment, rework that area now. Don’t bury it under stone and hope for the best.
Choose vehicle-rated pavers and base material
Use driveway pavers rated for cars and light trucks, usually at least 2 inches thick. Patio pavers may look similar, but a parking surface must handle vehicular weight, braking, and turning forces. Two inches is a common minimum, but site conditions and manufacturer guidance control the final selection.
The chosen crushed aggregate should meet the applicable installer, engineer, or local specification. A common build includes:
Compacted native soil, shaped for proper slope.
Crushed stone or crusher run installed in thin lifts and compacted well.
A thin, even bedding layer of concrete sand, not a thick layer used to hide an uneven base.
Interlocking driveway pavers, edge restraint, and joint sand.
Stone dust shouldn’t automatically replace the specified compacted aggregate or bedding sand. Material terminology varies locally, so confirm the appropriate gradation and drainage behavior with the installer.
For overflow parking, permeable plastic grids with grass can work in the right location. They need a properly prepared aggregate base and regular care. I would not use a grass grid as a substitute for a solid, vehicle-rated paver extension where cars park every day or turn their wheels often.
Install the pavers in the right order
A clean paver pattern is satisfying to look at, but installation order matters more than almost anything. The aggregate base carries vehicle loads, while bedding sand supports and levels the pavers.
Compact the base in thin lifts
Place the aggregate base in manageable lifts, then compact each layer with a plate compactor. Adding all the base at once and compacting only the top leaves weak material underneath.
Check slope often with a string line or laser level. Bedding sand should follow the established grade, not create it. Never dump extra sand over an uneven base. Stone dust also shouldn’t be used as a thick corrective layer when concrete sand is specified. It can make grading and drainage less predictable.
A strong driveway extension feels solid from the first day. It shouldn’t rock, bounce, or develop a soft tire track after the first few storms.
Screed the sand and set the field pavers
Spread concrete sand in a consistent layer, usually about 1 inch before final compaction. Screed it smooth using rails and a straight board. Once it’s level, don’t walk all over it.
Start at a straight, stable edge and work outward. Keep joint spacing consistent and check the pattern as you go. A herringbone layout is a strong choice for driveway pavers because the interlock handles wheel movement well.
Cut edge pieces with the correct saw and safety gear. Small slivers at the outside edge tend to loosen, so adjust the layout or widen the border when possible. Use a wet saw with masonry blades, eye protection, hearing protection, and gloves. Work from stable footing and handle the saw carefully.
Install a durable edge restraint against every exposed perimeter and at transitions before final compaction. Anchor it according to the product instructions, and don’t rely on the pavers alone to contain lateral movement.
Match the old driveway without forcing a perfect match
New pavers beside an existing concrete or asphalt driveway won’t always match perfectly. Sun, tire marks, sealer, and years of weather change color, and that’s normal.
Use borders and transitions to make it look intentional
A contrasting soldier-course border can separate new pavers from the existing surface cleanly. A complementary blend or clear transition makes the change look planned instead of patched together.
I also look at the home’s roof color, exterior paint, landscape stone, walkway pavers, and garage elevation before selecting a blend. A small sample can look different in full Florida sun. Put samples outside and view them morning, afternoon, and after rain.
Where new pavers meet an existing slab, establish the finished heights carefully. Provide a clean separation or movement joint, avoid a lip that catches tires, and keep debris from collecting in the gap. Concrete and pavers move differently, so don’t force them into a rigid connection that can crack.
Compare costs the honest way
Pavers can cost more upfront than a basic concrete extension, especially when you choose a detailed border or premium finish. Compare the complete installation, not just the paver price. A paver system also has practical repair value, since individual pavers can be lifted, the base repaired, and the same pavers reset if water or soil movement causes settling.
When comparing estimates, make sure each quote includes excavation, hauling, base depth, compaction, drainage work, cuts, edge restraint, joint sand, and cleanup. A low number that skips base preparation isn’t a bargain.
For a project in Fort Myers, Cape Coral, Bonita Springs, Punta Gorda, Sarasota, or nearby areas, you can Get a Free Quote. I can look at the existing driveway, grade, drainage, and layout, or you can consult a Unilock authorized contractor for a site-specific assessment before committing.
Finish joints and protect the new surface
The final details lock the system together. Loose edges and empty joints can allow movement, even when the base is good.
Fill the joints with polymeric sand
Wait until the pavers are fully compacted before filling the joints. Sweep polymeric sand across the surface until every joint is full. Remove excess material according to the manufacturer’s directions, then apply water carefully so the binder activates without washing sand away.
Polymeric sand supports interlock, but it can’t correct a weak base, failed edge restraint, poor slope, or ongoing drainage problem. Ants, concentrated water flow, and aggressive cleaning can still damage joints over time.
Inspect the joints after major storms, and replenish low areas before pavers start shifting. Don’t patch eroded joints with loose stone dust or random fill material. Clean the joints first, then replenish them with the specified joint material.
Remove leaves, mulch, and soil before weeds establish. Debris holds moisture and creates a place for weeds to grow.
Clean with care, not maximum pressure
Routine maintenance is especially important under trees or in shaded areas where algae grows. Mild soap, water, and a brush handle many routine cleaning jobs.
Pressure washing can remove heavy dirt, but use controlled pressure to protect pavers and nearby landscaping. Keep the stream out of the joints, and replace lost joint material promptly.
Don’t use cleaning to cover up drainage or settling. If pavers become uneven, soft, or loose, check the base and water flow before sealing or merely adding sand.
Frequently Asked Questions
How deep should a paver driveway extension be excavated?
Many residential driveway extensions need roughly 6 to 8 inches below the planned finished surface, including the pavers, bedding sand, and compacted base. Weak soil, poor drainage, heavy vehicles, or elevation requirements may call for more, so set the depth from the actual site conditions.
Can pavers be installed next to an existing concrete driveway?
Yes, but the finished heights and transition need to be planned carefully. Provide a clean separation or movement joint, avoid a tire-catching lip, and don’t force the concrete and pavers into a rigid connection because they move differently.
Do I need a permit for a paver driveway extension?
Possibly. Requirements can vary by city, county, right-of-way conditions, setbacks, drainage rules, impervious-surface limits, and HOA regulations, so confirm current requirements with the relevant local offices before ordering materials.
Are all pavers suitable for a driveway?
No. Choose pavers rated for vehicles, usually at least 2 inches thick, rather than patio pavers that are intended only for foot traffic. The correct base and compaction are just as important as the paver itself.
How should a new paver driveway extension be maintained?
Inspect the surface and joints after major storms, remove leaves and soil, and replenish low areas with the specified joint material. Use mild soap or controlled pressure when cleaning, and investigate settling or standing water instead of trying to hide the problem with extra sand or sealer.
A Driveway Extension Should Feel Like It Belongs
A well-built paver driveway extension adds parking space, curb appeal, and a durable surface that fits the home. The pavers matter, but long-term performance comes from excavation, compaction, drainage, and strong edge support.
I always recommend confirming permits and local requirements, calling 811, and establishing the finished grade before work begins. If soil, drainage, utility, or transition conditions are uncertain, consult a qualified local professional. A careful plan helps the extension stay stable, look integrated, and provide useful parking for years.