


Paver Patio Border: When a Soldier Course Makes Sense
A soldier course makes sense when you want a clean frame around your patio, especially beside a patterned field. But the visible border still needs proper edge support, because the visible row alone won’t keep the installation from spreading.
I recommend choosing the border layout and its restraint together. That gives you a finished appearance and dependable support, without paying for decorative work that starts moving after heavy rain.
Start with the difference between the border you see and the support underneath.
What Does a Soldier Course Do?
The visible course frames the patio
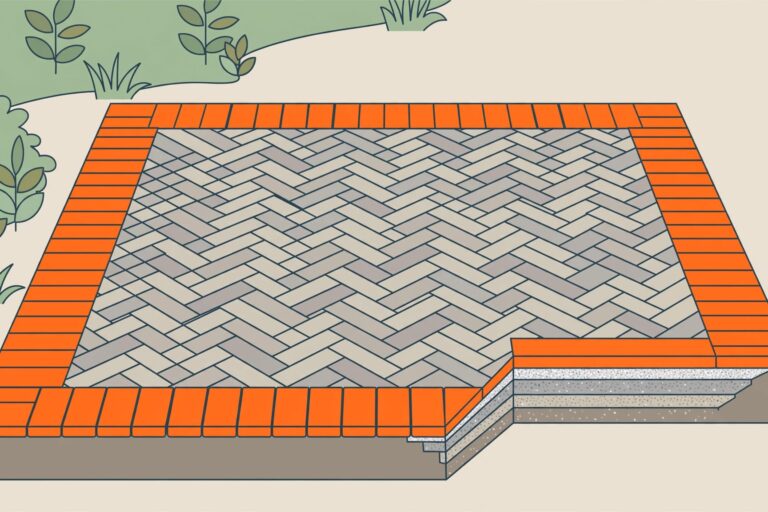
A soldier course uses rectangular pavers laid flat, with their long dimension pointing across the border, perpendicular to the patio edge. Their short ends face outward.
This creates a defined band around the field pavers. You can match the patio color for a quieter finish or use a contrasting color to make the outline stronger.
It also gives cut field pavers a consistent stopping point. That helps when a herringbone or diagonal pattern meets the perimeter.
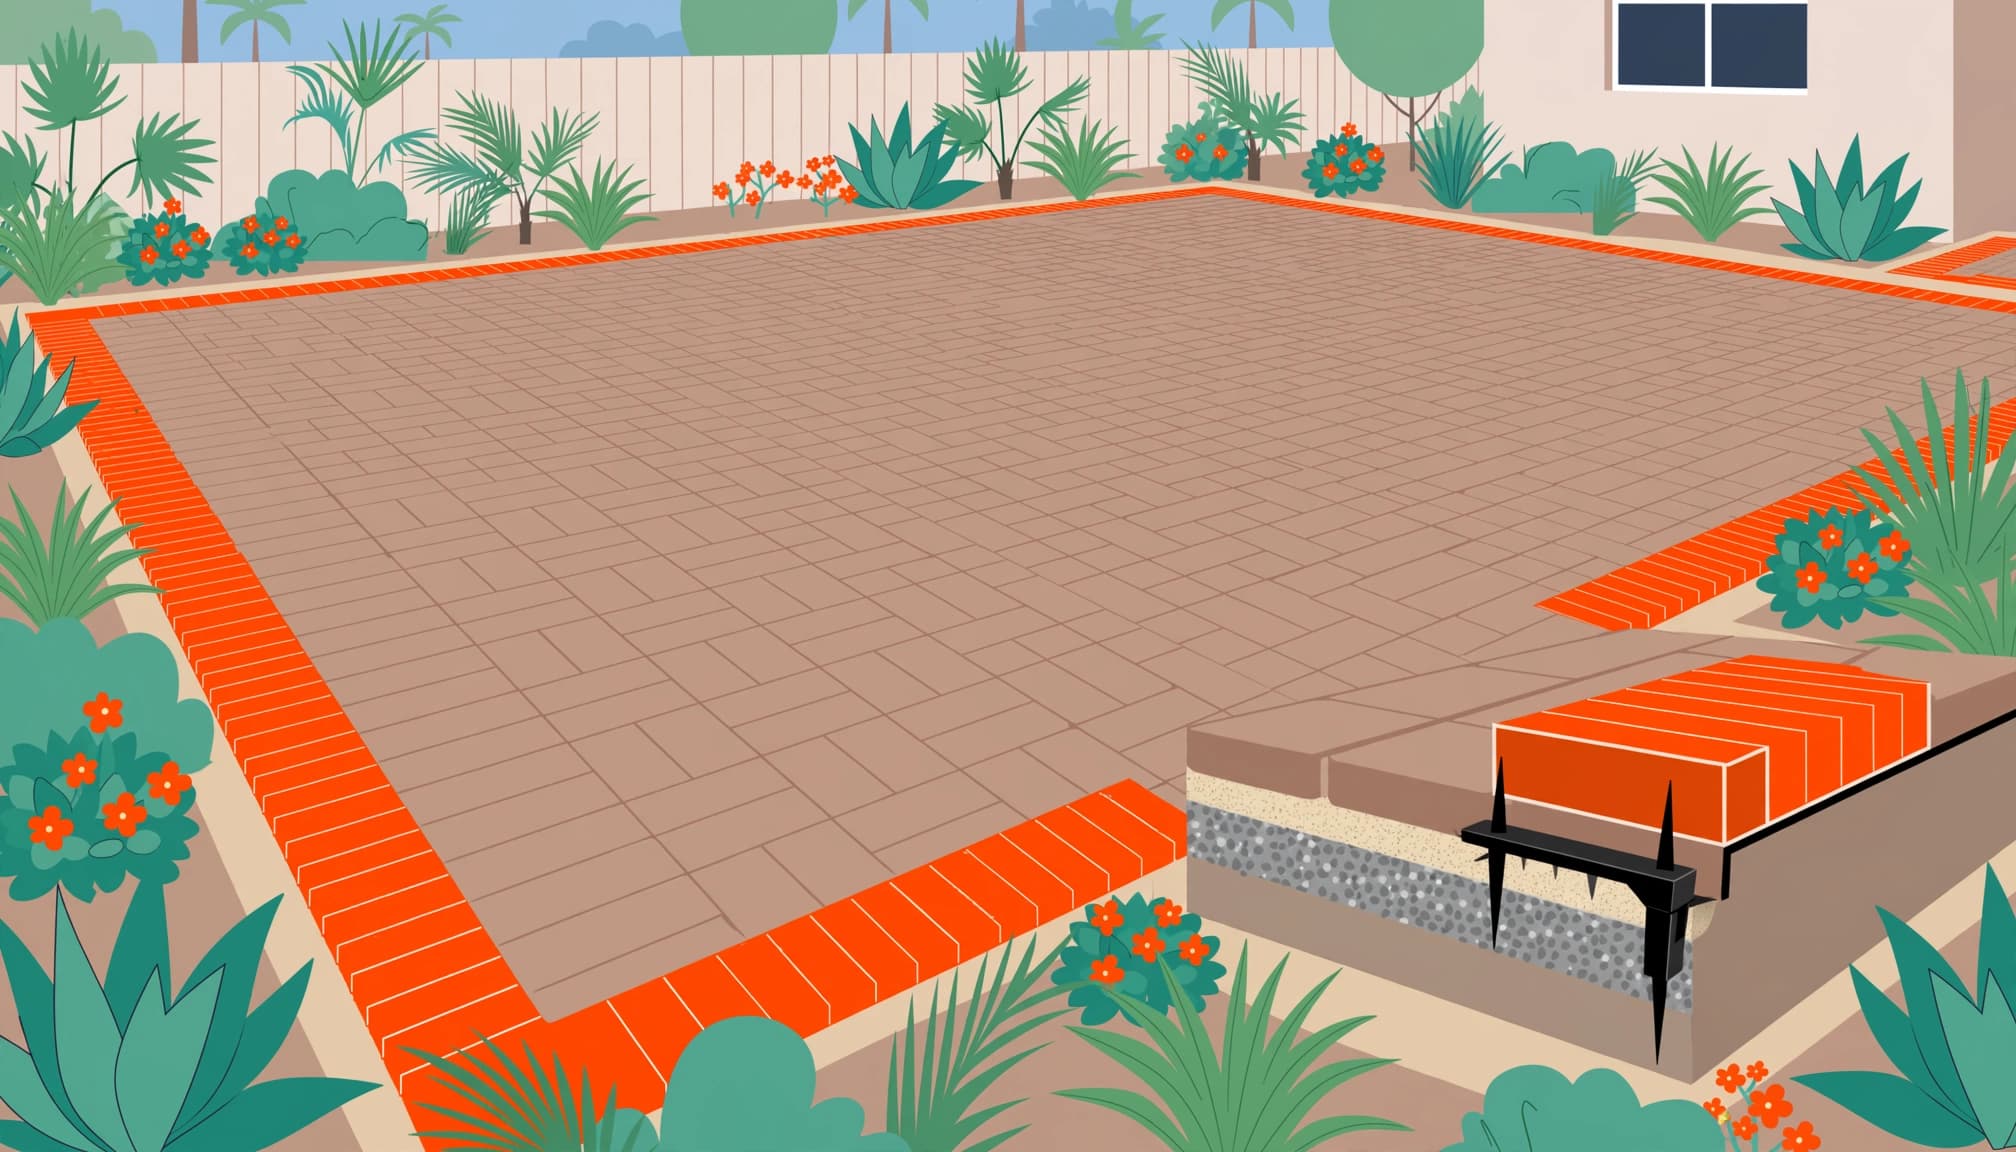
Alt text: Paver patio border with a soldier course around patterned field pavers.
The restraint holds the outside row
Paver edging is the structural support that secures the outside paver course. It may be plastic, metal, concrete, or an existing permanent edge included in the design.
CMHA’s interlocking pavement application guide explains how joint sand helps transfer loads between pavers. A secure perimeter helps maintain that interlock.
A soldier course installed over weak support can move outward as one complete row. Attractive border pavers don’t replace a properly anchored restraint.
When a Soldier Course Makes Sense
Use it to finish a patterned field
I recommend a soldier course when the field pattern creates many exposed cuts or patio edging needs a clear transition beside grass or a landscape bed.
A single course usually provides enough definition for a smaller patio. Adding another band takes more space and material, so the extra width should have a clear purpose.
Plan the border before laying the field. Our paver layout and border planning guidance covers how the pattern, outside dimensions, and perimeter cuts work together.
Avoid narrow sliver cuts. Small pieces are harder to contain and more likely to loosen.
Keep the layout simpler where needed
A soldier course isn’t necessary on every patio. A straight field ending neatly against sound, properly designed concrete edging may already have a finished appearance.
A soldier course creates a strong perpendicular frame and gives pattern cuts a neat stopping point. A sailor course runs lengthwise along the edge for a more linear look. Tight curves need more attention: rectangular units can create wide, wedge-shaped joints unless the layout uses suitable cuts or shaped pavers.
I wouldn’t choose a wider decorative border to hide a drainage problem or an uneven patio outline. Correct the layout and support first, then choose the finish.
Choose a Paver Patio Border Restraint
Choose paver edging to match the base, patio shape, and expected load.
| Restraint | Good fit | Main requirement |
|---|---|---|
| Paver-rated plastic edging | Patios and curved walkways | Long spikes into a compacted gravel base |
| Aluminum or steel | Crisp lines and smooth, tight radii | Secure stakes and corrosion resistance |
| Cementitious toe or concrete curb | High-traffic edges and driveways | Load-appropriate dimensions and firm support |
Plastic edging can be practical for a residential patio. Master Mark describes its HDPE Dig-Free edging as resistant to fading, cracking, chipping, and weathering. Its listing recommends anchoring about every 2 feet.
The Master Mark landscape-edging catalog gives different spacing for landscape edging applications: 4 feet on straight runs and 2 feet on curves. These aren’t universal paver-restraint specifications.
Spikes should be closer together around curves, corners, transitions, and higher-load areas.
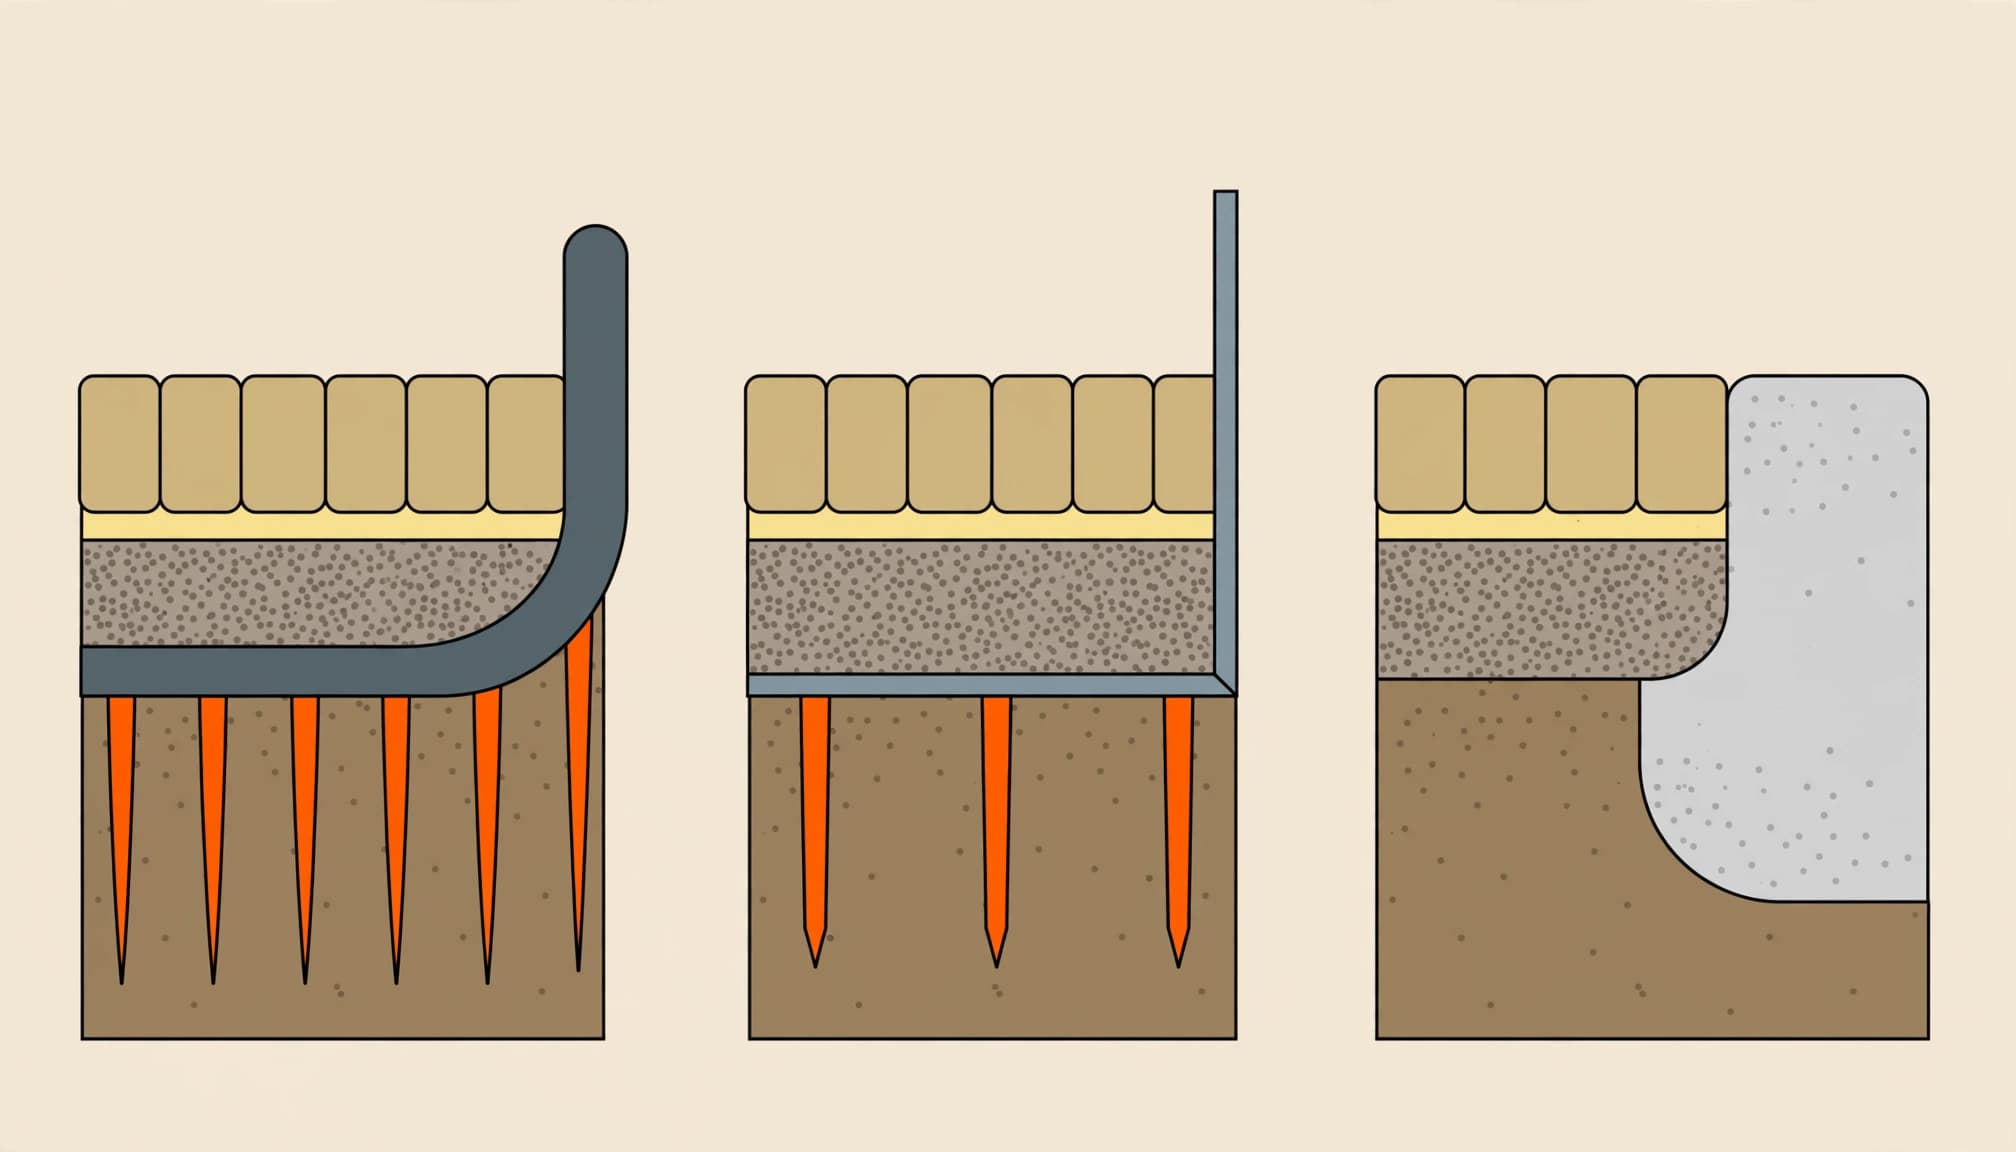
Aluminum or steel needs suitable corrosion resistance, particularly near coastal exposure. Where snow-removal equipment crosses metal edging, keep it slightly below finished grade.
Concrete edging provides strong containment for vehicle loads. Cementitious edging, such as a toe or curb, can support outside courses, but neither should be an unsupported smear of material. Curbs need compacted-base support, load-appropriate sizing, and proper curing before traffic. A decorative concrete edger isn’t automatically a load-rated restraint. ACI’s cold-weather concreting guidance addresses protection during freezing conditions.
Decorative landscape edging isn’t automatically a structural paver restraint. Our paver edge restraint guide explains the difference.
When Does the Edge Need Stronger Support?
Dedicated restraint is generally needed where pavers carry vehicles, experience freeze-thaw cycles, sit on expansive soil, or follow curves and elevation changes. An existing permanent edge can provide restraint only when it’s sound, properly supported, and positioned to contain the pavers.
A paver driveway puts greater outward pressure on the perimeter than a patio or walkway. Braking and turning tires push against the pavers, especially near an apron or a tight turn. A loose curb, crumbling asphalt edge, or gap beside concrete leaves that pressure unsupported.
A raised patio also needs more than a decorative outside row. An edge restraint contains pavers, while a retaining structure supports changes in ground elevation. Those are different jobs.
For Southwest Florida patios, I put drainage high on the list. Heavy rain, sandy subgrade, saturated soil, and poor grading are more common concerns here than repeated freezing. Water can remove support underneath an edge that still looks straight.
Permeable pavers need their own compatible restraint and open-graded stone details. Porcelain pavers also need compatible restraint and base details, so don’t assume standard sand-set interlocking-paver requirements apply. Follow the paver system’s specifications.
Install the Border on Firm Support
Build the base beyond the outside row
The restraint must bear on a compacted base of aggregate, never on topsoil, loose soil, or bedding sand. Extend the base beyond the paver field far enough to support the restraint and its anchors.
Install aggregate in controlled lifts and compact each lift. Dumping the full depth at once and compacting only the surface leaves room for settlement.
Bedding sand sets the pavers to their final grade. It can’t replace missing aggregate or correct a soft base. Geotextile can separate problem soil from the base where needed, but it doesn’t replace excavation or compaction.
CMHA’s pavement construction bulletin provides the broader installation guidance behind these layers.
Follow a practical installation sequence
I recommend keeping this order clear before work begins:
- Establish finished elevations and drainage, then excavate and correct unstable ground.
- Place and compact the aggregate in lifts, including the support beyond the border.
- Lay out the field and border so full units and substantial cuts meet the perimeter.
- During edging installation, fit the restraint tightly against the outside course and drive its anchors into firm base material.
- Complete compaction and joint filling using materials and equipment suited to the paver system.
The restraint needs continuous contact with the outside course. Gaps allow movement before the support starts doing its job.
Keep the finished restraint low enough to avoid a trip point, while maintaining the required contact against the pavers.
Catch Edge Failure Before It Spreads
Watch the curves and outside joints
A border that waves or bulges on a curve deserves attention. So do edge pavers that rock, tip outward, or feel loose underfoot.
Joint sand disappearing faster along the perimeter is another warning. Compare the outside joints with joints nearer the center. A repeated difference can point toward moving pavers, concentrated runoff, or missing support.
Surface discoloration is a maintenance concern. Rocking units and widening gaps require an inspection below the surface.
Understand how movement travels inward
Edge failure usually starts when the perimeter loses confinement. The outside pavers spread, joints widen, and water gains easier access to the bedding and base.
As support washes out, the border deforms. Nearby field pavers then lose their own confinement, so movement can spread inward.
A neat-looking edge doesn’t rule out hidden washout. I recommend looking at where stormwater enters and leaves the patio, including downspouts, irrigation, and low areas beside the border.
Our guidance on fixing paver border separation covers why pushing the outside row back into place may only provide a temporary improvement.
Repair a Moving or Rough Patio Edge
A moving border needs the cause repaired before the finish is restored. Lift the affected pavers and expose the restraint, bedding, and supporting aggregate.
Replace washed-out material, compact the rebuilt base in lifts, and correct the water path. Then reset the pavers and install or repair the restraint. Refill the joints with material compatible with the pavement.
Adding loose sand under a sinking unit may improve its height briefly. Polymeric sand and sealer won’t rebuild failed support.
For an edge that’s structurally sound but looks unfinished, landscape edging can define the adjacent planting area without supporting the border. Topsoil can cover an exposed rough concrete toe, with the ground sloped away from the patio and finished with sod or planting.
Keep soil below the paver surface and preserve drainage. Landscape edging or planting won’t stabilize a moving border, so don’t bury one and expect the planting bed to hold it together.
I recommend professional repair when settlement keeps returning, several rows have moved, or the patio meets a raised edge or structure.
Key Takeaways for a Lasting Border
- Choose a soldier course for a defined finish and a clean stopping point for the field pattern.
- Support the border with a restraint suited to the pavers, base, shape, and loads.
- Keep anchors in compacted aggregate and repair drainage or washout before resetting loose units.
Quality work below the surface protects the appearance you paid for above it.
Common Questions About Patio Borders
Can pavers alone hold the patio edge?
Loose border pavers generally can’t provide dependable restraint for an interlocking patio. They need secure outside support. A properly supported permanent border can be part of the design, but simply laying another row doesn’t create that support.
Does every patio need a soldier course?
No. The soldier course is a layout choice. The patio still needs dependable perimeter restraint, whether the visible finish uses a soldier course, another border pattern, or neatly cut field pavers.
A Finished Border Starts With Reliable Support
A soldier course gives your patio a clean outline, but lasting support comes from the base, drainage, and restraint working together.
I recommend settling those details before choosing the border color. The finished patio should look good and stay secure.
For help with a new border or a moving patio edge, Get a Free Quote for a consultation and project estimate.