



Why Pavers Sink Around Roof Downspouts
A downspout can dump a lot more water than most homeowners realize. When that runoff hits the same patch of your patio every storm, the stones start losing support, and pavers sinking becomes a real problem. Beyond the aesthetic issue of sinking pavers, these dips can collect water and create a genuine safety hazard for anyone walking nearby.
I see this all the time after heavy rain. The pavers usually do not fail on their own; the water does the damage first, then the base gives way, and the surface starts to dip, wobble, or hold puddles.
Key Takeaways
- Water is the primary culprit: Sinking pavers are rarely caused by the materials themselves, but rather by uncontrolled runoff from roof downspouts that erodes the bedding sand and weakens the base.
- The base is key: Structural failure begins beneath the surface where water washes out support layers; restoring a firm, compacted base is essential for a permanent repair.
- Joint integrity matters: Keeping joint sand, especially polymeric sand, topped off is crucial to prevent water infiltration that leads to further shifting and settling.
- Redirect the source: No repair will last if the downspout continues to discharge water directly onto the patio; installing extensions or splash blocks is necessary to prevent recurring damage.
Why Roof Downspouts Put Pavers Under Stress
A roof downspout is basically a controlled water cannon. It sends runoff to one point, and if that point sits right beside a patio, walkway, or driveway, the pavers take the hit again and again. The only way to stop this is by ensuring proper drainage to redirect the water away from the hardscape.
The damage starts below the surface. Water works into the joints and leads to soil erosion, which washes out sand, softens the bedding sand layer, and weakens the compacted base underneath. Once that support is compromised, the pavers do what any loose surface would do, they settle over time due to ground movement and sink into the void.
I have seen homeowners blame age or bad pavers when the real issue is much simpler. The stone is usually fine. The drainage is the problem.
A few common triggers show up over and over:
- A short downspout extension that drops water too close to the patio.
- A lack of proper drainage that sends runoff back toward the hardscape.
- Sand already missing from the joints.
- A base that was never compacted well enough in the first place.
If the pavers are sinking in a neat line under the downspout, I stop looking at the stone first and start looking at the water.
The Hidden Base Problems I Check First
When I inspect a sunken area near a downspout, I start with the obvious visual cues before digging into what is happening beneath the surface. That is where the real answer usually lives.
I look for uneven spots that you can feel underfoot. I check for joints that have lost joint sand and look for soil that stays damp long after the rain stops. If the surface feels spongy, it is a clear sign that the paver base has been washed out or weakened. I also keep an eye out for tree roots, which can occasionally push against the foundation from below, mimicking the signs of water-related failure.
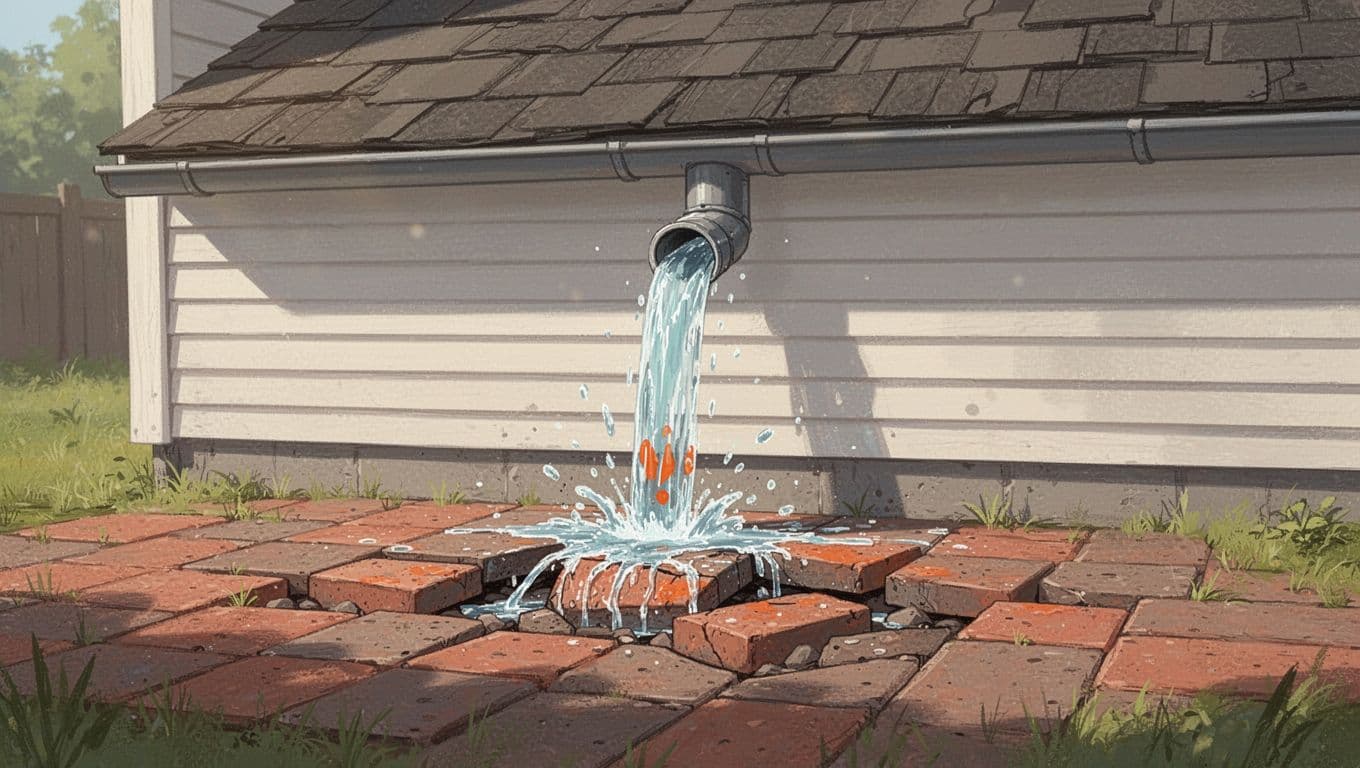
The pattern of the damage matters, too. When sinking happens right where the downspout lands, I know water is doing repeated damage to the paver base in one specific spot. Whether the surface is made of concrete bricks or natural stone pavers, the material is equally susceptible to these issues. When the settling spreads outward, I begin to evaluate drainage across the entire section rather than just focusing on one bad patch.
I also watch for signs that routine maintenance might have contributed to the problem. Excessive pressure washing can strip joint sand out of a soft area very quickly. This does not mean you should never clean your patio, but it does mean you should avoid blasting a weak section with high pressure if you expect it to hold together afterward.
How I Repair Sunken Pavers at a Downspout
To effectively fix sunken pavers, I begin by removing the affected units along with a surrounding border to assess the underlying structural integrity. Proper base preparation is essential because I need to identify the extent of the soil erosion before I can rebuild the foundation.
If the bedding sand has been washed away by water runoff, I clear it out entirely. If the sub-base and soil below have softened or shifted, I excavate the compromised base material and replace it with fresh, crushed gravel. I then focus on compaction, using a plate compactor or a hand tamper to ensure the new gravel base is dense and stable.
Once the foundation is solid, I spread new bedding sand and re-level the stones to match the surrounding surface. If any units are cracked or worn, I replace them rather than trying to salvage damaged pieces. After the stones are set, I sweep polymeric sand into the joints. Unlike standard sand, polymeric sand hardens to lock the surface together, which prevents water infiltration and keeps the pavers from shifting.
This attention to detail is critical for longevity. When the joints are properly sealed, the entire field stays tight. If the joints remain empty, the pavers can move, and the settling problem will inevitably return.
I also evaluate the downspout discharge to ensure the repair lasts. If water continues to dump directly onto the edge of the patio, the repair is only half finished. The water must be directed away from the paver installation to protect your investment.
If you want a professional evaluation of your landscape, Get a Free Quote and I will inspect your downspouts before the next heavy rain causes further damage.
How I Keep the Damage from Coming Back
Once the pavers are repaired, my priority is to ensure proper drainage by moving water away from the area. That part is plain and simple. A longer downspout extension, a splash block, or a better runoff path can make a huge difference in protecting your patio.
I also check the grade around the area to ensure the slope is correct. Water should move away from the house and away from the pavers. If water continues to run back toward the same corner, the paver base will stay wet, and a saturated base inevitably leads to more settling.
A few prevention steps go a long way:
- Extend the downspout so water lands farther from the hardscape
- Rebuild low spots that trap runoff to encourage better flow
- Refill the joints with polymeric sand after cleaning or repairs to lock them in place
- Use high-quality joint sand for regular maintenance
- Keep an eye on soft areas after long storms
While fresh joint sand helps with aesthetics, it is not a cure for poor drainage. Applying a sealer can help the surface look better, but it does not stop water from washing out the base material underneath. If the runoff problem remains, the sinking usually comes back.
That is why I treat the water source and the patio itself as one complete project. Fixing only one side of the equation leaves the other side vulnerable to failure in the future.
Frequently Asked Questions
Can I just add more sand to level the sunken pavers?
Simply adding sand on top or underneath individual stones is only a temporary cosmetic fix. If you do not address the drainage issue and the eroded base, the pavers will inevitably sink again the next time it rains.
Why is polymeric sand better than regular sand for joints?
Polymeric sand contains additives that harden when activated, creating a rigid, water-resistant seal between the pavers. This lock prevents water from penetrating into the base, which is the main cause of soil erosion and foundation instability.
How far should I extend my downspouts away from my patio?
You should aim to discharge water at least several feet away from any hardscape installation. The goal is to move the runoff to a lower point in your yard where it can soak into the ground without affecting your patio’s structural foundation.
Are some types of pavers more resistant to sinking?
Regardless of whether you use concrete bricks or natural stone, all pavers rely on a properly compacted base and stable sand layer. If the drainage isn’t corrected, any type of paver will eventually sink once the foundation underneath them is compromised.
Conclusion
A roof downspout can wear down your hardscape faster than most people expect because it keeps hitting the same spot with the same force. That steady runoff washes out sand, weakens the foundation, and eventually leads to pavers sinking into the ground.
If you notice sunken pavers near a downspout, I would not ignore the problem. A small dip can turn into a soft, uneven section quite fast, especially after another round of heavy rain. Addressing the issue early ensures that the damage does not spread to the surrounding area. To fix the problem for good, your repair process must start by managing the water flow, then restoring the base, and finally resetting the sinking pavers to a level position.
Why Tree Roots Lift Walkway Pavers
When tree roots lift pavers, the path usually tells the story before the tree does. One corner starts to rise and a joint opens up, eventually creating a significant tripping hazard that makes the whole run look uneven.
I see this most often near older trees, where the roots have had years to spread and thicken underneath the surface. The walkway usually does not fail all at once; instead, it shifts a little at a time until the change is hard to miss.
Key Takeaways
- Tree roots cause gradual, upward pressure on pavers as they grow, creating tripping hazards and uneven surfaces over time.
- Distinguishing between root-induced lifting and standard ground settling is essential, as roots consistently push material upward while settling causes it to sink.
- Simple resets that only address surface stones will likely fail; a lasting repair requires excavating the base and addressing the root environment beneath.
- Maintaining full joint sand and proper drainage is critical for structural integrity, as these elements prevent the loose gaps that allow pavers to shift more easily.
- Proactive measures like installing vertical root barriers can help direct root growth away from walkways, protecting both the tree health and the hardscape surface.
What tree roots do under a walkway
Roots do not sit still. They keep growing, expanding, and searching for water, and the biological pressure from constant root growth has to go somewhere. Under a paver walkway, the easiest path for that energy is upward, causing noticeable pavement lifting. Certain tree species with shallow roots are often the primary cause of these surface disruptions, as their root systems naturally stay closer to the topsoil.
That is why I think of roots like a slow wedge. They push against the soil and bedding layer, then the pavers start to follow the movement. Once the joint sand loosens, the whole area loses some of its lock.
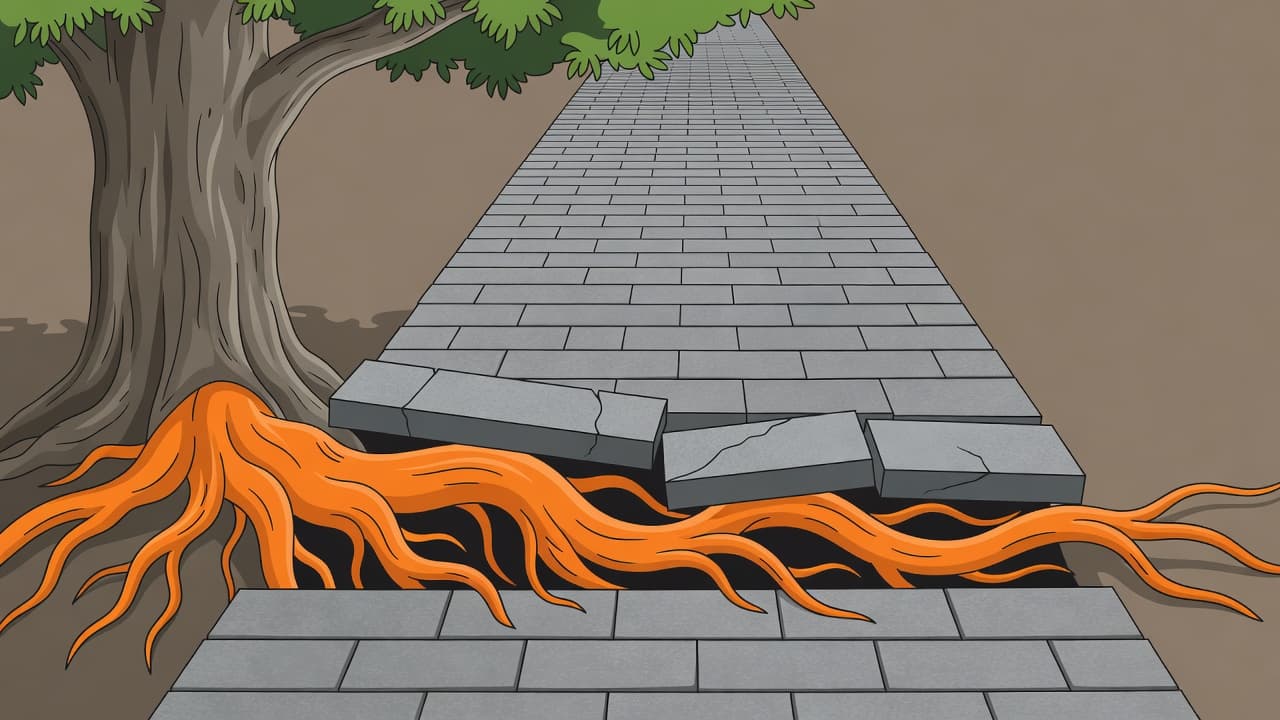
Roots do not need to crack every paver to make a mess. A small lift in one section can change the slope, open gaps, and send water into places it should not go. In a wet climate, that kind of movement tends to show up faster.
The more mature the tree, the more likely the pressure keeps building. A path that looks fine in one season can start waving the next if nobody resets it the right way.
The signs I look for first
The first clue is usually the shape of the lift. Root damage tends to run in a line near the tree, or across the side where the roots are traveling. Settling is different. Settling drops down, but roots push up.
I also look for the early signs of sidewalk damage that homeowners notice after the initial movement is ignored:
- A raised strip that follows the tree side of the walkway
- Pavers that rock instead of sitting flat, leading to pavement cracking as the stones lose their structural lock
- Gaps that keep opening after fresh sand is added
- Edges that tilt, twist, or sit higher than the rest of the run, a clear indicator of sidewalk lifting
If a section feels soft underfoot, I pay attention. That soft feeling usually means the base has moved, not just the top layer.
If the lift keeps coming back in the same strip, I stop blaming the stone and start looking below it.
Rain and irrigation can make it worse. When the soil stays damp, the base gets easier to move, and the pavers keep riding up on the same weak spot. That is why I do not treat this like a surface stain or a simple cosmetic problem.
Why a quick reset usually fails
Many homeowners are tempted to pry up uneven stones, level the base, and call the job finished. I understand the appeal because it seems like a fast and inexpensive solution.
The problem is that you are only addressing the symptoms, not the cause. If the tree root overgrowth remains active beneath the surface, your pavers will continue to sit on top of a shifting foundation. Simply smoothing the top does nothing to neutralize the force waiting underneath. This type of infrastructure damage requires a structural approach rather than a cosmetic touch-up. If the roots are significant enough to displace heavy pavers, you might even consider consulting an arborist to ensure the tree remains healthy and to discuss safe options for root management that do not compromise the tree.
This is also why I advise against aggressive cleaning on a damaged section. High pressure can easily chip paver edges and blow sand out of the joints. That joint sand is vital because it helps the walkway function as a cohesive surface instead of a pile of loose pieces.
If I pressure wash a paver path, I keep the process controlled. Too much force does more harm than good, especially when the joints are already loose or compromised. A path suffering from root lift requires a structural repair first, with cleaning performed only after the foundation is stable.
Sometimes the right move is not forcing the walkway back into its original position. You have to consider the health of the tree, the site drainage, and the space available before deciding how the repair should be built.
How I repair lifted walkway pavers
I start by lifting the affected pavers and the stones surrounding them. You have to see what the base is doing before you can fix it. Guessing does not help here.
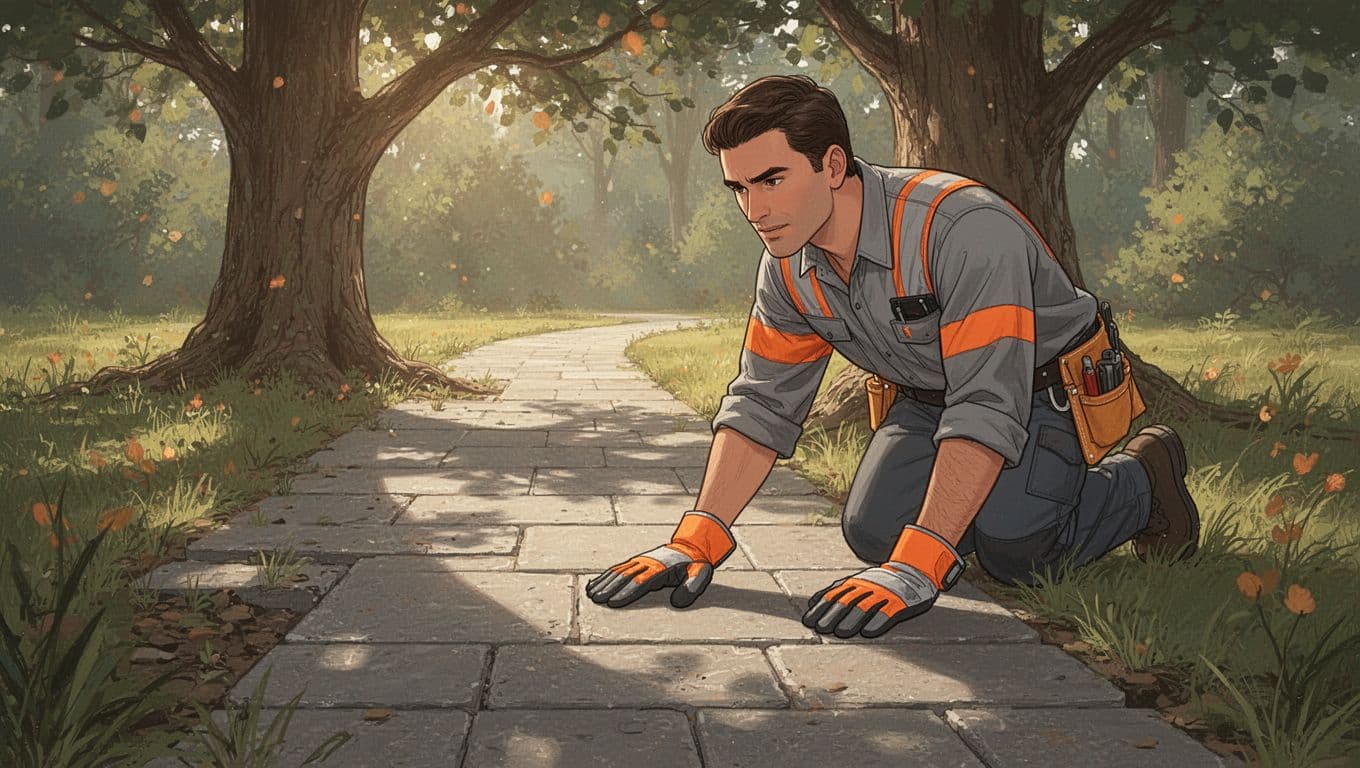
Then I check the bedding layer and the compacted base. Proper base preparation is essential for a long-lasting result. If the soil has shifted, I excavate the area and install a fresh layer of crushed gravel to ensure excellent drainage. In some cases, I incorporate paver base panels or additional paving slabs to add rigidity and provide a more stable surface for the walkway to sit on. If the old pieces are chipped or worn, I replace them instead of trying to hide the damage.
The reset itself has to be level and tight. If the line is off, the problem will show up again. Once the stones are back in place, I sweep in fresh joint sand so the surface locks together again. That is the part many people skip, and it is usually the step that holds everything in place.
After that, I clean the area carefully. If the walkway needs pressure washing, I use the right nozzle and a moderate setting, not a harsh blast. The goal is to clean the surface without stripping out the joints I just rebuilt.
Keeping the walkway stable after the fix
A repaired walkway still needs consistent attention. I always advise homeowners to monitor the area closely after heavy rain, as that is when minor movement often becomes visible. If the tree continues to grow and drainage remains poor, the pressure on your pavers can quickly return.
To prevent future problems, I often recommend installing root barriers. Solutions like DeepRoot barriers or other vertical barriers are highly effective at guiding roots downward and away from your foundation. This approach protects tree health while ensuring your walkway stays flat and stable. Incorporating these barriers into your overall landscape design is a proactive way to avoid recurring maintenance issues.
Fresh joint sand also plays a critical role in long-term stability. When joints remain full, the pavers stay tighter, allowing the walkway to better handle small shifts. If the sand washes away, the path inevitably begins to loosen. I also carefully evaluate the surrounding grade and the way water moves across the property. Standing water is never a good sign, as it softens the base and encourages roots to continue pushing toward the surface.
If your walkway is starting to rise near a tree, I can provide a professional assessment to determine if it requires a simple reset, a deeper repair, or a more permanent landscape design strategy. Get a Free Quote and get ahead of the damage before the lift spreads.
Frequently Asked Questions
Can I just pry up the pavers and push the dirt down to fix the lift?
Simply leveling the soil is usually a temporary fix because it ignores the biological pressure of the growing roots. Unless you address the root system or install a barrier, the tree will continue to push the base back up, causing the pavers to shift again.
Will root barriers harm the tree?
When installed correctly, root barriers guide root growth downward or away from the walkway without compromising the overall health of the tree. It is often wise to consult with an arborist before installing these barriers to ensure the specific tree species can handle the modification without becoming unstable.
Why is joint sand so important for preventing root damage?
Joint sand acts as a locking mechanism that keeps individual pavers bound together into a cohesive, structural unit. When the sand washes away or loosens, the pavers can move independently, making the walkway much more susceptible to the localized lifting caused by roots.
Is it safe to pressure wash a walkway that has been lifted by roots?
You should avoid aggressive pressure washing on compromised walkways, as the high force can easily chip edges and blow out the essential joint sand. Always perform structural repairs first to stabilize the foundation before using a low-pressure setting to clean the surface.
Conclusion
Tree roots do not attack pavers all at once. They grow, press, and shift the ground until the walkway shows the strain. That is why the fix must deal with the movement under the surface, rather than just adjusting the pavers on top.
When I see a lifted path near a tree, I look at the pattern, the base, and the joint sand first, as that is where the real problem usually lives. By incorporating structural soil into the repair area, you can provide a long term foundation that supports the tree while maintaining a level surface. Ultimately, pavement lifting can be solved permanently if you take the time to address the root environment correctly.
Why Paver Border Separation Happens
I see paver border separation all the time, and it usually starts small. A thin gap shows up, one edge feels loose, then the border starts to drift away from the main field.
That little shift can look harmless at first, but it is not. Once the edge loses support, water, traffic, and time keep working on your patio pavers until the entire line breaks down.
Key Takeaways
- Border separation is a systemic issue: A gap at the edge is rarely just a cosmetic defect; it is typically the first sign that your patio or walkway’s foundation or structural restraint is failing.
- The border bears the most stress: Because it lacks support on its outer side, the edge is the most vulnerable area to movement caused by soil settlement, heavy traffic, and poor drainage.
- Edge restraint is critical: High-quality, properly anchored edge restraints are essential to prevent pavers from creeping or shifting outward over time.
- Address the root cause, not just the symptom: Simply pushing stones back into place will not work; a durable repair requires rebuilding the base, securing the restraint, and managing water runoff to prevent further erosion.
Why the Border Pulls Away from the Main Field
The border serves as the outermost perimeter, and because of its position, it absorbs the most stress. While the central paver field is locked together by a tight interlock system, the border has one side fully exposed. This lack of structural containment makes it the first place where movement becomes visible.
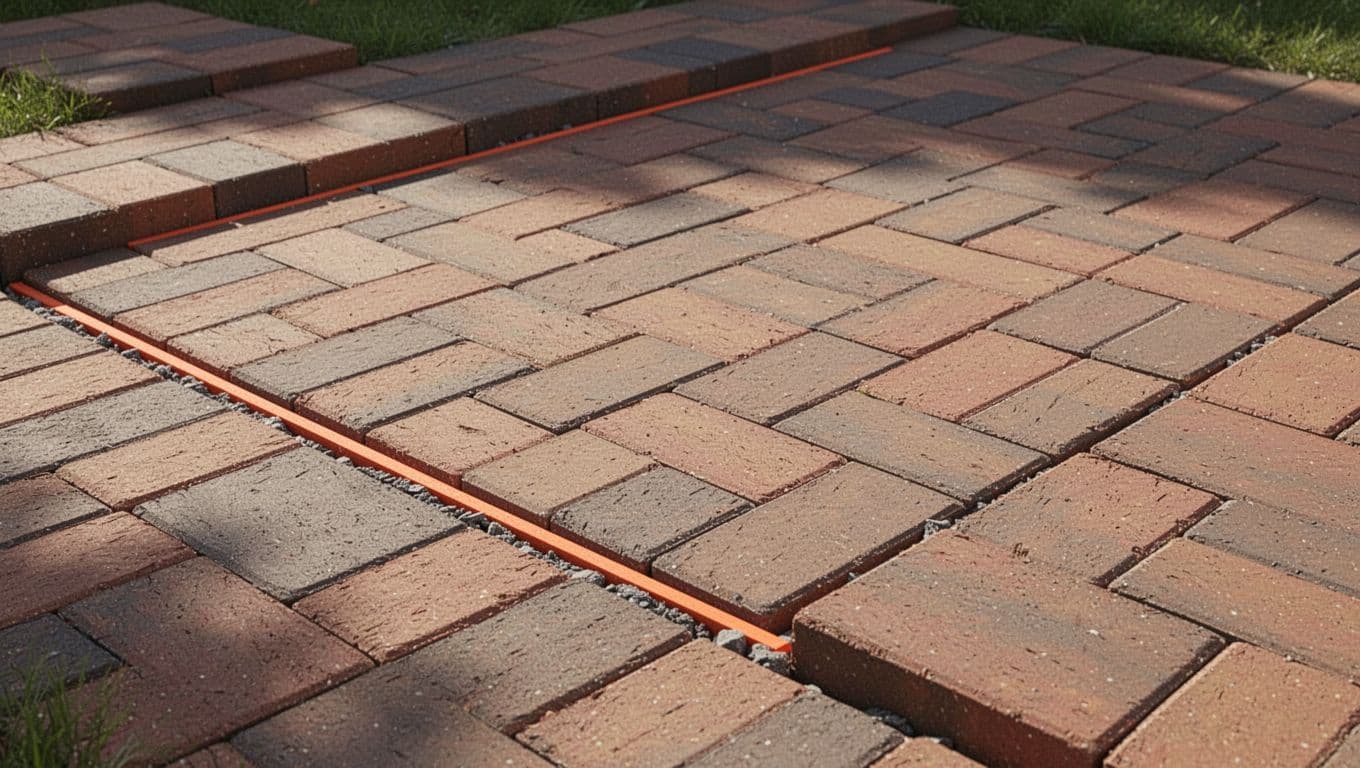
When I inspect a patio, driveway, or outdoor living space, I first look at what the border is sitting on. If the base under that edge wasn’t compacted well, the stones can settle. If water is washing out the bedding sand, the edge starts to sink or lean. If the restraint failed, the border can slide outward like a row of books missing a bookend.
Southwest Florida conditions make this worse. Heavy rain, sandy soils, irrigation overspray, and constant sun all put stress on the edges of your hardscape. A high-quality driveway installation must account for tire loads, while a pool deck border deals with constant splash and moisture. Even a simple walkway border is subjected to consistent foot traffic and the natural cycle of shifting pavers caused by changing soil moisture. The border does not need a catastrophic failure to separate; it only needs one weak spot to begin the process.
I also see separation where the installation was rushed. If the edge was cut too close to soft ground, or if the stones were set before the base was fully stable, the problem inevitably shows up later. The center of your project might still look perfect, but the border is the part that tells the truth about the foundation first.
The Hidden Job of Edge Restraint
A lot of homeowners never think about edge restraint until it fails. I get that. You don’t see it once the job is finished, but it does a lot of the quiet work.
This system holds the outer line of pavers in place, providing the necessary lateral support to keep the border from spreading under pressure. Without quality paver edging, the units can creep, tilt, or open up at the joints. Whether the project uses rigid paver edging, plastic strips, or decorative concrete curbing, the goal remains the same: keeping the border locked to the rest of the surface.
There are a few ways a system can fail. Sometimes the edge restraint was never installed well enough to withstand the load. Sometimes the spikes or fasteners loosen over time. Sometimes the material sits in soft soil instead of firm support, so it moves when the ground shifts. And sometimes the paver edging is there, but the base below it is already failing, so the edge still walks away.
Think of it like this: the border is the frame and the field is the picture. If the frame slips, the whole picture looks crooked.
If the edge starts moving, I don’t blame the pavers first. I look at the support under them.
Water is the other big piece here. If water runs along the border and cannot drain properly, it can carry joint sand out from between the units. Once the bedding material leaves, the restraint has less to hold. That turns a small gap into a bigger one.
I pay close attention to where the water goes after a storm. Downspouts, low spots, and pool runoff can all push water right at the edge. The pavers do not need to be damaged to separate. They only need the ground beneath them to give up.
Signs the Problem Has Already Started
I do not judge paver border separation by the size of the opening alone. I look at how the entire edge is acting. That tells me whether I am dealing with a small cosmetic issue or a deeper issue regarding the structural stability of the installation.
| What you see | What it usually means | How serious it is |
|---|---|---|
| A narrow gap between the perimeter stones and the field | The edge has started to move | Early warning |
| A border paver that rocks when stepped on | The bedding sand has washed out | Needs attention soon |
| Joint sand keeps disappearing after rain | Water is moving through the edge | Check drainage and restraint |
| The border line looks sunken or shifted outward | The base material has likely settled | Often more than a surface fix |
If I see more than one of those signs at the same time, I stop thinking about a quick touch-up. A border that rocks and sinks usually has a support issue under it. A border that keeps losing joint sand usually has a water problem as well.
The size of the gap matters, but the pattern matters more. One loose stone can be simple. A whole edge drifting out of line is a system problem. That is the part people miss. They see a few bad pieces, but the failure started below them.
I also check the nearby pavers. If the field is tight but the edge stones are loose, the edge restraint may be the weak link. If both the border and the first few rows are moving, the foundation itself is probably part of the story. Either way, I do not want to patch the face of it and leave the cause behind.
How I Put the Edge Back Together
When I fix a separating border, I do not just push the stones back into place and call it done. That kind of quick fix usually only lasts for a month before it comes apart again. True stability requires a professional installation that addresses the root cause of the movement.
First, I lift the loose border and any pavers around it that have lost support. Then I check the base. If the material under it is soft, low, or washed out, I rebuild that section and compact it again. If the previous support was inadequate, I replace it with durable materials. The border needs something solid to hold against.
- I remove the loose border and the nearby pavers that are affected.
- I rebuild the base using open graded stone, ensuring the area is set on a firm, compacted stone foundation.
- I reset the border so it sits tight and level with the field, securing the new paver edging firmly in place with long galvanized spikes.
- I restore the joint sand, then check the slope so water moves away from the edge.
That process takes longer than a surface fix, but it lasts much longer too. If the edge is being held in place by fresh sand alone, it will inevitably move again. When the base is solid and the restraint is properly anchored, the border can stay put for years.
I also watch for drainage problems during the repair. If water keeps running at the same edge, the repair must account for that. Otherwise, the same washout will simply return. A good repair is not just about the pavers; it is about the ground and the water moving around them.
If your border is already shifting, Get a Free Quote and I can take a look before the movement spreads into the field.
Frequently Asked Questions
Why does my paver border pull away even though the rest of the patio looks fine?
The border is the only part of your hardscape that lacks structural support on one side, making it the most susceptible to lateral movement. Even if the center of your patio remains tight, environmental factors like soil settling or poor drainage will always impact the outer edge first.
Is it okay to just fill the gap with more sand?
Filling a gap with sand is only a temporary cosmetic fix and will not stop the underlying movement. If the border has already begun to shift, the foundation is likely compromised, and the sand will simply wash away again without proper structural reinforcement.
Can I fix a separating border myself?
While you can physically move the pavers back, fixing them properly requires specialized tools like plate compactors and proper base materials to ensure long-term stability. If the base was not installed correctly the first time, it is often best to have a professional rebuild the foundation to prevent the issue from recurring.
Does rain really affect paver edges that much?
Yes, water is a major contributor to paver failure because it washes away the fine bedding sand that holds the pavers in place. Once that support material disappears, the edge restraint has nothing to anchor against, which inevitably leads to the border shifting or tilting.
What the Edge Is Telling You
A separating border is rarely random. It usually points to one of three things: weak support, failed restraint, or water moving where it shouldn’t. Once I know which one is at work, the repair becomes much clearer.
The small gap at the edge is not the whole problem. It is a warning sign. If I catch it early, I can often save the rest of the surface. If I ignore it, the repair gets bigger, messier, and more expensive.
That is why I look at the border so closely. It does not just frame the hardscape design. It tells me when the whole system is starting to shift. Beyond structural integrity, maintaining a tight edge is vital for effective weed growth prevention, as gaps provide the perfect environment for unwanted plants to take root. These same principles of movement and restraint apply throughout your outdoor space, whether I am inspecting a retaining wall block or checking the stability of step edging. When you treat the border as a critical indicator, you can catch minor issues before they compromise the entire installation.
Why Loose Pavers Feel Soft Underfoot
Loose pavers usually don’t start with the stone itself. They start with what’s underneath, between, or around it.
That soft, shifting feeling under your foot is a clue. If a patio, driveway, or walkway has begun to move, those shifting patio pavers are telling you something below has changed. I see it all the time, and it almost never gets better on its own. Left unaddressed, this movement can quickly turn into a significant trip hazard.
The good news is that the cause is usually easy to track once you know what to look for. The trick is separating a small surface issue from a bigger base problem.
Key Takeaways
- Foundation First: Loose pavers are almost always a symptom of an underlying issue, such as inadequate base compaction, poor drainage, or soil settlement, rather than a problem with the stones themselves.
- The Role of Joint Sand: Beyond just filling gaps, joint sand provides essential friction that locks the paver system together; when it washes away, stones lose stability and begin to shift.
- Environmental Factors: External elements like water runoff, invasive tree roots, and failing edge restraints can undermine your base, turning small surface inconsistencies into larger trip hazards.
- Repair vs. Reset: While minor issues can be solved with a simple re-sand, recurring movement often requires removing the section to properly level and re-compact the base to ensure a permanent fix.
The Base Is the First Thing I Check
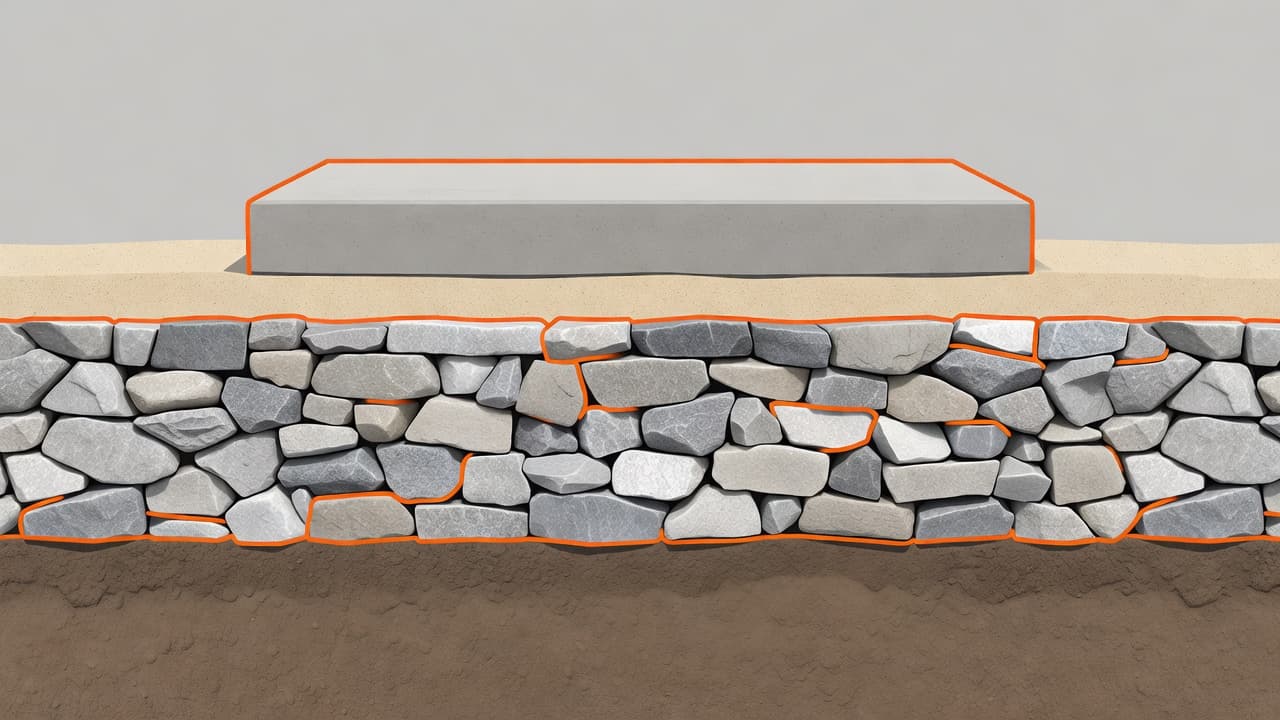
When pavers move, I start below the surface. A paver system is only as steady as the base material under it, and that foundation has to stay compact and level through proper installation techniques, such as thoroughly compacting the base.
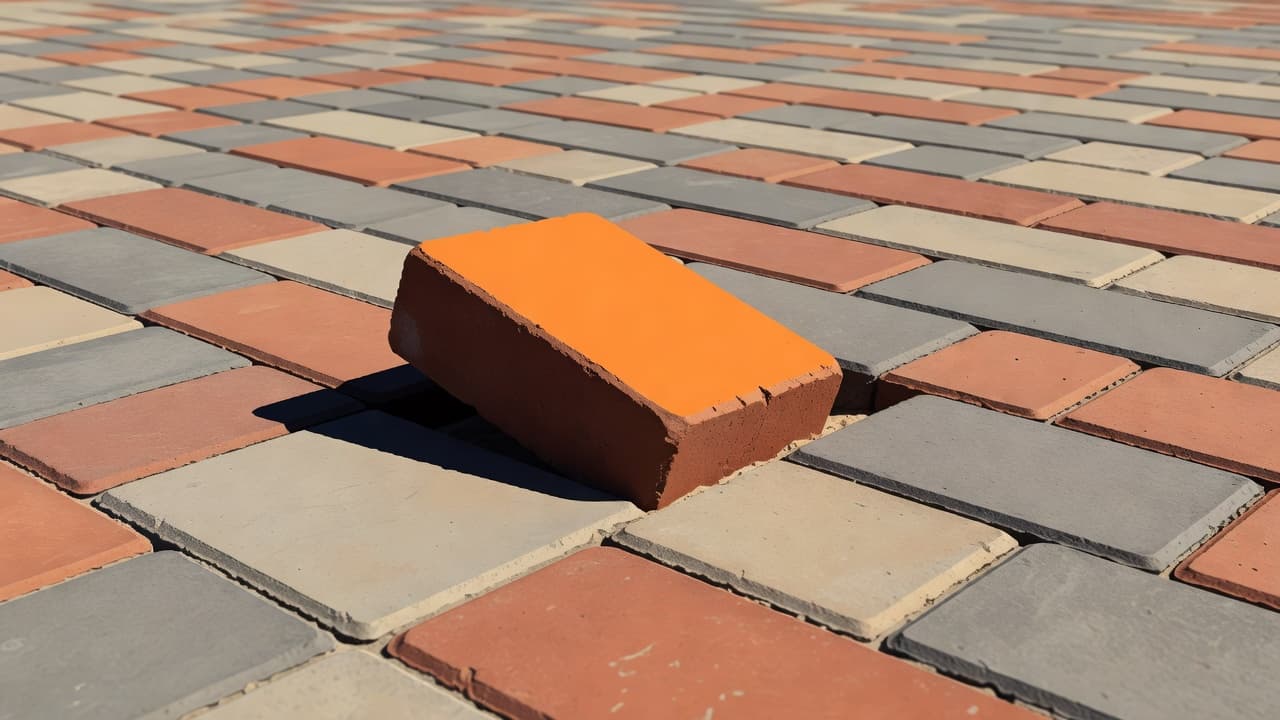
If the base was installed too thin, not compacted enough, or laid over weak soil, the pavers can suffer from base settlement. Once that happens, the stones become wobbly pavers that rock when you step on them. You may notice one corner dropping first, or a small patch that feels soft while the rest of the area still feels firm.
That is because pavers spread weight across the surface, but they still depend on support underneath. If the support shifts, the pavers shift with it.
Heavy rain makes this worse. So does poor drainage. Water works its way into open spots, softens the soil, and creates tiny voids that let the stones move. A sand base is particularly susceptible to these drainage issues, and in Southwest Florida, that kind of movement can show up fast after a storm.
If a paver rocks, I don’t look at the top first. I look at the support below it.
Joint Sand Keeps Pavers Locked In
Joint sand does more than fill the gaps; it acts as a critical structural component that helps hold the whole system in place. When joint sand gets washed out, blown away, or worn down over time, the stones lose their necessary friction. As a result, loose pavers may begin to slide, tip slightly, and create a hollow feeling when you walk across them.
A few missing sections of joint sand can create a much bigger problem than most homeowners expect. I often see this issue after aggressive pressure washing. Too much force can strip out the material and leave the stones free to move. This does not mean pressure washing is bad, but it does mean that the joints need to be protected afterward.
Weeds and ants can also make the problem worse. Once the sand level drops, gaps open up. Those gaps invite more movement, more moisture, and more debris, which turns into a destructive cycle.
This is where re-sanding matters. Using fine sand, or choosing polymeric sand to tighten the surface of your patio pavers, provides a durable solution to prevent further movement. It fills the voids, reduces shifting, and gives the stones something to lock against. If the base is sound, this simple maintenance step can make a significant difference.
Water, Roots, and Heavy Loads Push Them Out of Line
Loose pavers don’t always come from one single mistake. Sometimes they get pushed around by daily life.
Water is a big one. If runoff keeps moving across the same spot, it leads to water erosion that can wash out bedding sand and weaken the base. Low areas are the first to show it. So are spots near downspouts, sprinkler heads, and pool edges where drainage issues often persist.
Tree roots can lift sections too. Roots don’t need to tear everything apart to cause trouble. A slight lift under one side of a brick patio or a pool deck is enough to make a paver feel unstable underfoot. Once the surface is no longer flat, the movement becomes obvious.
Heavy traffic matters as well. Driveways take repeated loads. So do walkways near side yards, service areas, and garage entries. Every pass adds stress. If the base was already weak, the wear shows up sooner.
I also pay attention to edge restraints. If the system that holds the border in place fails, the outer pavers begin to spread. Once the perimeter moves, the field of pavers follows.
The problem may look small at first. Then one loose area becomes three. That is how a tiny soft spot with loose pavers turns into a full repair.
How I Tell a Small Issue From a Bigger One
Not every loose paver means the whole surface has failed. When dealing with your patio pavers, some issues are simple fixes, while others serve as a warning sign of deeper problems.
A quick check usually tells the story. I look at how many pavers are moving, where they are shifting, and whether the problem returns after heavy rain.
Here is the simple version:
| What you notice | What it often means |
|---|---|
| One paver rocks when you step on it | Joint sand is low or the bedding sand has a small void |
| A small cluster feels soft | The base has settled in one spot |
| Edges move first | The border restraint may have failed |
| The same area loosens again after rain | Drainage is washing out the support below |
| Wobbly pavers across a large area | General base settlement is occurring |
If the problem stays in one spot and the rest of the surface feels solid, the repair may be small. However, if the area keeps sinking, spreading, or reappearing after a storm, I start thinking about a more intensive fix.
A paver surface should feel firm all the way across. If it does not, there is usually a reason hiding under the surface. Identifying loose pavers early is critical because shifting stones can quickly create a safety hazard for anyone walking on your path or patio.
What Holds a Repair Together Long Term
A quality repair involves more than just putting the same pavers back where they were. I have seen that mistake too many times. While a simple DIY repair might involve pulling up a few stones, a professional repair ensures the underlying issues are solved for good.
If the base has failed, the entire loose section must be removed. The area underneath needs to be cleaned out before you add new base material like stone dust. You should then follow a step-by-step repair process to ensure the ground is leveled properly. Using a plate compactor is essential here, as compacting the base is the only way to prevent future sinking. If you are not using a machine, you must ensure you are compacting the base thoroughly by hand. Once the foundation is stable, use a level tool to check the grade. Even if the stones look flat, a level tool will confirm you have the right slope for drainage.
After preparing the bedding layer, you can reset pavers into their final positions. Use a rubber mallet to tap each stone into place, then use your level tool one last time to ensure everything is flush. The finishing steps are just as important as the foundation. Fill the gaps with joint sand or high-quality polymeric sand to lock the pieces together, and always inspect your edge restraints. If the border is shifting, the entire project will lose its shape.
For smaller problems, a simple reset and re-sand may be enough. For bigger ones, I prefer a professional repair that rebuilds the section correctly rather than chasing the same loose spot every season. If you are dealing with pavers that keep moving, start with an inspection instead of a guess. You can Get a Free Quote and find out whether the fix is a simple reset or a deeper structural rebuild.
Frequently Asked Questions
Can I just fix a loose paver by adding more sand under it?
Usually, this is only a temporary patch. If the paver is loose, there is typically a void or a settling issue in the base that needs to be addressed with proper compaction to prevent the stone from rocking again.
Why does my patio feel soft after heavy rain?
Water often infiltrates the paver system and saturates the soil or bedding layer, which softens the foundation. If your drainage is poor, this moisture causes the base to shift, resulting in that spongy, unstable feeling underfoot.
Do I need to remove all my pavers to fix a few loose ones?
Not necessarily, but you must remove the loose pavers and the surrounding stones to properly reach the base. This allows you to inspect the sub-surface, add fresh bedding material, and ensure the new stones are compacted level with the rest of the patio.
How can I stop weeds and ants from loosening my pavers?
Keeping your paver joints filled is the best defense. Using polymeric sand creates a hardened, restrictive barrier that makes it much more difficult for ants to tunnel or weeds to take root compared to standard paver sand.
Conclusion
Loose pavers feel soft because something in the structural system has shifted. This instability often stems from a compromised foundation, washed-out joint sand, failing edge restraints, or poor drainage around the area.
Once you identify where the movement begins, the path to a permanent fix becomes much clearer. By consistently maintaining your joint sand and ensuring the foundation remains solid, you can prevent future settling and ensure a long-lasting surface. A single stone that moves under your foot might seem like a small issue, but addressing it correctly now will prevent the need for more extensive repairs down the road.
How I Remove Oil Stains From Driveway Pavers
A fresh oil stain on pavers looks worse than it has to. The dark spot spreads, the surface grabs it, and suddenly the whole driveway feels dirty.
The good news is that oil stains on driveway pavers can usually be improved if I move fast and use the right method. Why let one spill run the show when a little patience can save the surface? If the black streaks on your driveway are rubber from tires rather than oil, I walk through removing tire marks from driveway pavers with the same gentle-first method.
I start with the same rule every time, clean gently first, then work up only if I need to. That keeps me from making the stain bigger or roughing up the pavers.
Act fast before the oil sinks in
If the spill is still wet, I treat it like a race. The longer oil sits in heat and sun, the deeper it settles into the surface and the joints.
If the stain is still wet, blot it. Don’t scrub first. Scrubbing pushes oil deeper.
I also check whether the pavers are sealed. Sealed pavers give me a little more time, while unsealed pavers can soak up oil fast. If I want a quick refresher on cleanup basics, I look at the EPA’s oil-spill guidance.
For a fresh spill, I do this first:
- Cover the stain with an absorbent material like unscented clay litter, baking soda, or oil absorbent granules.
- Let it sit long enough to pull up as much oil as possible.
- Sweep it up without grinding it into the paver face.
- Wash the area with warm water, mild dish soap, and a nylon brush.
- Rinse lightly and repeat if the mark is still there.
I avoid soaking the whole area on the first pass. A small spill can turn into a wider stain if I flood it too early.
My step-by-step method for stubborn oil on pavers
Older stains need a little more patience. I usually test the least aggressive method first, then move up only when the stain stays put.
| Stain age | My first move | What I try next |
|---|---|---|
| Fresh, wet spill | Absorb it right away | Soap, brush, and light rinse |
| Set-in stain | Degreaser or paver-safe cleaner | Repeat treatment after drying |
| Deep, dark stain | Poultice or professional cleaning | Sealing after cleanup |
The table keeps my approach simple. Fresh spills are about speed. Set-in stains are about pulling the oil back out.
For a stubborn spot, I apply a paver-safe degreaser and let it sit for the time listed on the label. Then I scrub with a nylon brush in small circles. I don’t rush this part. If I rinse too early, I wash away the cleaner before it has time to work.
If the stain is heavy, I sometimes use a poultice. That means I make a paste with an absorbent powder and a cleaner, spread it over the stain, and let it dry. As it dries, it pulls oil out of the paver. It looks messy for a while, but that’s the point.
Once the area dries, I check the color in daylight. Artificial light can hide a shadow that the sun will show immediately.
For oily rags and leftover absorbent, I follow EPA household hazardous waste guidance. I don’t leave oil-soaked material piled up in the garage.
What I never do to paver surfaces
This is where a lot of damage happens. People attack the stain, then end up fixing the pavers too.
I stay away from these mistakes:
- I don’t use a wire brush, because it can scratch the face of the paver.
- I don’t pour strong acid or bleach on the spot, because it can discolor the surface.
- I don’t blast the stain with a pressure washer tip held too close.
- I don’t keep adding cleaner after the surface has already started to dry.
Pressure washing has its place, but I treat it like a finish step, not a first move. Too much force can open up the surface or disturb the joint sand between pavers. Once that sand moves, the driveway starts looking tired.
Sealed pavers need extra care too. Harsh chemicals can haze the finish or make the sheen uneven. If I don’t know what was used on the driveway, I test a small corner first. That small check can save a lot of regret.
When the stain won’t budge
Some stains are too old, too deep, or too widespread for a simple cleanup. If oil has sat for months, or if it reached the base layer under the pavers, I can clean the surface and still see a shadow.
That doesn’t always mean the driveway is ruined. It may need a deeper restoration, resealing, or a professional cleaning that goes beyond soap and a brush.
I also call for help when:
- the stain sits on a large section of the driveway,
- the pavers are already fading or loose,
- the surface has been sealed and I don’t want to damage the finish,
- the spill came from a car leak that keeps coming back.
If that sounds familiar, I can get help before the problem spreads. I can also Get a Free Quote and have someone look at the driveway before I make it worse with the wrong cleaner.
The cleanest fix starts with the first 10 minutes
Oil on pavers doesn’t have to turn into a permanent eyesore. If I act fast, absorb the spill, and use the mildest cleaner that works, I give the driveway a real shot at looking normal again.
The big lesson is simple. Fast cleanup beats aggressive cleanup almost every time. A calm first move, a careful second pass, and the right finish can save the surface and keep the whole driveway looking sharp.