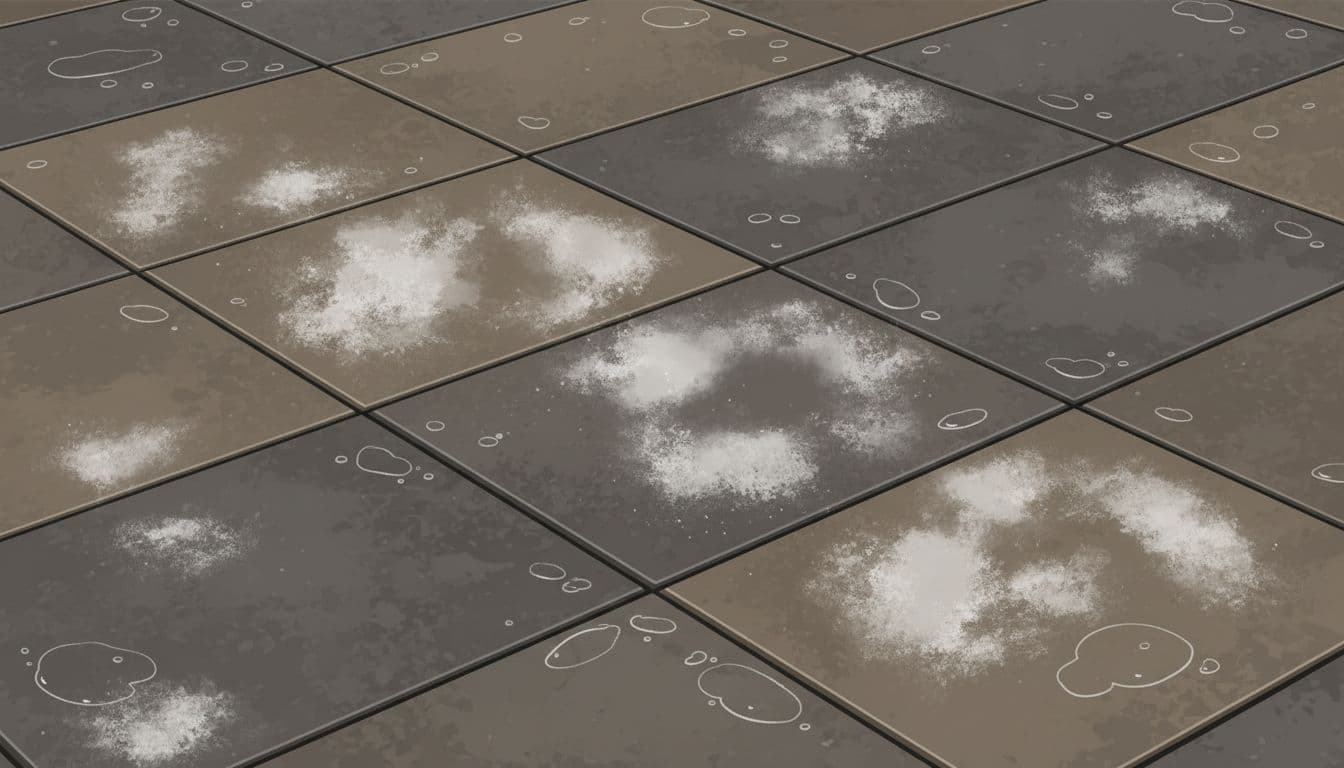
A fresh oil stain on pavers looks worse than it has to. The dark spot spreads, the surface grabs it, and suddenly the whole driveway feels dirty.
The good news is that oil stains on driveway pavers can usually be improved if I move fast and use the right method. Why let one spill run the show when a little patience can save the surface? If the black streaks on your driveway are rubber from tires rather than oil, I walk through removing tire marks from driveway pavers with the same gentle-first method.
I start with the same rule every time, clean gently first, then work up only if I need to. That keeps me from making the stain bigger or roughing up the pavers.
Act fast before the oil sinks in
If the spill is still wet, I treat it like a race. The longer oil sits in heat and sun, the deeper it settles into the surface and the joints.
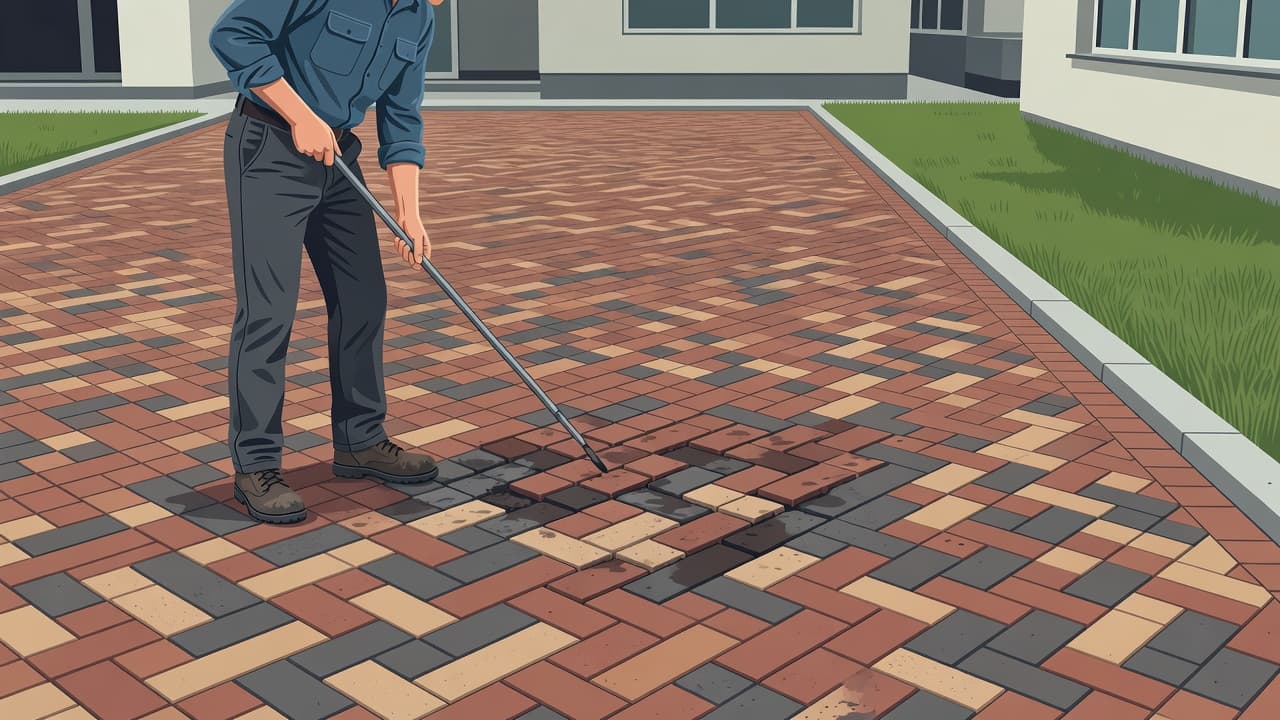
If the stain is still wet, blot it. Don’t scrub first. Scrubbing pushes oil deeper.
I also check whether the pavers are sealed. Sealed pavers give me a little more time, while unsealed pavers can soak up oil fast. If I want a quick refresher on cleanup basics, I look at the EPA’s oil-spill guidance.
For a fresh spill, I do this first:
Cover the stain with an absorbent material like unscented clay litter, baking soda, or oil absorbent granules.
Let it sit long enough to pull up as much oil as possible.
Sweep it up without grinding it into the paver face.
Wash the area with warm water, mild dish soap, and a nylon brush.
Rinse lightly and repeat if the mark is still there.
I avoid soaking the whole area on the first pass. A small spill can turn into a wider stain if I flood it too early.
My step-by-step method for stubborn oil on pavers
Older stains need a little more patience. I usually test the least aggressive method first, then move up only when the stain stays put.
Stain age
My first move
What I try next
Fresh, wet spill
Absorb it right away
Soap, brush, and light rinse
Set-in stain
Degreaser or paver-safe cleaner
Repeat treatment after drying
Deep, dark stain
Poultice or professional cleaning
Sealing after cleanup
The table keeps my approach simple. Fresh spills are about speed. Set-in stains are about pulling the oil back out.
For a stubborn spot, I apply a paver-safe degreaser and let it sit for the time listed on the label. Then I scrub with a nylon brush in small circles. I don’t rush this part. If I rinse too early, I wash away the cleaner before it has time to work.
If the stain is heavy, I sometimes use a poultice. That means I make a paste with an absorbent powder and a cleaner, spread it over the stain, and let it dry. As it dries, it pulls oil out of the paver. It looks messy for a while, but that’s the point.
Once the area dries, I check the color in daylight. Artificial light can hide a shadow that the sun will show immediately.
This is where a lot of damage happens. People attack the stain, then end up fixing the pavers too.
I stay away from these mistakes:
I don’t use a wire brush, because it can scratch the face of the paver.
I don’t pour strong acid or bleach on the spot, because it can discolor the surface.
I don’t blast the stain with a pressure washer tip held too close.
I don’t keep adding cleaner after the surface has already started to dry.
Pressure washing has its place, but I treat it like a finish step, not a first move. Too much force can open up the surface or disturb the joint sand between pavers. Once that sand moves, the driveway starts looking tired.
Sealed pavers need extra care too. Harsh chemicals can haze the finish or make the sheen uneven. If I don’t know what was used on the driveway, I test a small corner first. That small check can save a lot of regret.
When the stain won’t budge
Some stains are too old, too deep, or too widespread for a simple cleanup. If oil has sat for months, or if it reached the base layer under the pavers, I can clean the surface and still see a shadow.
That doesn’t always mean the driveway is ruined. It may need a deeper restoration, resealing, or a professional cleaning that goes beyond soap and a brush.
I also call for help when:
the stain sits on a large section of the driveway,
the pavers are already fading or loose,
the surface has been sealed and I don’t want to damage the finish,
the spill came from a car leak that keeps coming back.
If that sounds familiar, I can get help before the problem spreads. I can also Get a Free Quote and have someone look at the driveway before I make it worse with the wrong cleaner.
The cleanest fix starts with the first 10 minutes
Oil on pavers doesn’t have to turn into a permanent eyesore. If I act fast, absorb the spill, and use the mildest cleaner that works, I give the driveway a real shot at looking normal again.
The big lesson is simple. Fast cleanup beats aggressive cleanup almost every time. A calm first move, a careful second pass, and the right finish can save the surface and keep the whole driveway looking sharp.
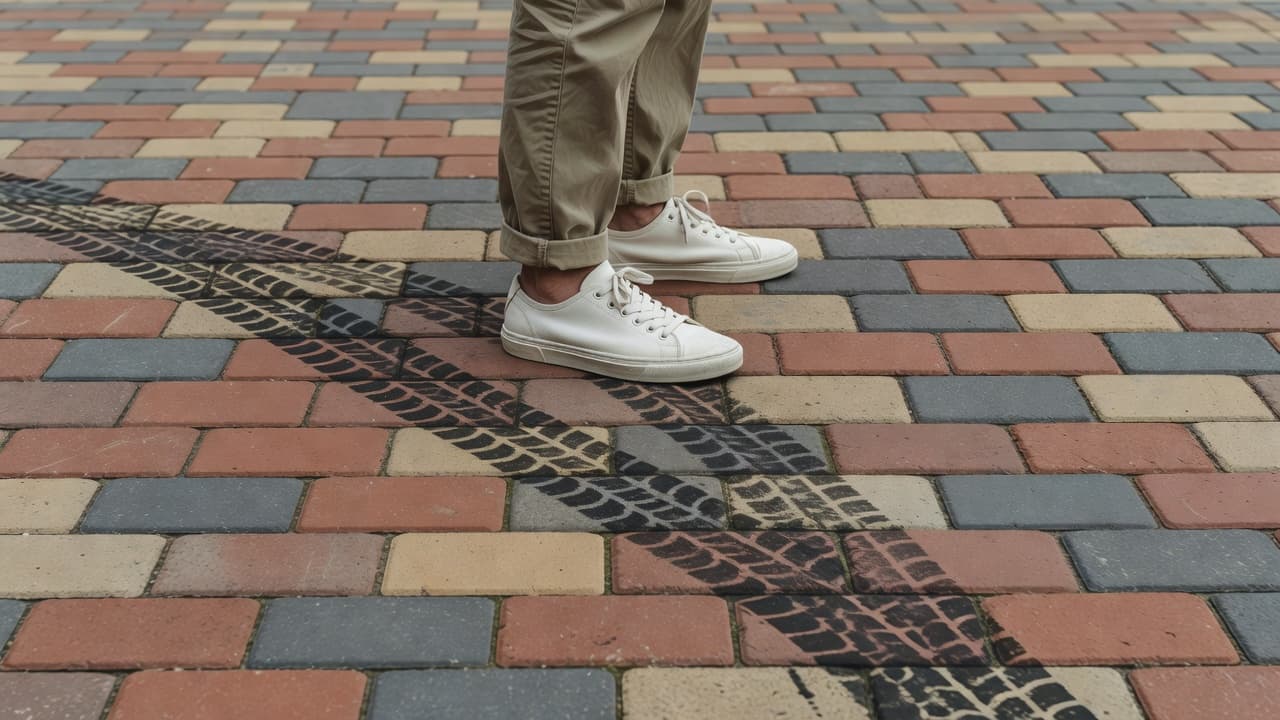
Few things make a clean driveway look tired faster than black streaks on pavers. You wash the car, tidy the yard, step back, and there they are.
I don’t panic when I see them because most tire marks on driveway pavers are simply surface stains rather than permanent damage. These marks are often caused by hot tires transferring rubber residue onto concrete pavers, which is a common occurrence after a long drive or on a particularly sunny day. The trick is not brute force. It is using the right cleaner, the right brush, and a little patience.
Here is how I handle it without making the driveway look worse.
Key Takeaways
Identify the stain: Before cleaning, verify the mark is rubber by rubbing with soap; if it smears, it is likely tire residue rather than oil or rust.
Start with a gentle approach: Avoid aggressive methods initially by using a stiff nylon brush and a mild degreaser to lift surface rubber without damaging the stone.
Protect your joints: When using a pressure washer, keep the nozzle at a distance and avoid high-pressure, direct streams to prevent stripping away the vital joint sand.
Avoid harsh chemicals: Skip wire brushes and strong acids, which can dull your paver color, alter the finish, or damage the protective sealer.
Apply a quality sealer: Maintaining a high-quality paver sealer helps prevent rubber from penetrating deep into the stone, making future tire marks much easier to remove.
I start by making sure it’s really a tire mark
Not every dark spot on interlocking pavers comes from tires. Some stains are oil, some are mildew, and some are plain old dirt that settled into the surface texture.
Rubber marks usually look like black or gray scuffs on the surface. I see them most often where a car turns, brakes, or backs out with the wheel cranked. This is often caused by hot tire pickup, where the heat from the rubber causes plasticizer migration from the tire into the stone. Hot weather makes these marks show up faster, because warm rubber softens and sticks more easily to the surface.
If I am not sure what I am looking at, I do a quick test. I wet the area and rub it with a little dish soap on a rag. If the mark smears slightly or lightens, it is usually rubber. If it stays greasy, rusty, or green, I know I am dealing with something else.
I also look at the paver sealer, if the stones have been treated. High quality paver sealer usually helps release tire scuffs more easily. Conversely, old or faded sealer can act like a sponge, allowing the rubber to penetrate deeper into the material.
That matters, because my cleaning plan depends on the surface. I want to lift the rubber without roughing up the pavers or stripping away the protective coating.
My step-by-step way to clean driveway pavers
I always start with the gentlest method that has a real shot at working. That is slower up front, but it saves me from fixing damage later.
Here is the routine I use:
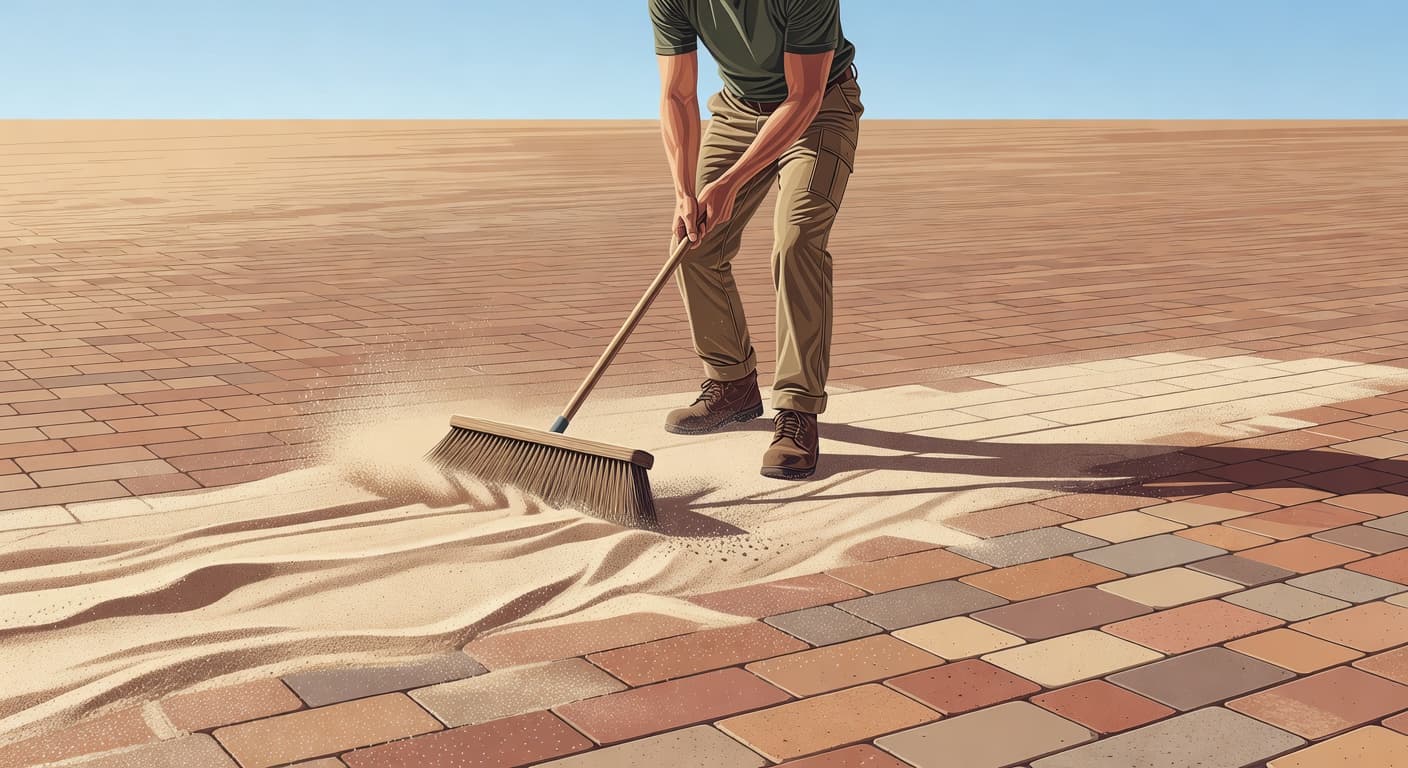
I sweep the area first, so grit does not scratch the pavers while I work.
I wet the stain with plain water and let it sit for a minute.
I mix warm water with a small amount of dish soap, a dedicated degreaser, or other specialized cleaning solutions designed for masonry.
I begin scrubbing with a stiff nylon brush, as a wire brush can damage the surface.
I rinse well and check the mark after the pavers dry a bit.
If the stain is still there, I repeat the scrubbing process before I move to pressure washing.
That first round handles a lot more than people expect. Rubber often sits on the top layer, so it does not need anything dramatic. It needs friction, cleaner, and time. Because friction is the key to lifting the rubber, I work in small circles and stay focused on the mark. I do not flood the whole driveway with strong chemicals and hope for the best, as that approach wastes product and can leave patchy spots.
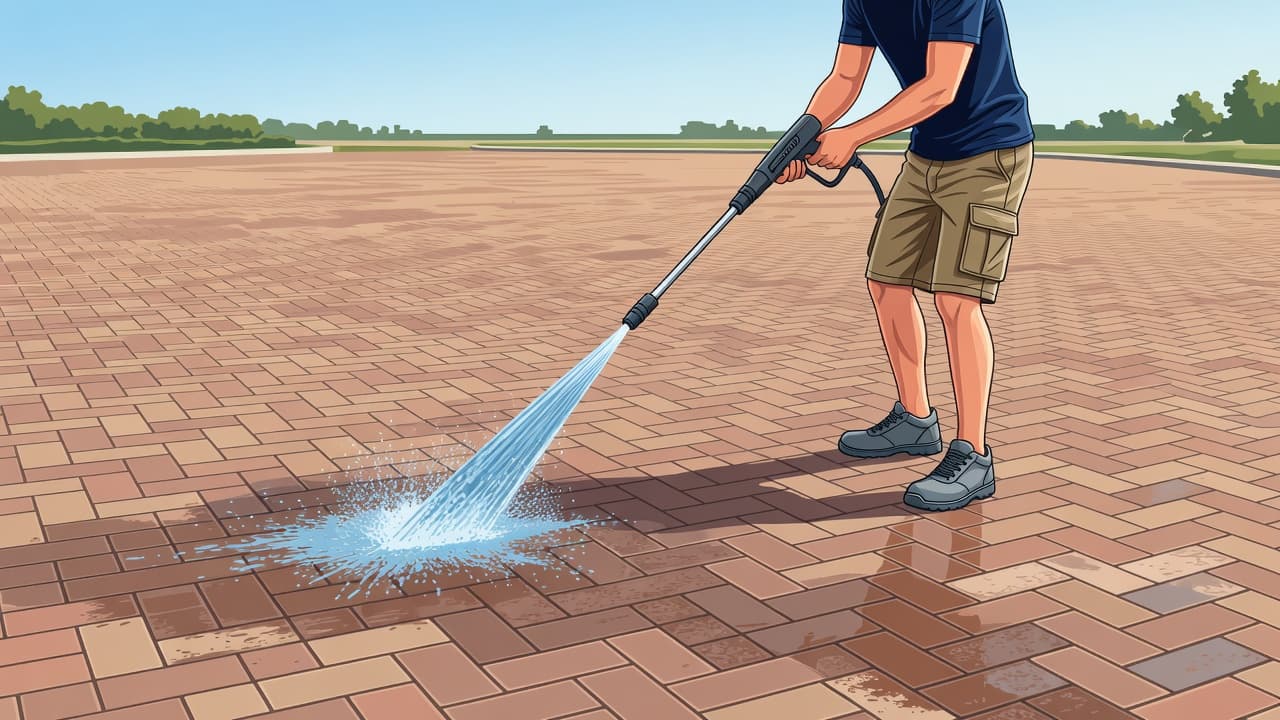
If scrubbing does not get it done, I bring in a pressure washer, but I treat it like a scalpel rather than a sledgehammer. Tire tracks are much easier to remove when the surface is cool, so I prefer working in the shade. I use a fan tip, keep the wand moving, and hold it far enough back that I am not carving lines into the stone. I also avoid blasting straight down into the joints. Note that high moisture levels or high humidity can slow down the drying time during your inspection, so keep an eye on the weather.
My goal is to remove the rubber, not wash out the joint sand.
That is the part people skip. You can clean the mark and still create a new problem if you strip out sand between the pavers. Once that happens, the surface can loosen up, weeds can move in, and the repair bill gets bigger.
I never use a metal brush on brick pavers. I also stay away from harsh acid for rubber marks. Acid has its place on some stains, but tire scuffs usually do not need it. Too much chemical strength can dull the color or mess with the finish.
If the stain is stubborn, I let the cleaner dwell a little longer and try again. Slow and steady wins this one. Tire marks on driveway pavers can be annoying, but they usually give up before the pavers do.
What I avoid, and when I stop DIY
There are a few mistakes I avoid now. I do not scrub with steel, I do not use random cleaners from the garage shelf, and I do not put the pressure washer nozzle two inches from the paver face. That is how a simple stain turns into permanent damage.
I also avoid cleaning during the hottest part of the day. Soap and cleaner dry too fast on hot pavers, leaving me to fight residue along with the tire marks.
If the driveway looks dull, blotchy, or hard to clean, the surface may need more than spot treatment. When that happens, I consider a full restoration and applying a high-quality paver sealer. Proper surface preparation is the most vital step before applying any protection, whether you choose a water-based acrylic sealer, an epoxy coating, or a penetrating sealer. Always respect the curing process and the total cure time of these products, as this is essential to prevent future damage from hot tires on concrete pavers. A professional finish makes future maintenance much easier.
If you would rather skip the trial and error, this is the point where I suggest bringing in a pro. A skilled contractor can tell the difference between a simple rubber mark and a surface that needs professional restoration. If you want another set of eyes on it, you can Get a Free Quote and have the driveway inspected before the marks settle in deeper.
The biggest thing I keep in mind is that not every stain needs maximum force. Most of the time, a careful method beats an aggressive one.
Frequently Asked Questions
Why do hot tires leave marks on my pavers?
Hot tires leave marks because the heat causes the rubber to soften and release plasticizers, which then stick to the surface of the pavers. This is especially common during warm weather or after a long drive when the tires are at their highest temperature.
Can I use a wire brush to scrub off stubborn tire marks?
No, you should never use a wire or metal brush on paver surfaces. These tools can scratch and permanently scar the texture of the stones, creating more damage than the rubber mark itself; always stick to a stiff nylon brush.
Is it necessary to reseal my driveway after cleaning it?
If your sealer is old, faded, or was stripped away during the cleaning process, applying a fresh coat is highly recommended. A good sealer acts as a protective barrier that prevents rubber from penetrating the stone, making subsequent cleanings much simpler and faster.
Should I use a pressure washer for every tire mark?
You should reserve the pressure washer for marks that do not respond to manual scrubbing with a degreaser. When you do use one, it is important to treat it like a precise tool rather than a sledgehammer to avoid damaging the joint sand or the surface of the pavers.
Conclusion
Those black streaks look worse than they are. When I remove tire marks from driveway pavers, I start gentle, clean in small sections, and only step up to pressure washing when the stain asks for it. Using a quality degreaser early in the process often removes these stubborn marks without the need for harsh chemicals.
Remember that respecting the curing process of your pavers and sealers is the best long-term defense against future stains. That careful approach protects the pavers, the joint sand, and the finish. A clean driveway should not come at the cost of a damaged one, and following these steps will keep your tire marks driveway pavers maintenance simple and effective for years to come.
A sealer is supposed to make pavers look richer, not chalky and washed out. When a patio or driveway dries with a milky film or a noticeable white haze, I know something went wrong during the application process.
The good news is that a cloudy paver sealer usually leaves clues. Once I know whether the issue is moisture, buildup, residue, or a bad product match, the fix gets a lot clearer.
Start with the finish itself, because the way that haze looks tells me a lot.
Key Takeaways
Cloudy paver sealer typically results from trapped moisture, excessive product buildup, surface contaminants like efflorescence, or chemical incompatibility between sealer layers.
Moisture trapped during the curing process—often from rain, dew, or damp joint sand—is the most common cause of a milky, “blushing” appearance.
Avoid the common mistake of applying additional sealer to hide a haze, as this usually exacerbates the issue and complicates the eventual removal process.
Successfully restoring a cloudy finish requires correctly identifying the root cause through testing and, in severe cases, using professional-grade strippers to remove the failed layer entirely.
What a cloudy finish is really telling you
When paver sealer turns cloudy after it dries, the haze is usually trapped within the sealer film. It might look like a white haze in bright sun, or it may take on a dull, milky appearance that hides the natural color of the stone. Sometimes the whole surface loses its luster, while other times, you might only see blotchy patches near the joints, low spots, or shaded areas.
If the pavers looked fine before sealing, the issue rarely lies with the brick itself. Instead, this type of sealer failure usually stems from what got trapped under the coating or how the product reacted while it cured. Most often, the film has either grabbed trapped moisture, locked in surface dust, or dried in a layer that is far too thick for the substrate.
If the haze showed up after sealing, applying another coat usually will not fix it.
That distinction matters, because taking the wrong next step can turn a minor surface blemish into a full strip and reseal project.
The most common reasons paver sealer turns cloudy
Moisture got trapped under the sealer
Water is the most common culprit. Rain, sprinkler overspray, morning dew, and damp joint sand can all leave a milky finish behind. In humid climates, the surface may feel dry to the touch while the joints still hold onto trapped moisture. As the sealer cures, that water pushes against the film, resulting in a foggy look often referred to as blushing.
The sealer was applied too heavily
This is a frequent mistake. Many homeowners assume that more sealer equals better protection or a higher shine, but that is rarely the case. This over-application often causes the product to puddle instead of bonding evenly. When a thick film dries, it frequently turns hazy, sticky, or develops glossy, uneven patches. If I notice drip marks, roller lines, or shiny islands, I immediately suspect that the product was laid on too thick.
The surface wasn’t fully clean
Sealer locks in whatever is already on the pavers. Fine dust, leftover cleaner, pressure washing residue, or even a persistent polymeric sand haze can all cloud the finish. Efflorescence is another major factor. This white, chalky salt deposit naturally migrates to the surface of concrete. If you seal over these deposits without proper preparation, the white cast gets trapped and often looks even worse once the sealer dries.
The new sealer didn’t match the old one
Not every product works well over an existing coating. Problems often arise when a contractor fails to identify whether the previous layer is an acrylic sealer, a water-based sealer, or a solvent-based sealer. When these different chemical bases interact, they may fail to bond properly, causing the finish to dry unevenly, peel, or turn cloudy. This is precisely why I always verify the composition of the previous coating before I attempt to apply a fresh layer or fix the surface.
How I narrow down the cause before I touch the surface
I never guess when it comes to troubleshooting, because the wrong fix can make the haze significantly harder to remove. I start by gathering a few simple clues: where the cloudiness sits, whether it changes appearance when wet, and whether the finish feels tacky or smooth. Before I commit to a removal process, I always perform a test patch in an inconspicuous area to see how the sealer reacts to solvents or cleaners.
This quick comparison helps me sort out the likely cause:
What I see
What it usually means
What I check first
White haze over the entire surface
Trapped moisture
Joint sand, humidity, and dry time
Glossy blotches or drip marks
Too much sealer applied
Pooled film on the surface
White haze looks stuck under the coating
Residue or efflorescence
Cleaning history and salt deposits
Patchy failure over an older sealed area
Product mismatch
What sealer was used previously
If I wet a small cloudy area and it briefly clears, trapped moisture is almost certainly part of the problem. I also look at the dry time of the original application, as applying sealer too late in the afternoon or right before a rain event can lock in humidity. If the haze looks raised and plastic-like, the coat is likely too heavy. A white crust coming up through the pavers points me back to efflorescence, not the sealer alone.
More sealer will not hide a cloudy finish. In fact, it usually makes the surface appear even whiter.
That single mistake causes a lot of expensive do-overs for homeowners and contractors alike.
How I fix cloudy paver sealer without making it worse
The fix depends on the cause and how long the sealer has been on the surface. If moisture caused the haze and the job is fresh, extra drying time may help. I look for hot, dry weather, no sprinklers, and no foot traffic while the film settles.
A buildup problem is different. If the coat is too thick or uneven, I often perform a solvent reflow by carefully applying xylene to re-soften and level out the existing film. If the haze is too severe or trapped deep in the layers, the only reliable path is using a professional-grade sealer stripper for complete stripping and resealing.
When residue or efflorescence is trapped below the coating, professional cleaning is mandatory. Resealing over trapped debris only buries the problem. To prevent this from happening again, I always recommend applying thin coats rather than one heavy application. In some environments, switching to a breathable sealer or a high-quality urethane sealer can also provide better long-term durability and clarity.
If a large driveway, pool deck, or patio has turned milky, I avoid trial and error. It is easy to make a small cosmetic issue much worse. If you are struggling with a cloudy finish, you can Get a Free Quote to have a professional evaluate your project for expert paver restoration services before you apply another coat.
Frequently Asked Questions
Why does adding more sealer make the cloudiness look worse?
Applying more sealer over a cloudy surface simply adds another layer of trapped moisture or residue, which hides the natural texture even further. Instead of clearing the haze, the extra product creates a thicker film that seals in the problem, making the milky appearance more opaque and harder to strip later.
Can I fix a cloudy finish by just waiting longer?
If the cloudiness was caused by light surface moisture during the curing process, sometimes additional days of hot, dry weather can allow the trapped water to escape. However, if the haze is caused by excessive product buildup or chemical incompatibility, no amount of drying time will resolve the milky appearance.
How do I know if the cloudiness is caused by efflorescence?
Efflorescence appears as a white, chalky salt deposit that typically migrates from the concrete to the surface. If you see a white crust forming underneath the sealer or patches of hazy white material that look like mineral deposits, it is likely efflorescence that was not properly cleaned before the sealer was applied.
Is it safe to use xylene to fix a cloudy sealer?
Xylene can be used to re-soften and level out a sealer that has been applied too heavily, but it must be used with caution. If you are not experienced with chemical solvents, it is best to consult a professional, as improper use can permanently damage the paver surface or create an uneven, sticky mess.
Final thoughts
A cloudy paver sealer after drying is rarely a random occurrence. When I see this hazy finish, I can usually trace the issue back to trapped moisture, excessive product buildup, surface residue, or the application of an incompatible sealer.
The smart move is to stop, identify the specific cause, and address that issue before attempting any further treatments. Properly sealed pavers should look richer and cleaner, not milky or dull. If your project does not turn out as expected, take a moment to evaluate the surface conditions; remember that the sealer is simply telling you exactly where the application process went wrong. With the right troubleshooting steps, you can restore that professional look and protect your investment for years to come.
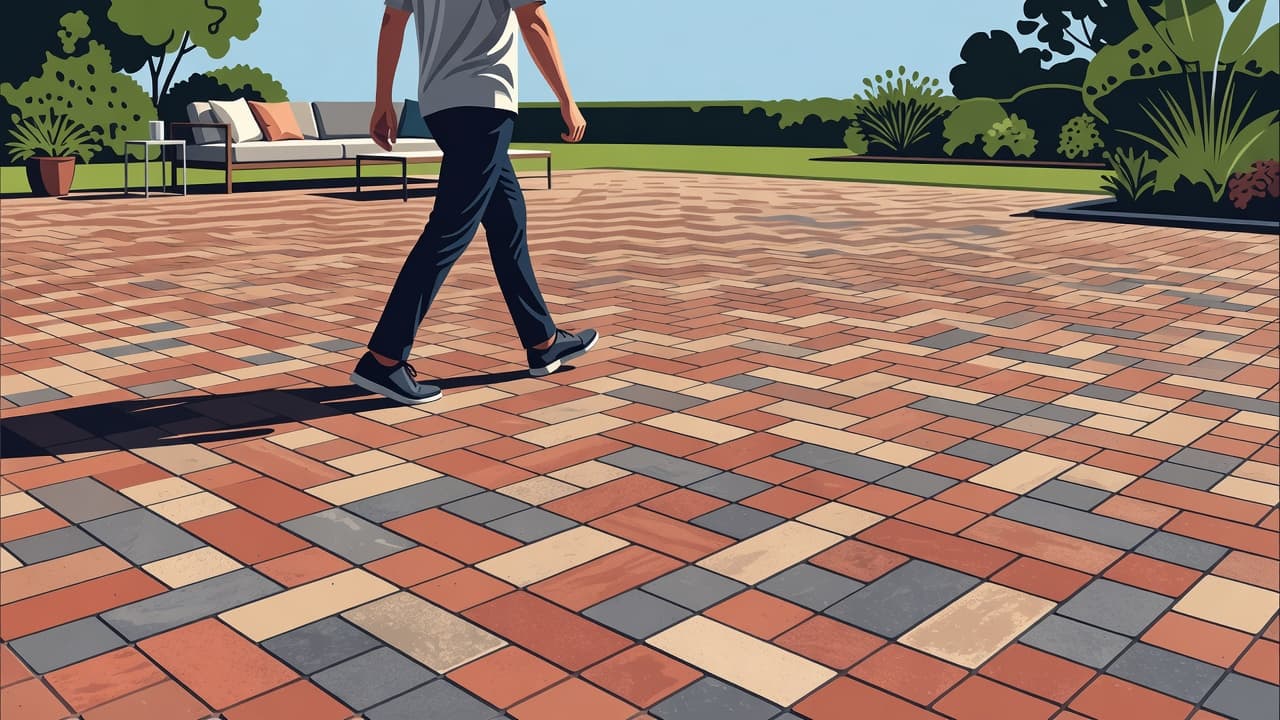
You can tell a lot about an outdoor surface with one walk across it. If your paving stones shift, get slick, or start looking worn after a few seasons, your feet know before your eyes do.
I have always thought the simplest test is the best one. Walk on your walkway or patio after rain, in flip-flops, barefoot, or with your hands full of groceries. That is where the durability of concrete pavers really comes through, providing a level of comfort and stability that goes beyond any sales pitch. That is where the real paver benefits show up.
Key Takeaways
Superior Stability and Feel: Concrete pavers offer a firm, textured surface that provides better grip and a more grounded sensation underfoot compared to plain concrete slabs.
Robust Interlocking System: The structural integrity of pavers relies on a comprehensive system of interlocking units and a compacted base, which allows the surface to handle weight and minor soil shifts without cracking.
Ease of Maintenance and Repair: Unlike poured concrete, which often requires complete replacement if damaged, pavers can be individually removed and replaced, making utility repairs and localized fixes simple and non-invasive.
Enhanced Curb Appeal: Beyond their functional benefits, pavers add character and visual rhythm to outdoor spaces, significantly increasing the aesthetic value and finished look of a property.
Why pavers feel better underfoot
One of the most overlooked paver benefits is pure feel. A well-built paver walkway feels firm without being punishing, offering a subtle stability underfoot. It has texture, grip, and a little visual rhythm, so each step feels more grounded, much like the classic sensation provided by high-quality brick pavers.
That matters more than people think. On a patio, you want a surface that feels comfortable when you are moving chairs, carrying food, or walking out with wet feet from the pool. On a front path, you want each step to feel steady, not slick or hollow.
When I walk across a good paver surface, I notice two things right away. First, it feels planted. Second, it does not feel flat and lifeless like a big gray slab.
The joints between pavers help break up the surface, which provides essential slip resistance when the area is built and graded well. That is a big deal for pool decks and walkways in Southwest Florida, where water is part of daily life for much of the year.
The combination of color and texture helps as well. Pavers usually look warmer and more welcoming than plain concrete, which changes how a space feels to use. A patio should invite you in, not remind you of a loading zone.
Of course, none of this happens by accident. If the base is weak or the installation is sloppy, even great-looking pavers will not feel right. But when the work is done well, the comfort is immediate. You do not have to think about the engineering. You simply feel the difference.
Interlocking pavers stay solid because the system works
I have heard people talk about pavers like they are just small bricks lined up in a row, but that misses the point. The real strength of interlocking pavers comes from the system itself, not just the individual pieces.
Each paver locks into its neighbors, creating a unified field. Under that surface is a compacted base, bedding material, and edge restraint that helps the entire area hold together. When weight lands on one area, the load spreads out across the surface instead of stressing a single, vulnerable point.
This is why these systems handle daily foot traffic so well and why driveway pavers are such a reliable choice for heavy loads. A poured concrete or stamped concrete slab is one rigid piece, so if the ground moves underneath, it is forced to crack. In contrast, the design of concrete pavers provides flexibility, which is essential in regions with frequent freeze-thaw cycles or shifting soils. Additionally, you can choose permeable pavers, which allow the system to manage water runoff efficiently by letting it drain through the joints.
A paver surface stays strong because it can handle small movement without turning one tiny problem into one big crack.
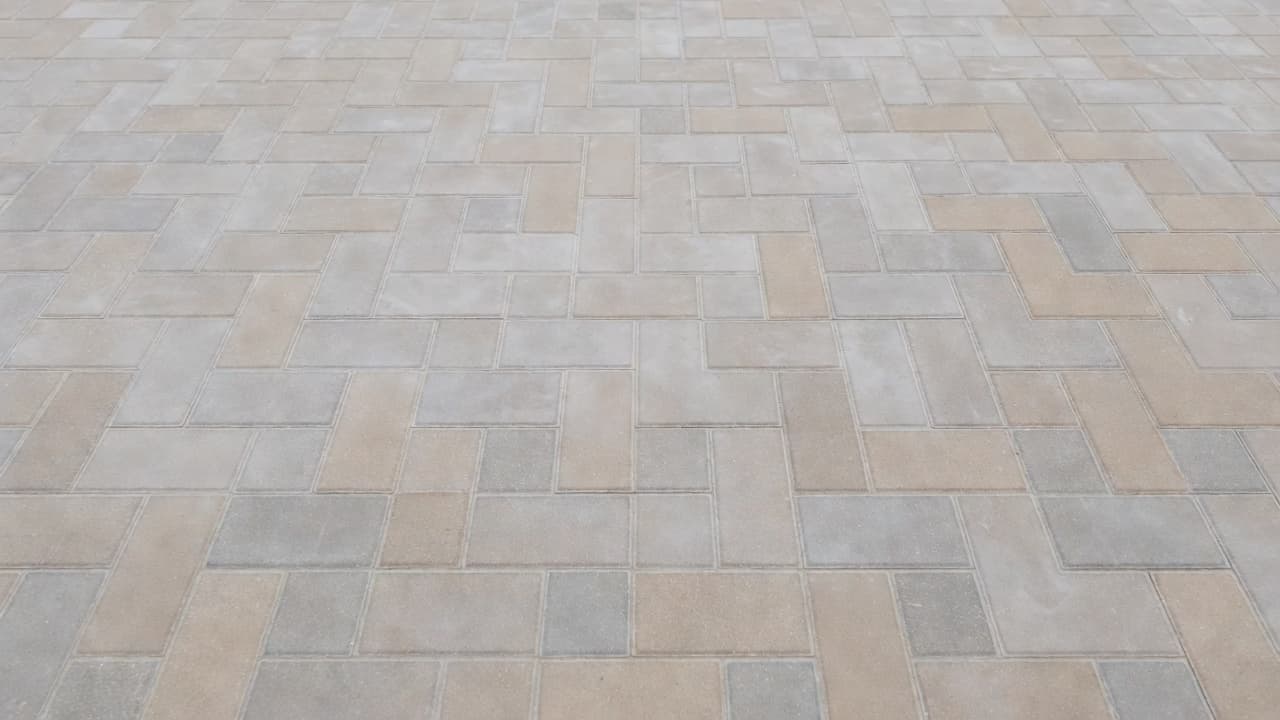
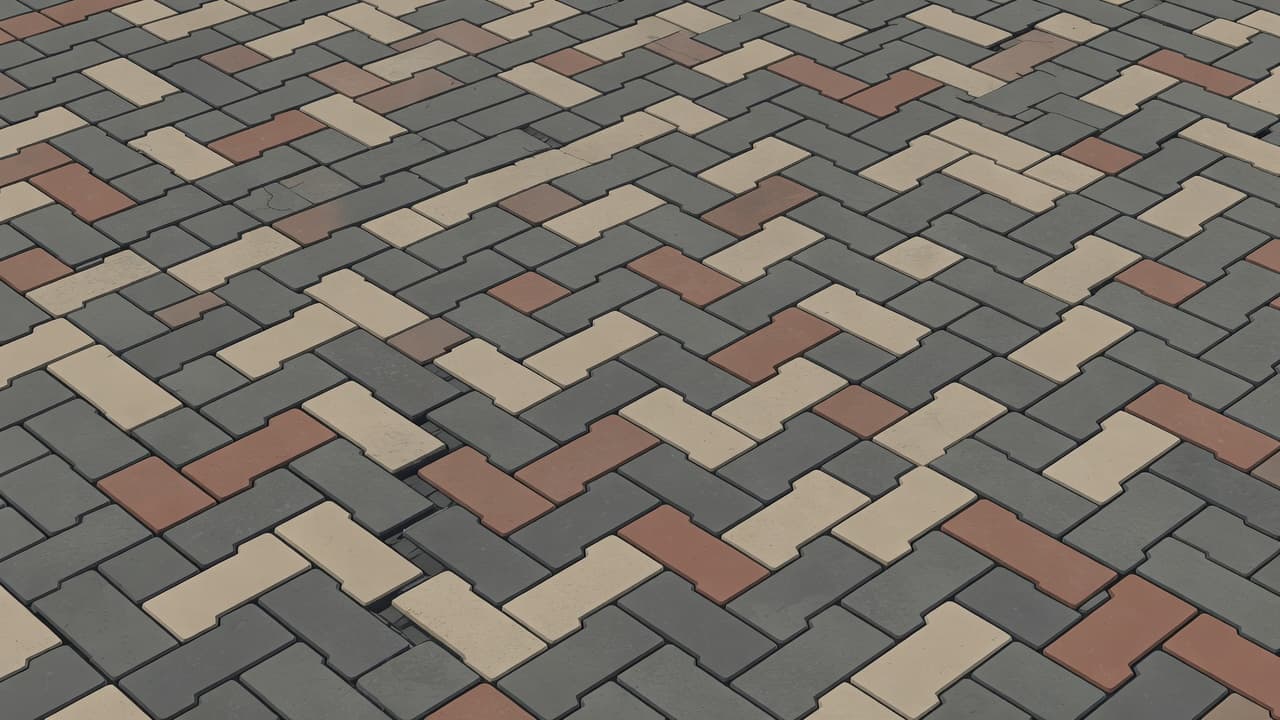
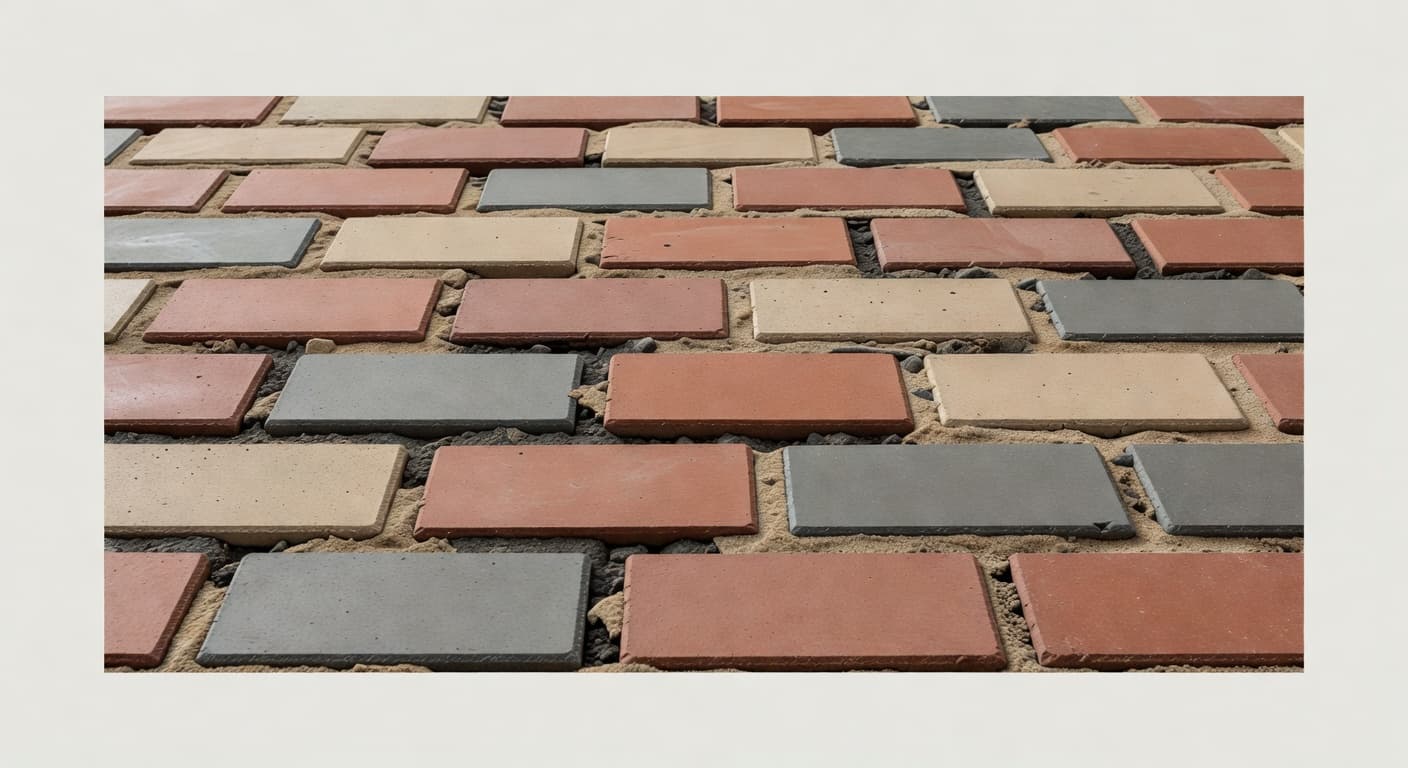
You can see that tight, stable fit in the pattern itself.
I like to compare it to a cobbled-together team versus a professional offensive line. One group is just standing near each other, while the other is actually working together. Pavers work together.
This collaborative structure also helps with long-term appearance. Because the surface is made of many units, it does not advertise every bit of stress the way a monolithic slab does. With concrete, one crack can draw your eye from across the yard. With pavers, the pattern keeps the surface looking orderly even after years of use.
When homeowners ask me why pavers feel so solid when you walk across them, this is the core of the answer. They feel reliable because they are built as a comprehensive system rather than poured as a gamble. Ultimately, this structural design is what provides such exceptional durability and longevity.
Repairs are simpler, and that saves a lot of headaches
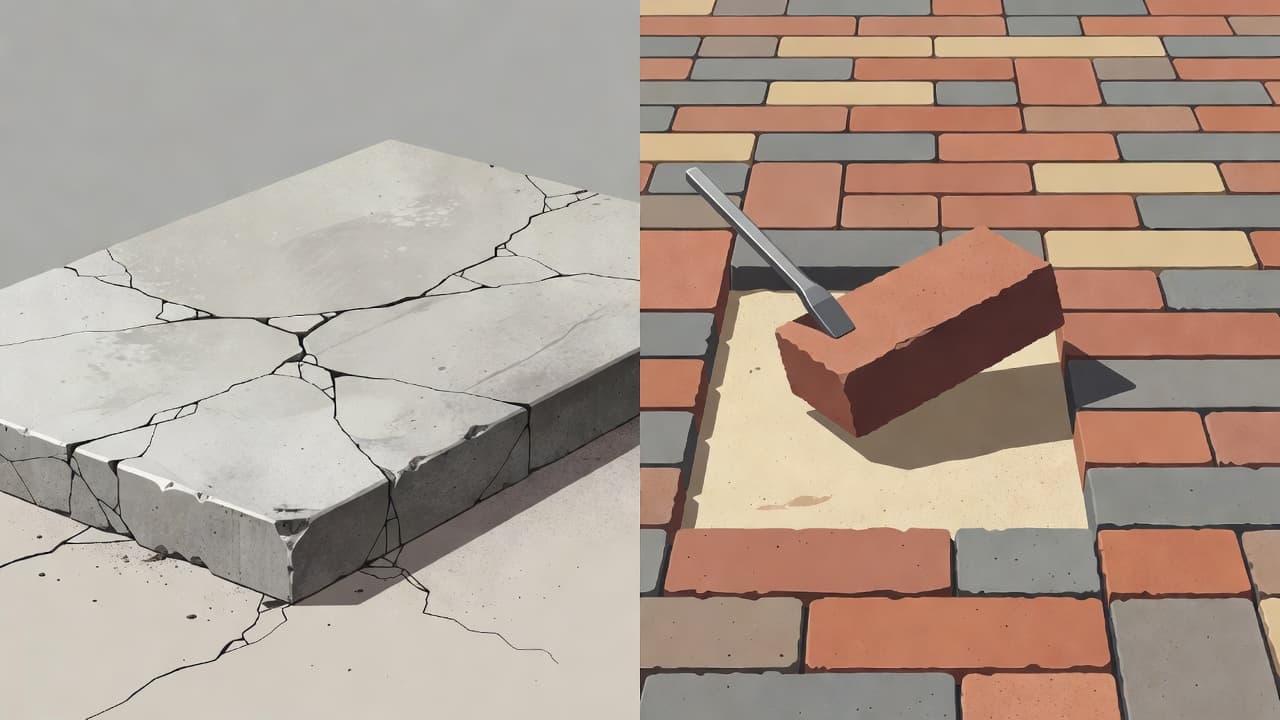
This is where pavers pull away from concrete in a practical, homeowner kind of way. If one section settles, stains badly, or gets damaged, you usually do not have to tear out the whole area. Instead, replacing a damaged paver is a straightforward process where you lift the affected units, fix the problem underneath, and put the surface back together.
That sounds small until you live with a cracked slab. Then it sounds glorious.
Tree roots grow. Water lines need work. Soil settles. Life happens. With pavers, you often have a repair path that is cleaner and more targeted than demoing a large section and hoping the patch will not stand out forever.
I have always liked how honest this material is. If a spot needs attention, you can usually get right to that spot. There is no giant scar, no weird patch color, and no long stretch of ignoring problems until they become major eyesores.
These materials are known for being low maintenance. While the initial installation cost might be a factor to consider, the long term savings provided by easy repairs add up quickly. Regular cleaning is generally sufficient for most hardscaping projects. In many cases, sealing helps protect the color and makes cleanup easier, especially in high use areas like pool decks and driveway pavers. If weeds show up in joints or joint sand needs refreshing, those are manageable issues, not the start of a total failure.
If your surface already has low spots, shifting pavers, or tired looking areas, it makes sense to deal with them before they spread. You can Get a Free Quote and see whether a repair, reset, or full restoration fits the condition of your space.
For me, this is one of the strongest benefits of pavers. Good design matters, but easy upkeep matters even more once the project becomes a part of your daily life.
Pavers make a home look more finished
Homeowners rarely choose pavers solely for their practicality. They invest in them because a beautiful hardscape changes the entire mood of a property. By boosting curb appeal, these upgrades provide a tangible increase in property value. Whether you are installing a paver patio or choosing driveway pavers, the right selection of paving stones significantly enhances your home value, often providing a high return on investment when it comes time for resale value.
A plain slab functions well enough, but a well-designed paver surface does the job while adding character. Through careful choices in pattern, color and texture, and border designs, your hardscape becomes an integral part of your home architecture rather than an afterthought.
That does not mean a project needs to be flashy to be effective. Some of the best hardscaping projects are subtle. A clean running bond path, a tidy soldier course border, or a warm-toned deck made of concrete pavers or natural stone can make a house feel finished without shouting for attention.
Here is the quick side-by-side view most homeowners care about when weighing their options:
What you notice
Pavers
Poured or Stamped Concrete
Underfoot feel
Textured, grippy, and more forgiving
Smoother, often harsher underfoot
Repairs
Single units can be reset or replaced
Repairs usually leave visible, permanent patches
Appearance
Pattern, color, and border options
One broad slab with less character
Maintenance
Low maintenance and easy to refresh
Cracks and stains stand out fast
Financials
Adds lasting resale value
Lower initial installation cost
The takeaway is simple. Pavers perform multiple roles at once. They hold up to heavy use, they clean up easily, and they frame an outdoor living space in a way that poured or stamped concrete rarely does. I have seen patios become true gathering spots after a quality install, not because the square footage changed, but because the space finally felt complete.
This is the detail people often miss. A better walkway gets walked on more, and a better patio encourages more time spent outside. A well-designed deck makes the entire backyard feel like a destination rather than leftover space.
Frequently Asked Questions
Are concrete pavers better than poured concrete for driveways?
Yes, concrete pavers are often a superior choice because their interlocking design handles weight distribution better and allows for slight movement without cracking. If a section of a paver driveway is damaged, it can be repaired by replacing only the affected stones, whereas a concrete slab would require a visible patch.
Do paver joints cause weeds to grow?
While weeds can occasionally appear in the joints of any outdoor surface, using high-quality polymeric sand during installation helps minimize this significantly. Regular, simple maintenance like sweeping or applying a sealant can keep your joints clean and prevent debris from taking root.
How do pavers hold up in areas with extreme weather?
Pavers are excellent for regions with freeze-thaw cycles because they are not a single rigid piece; they have the flexibility to shift slightly as the ground moves. This structural design prevents the large, permanent cracks that are common in monolithic concrete slabs during seasonal soil expansion and contraction.
Is it difficult to clean and maintain a paver patio?
Maintaining a paver surface is relatively low-effort and generally requires only regular sweeping or occasional rinsing with a hose. For deeper cleaning or to protect the color, a professional sealant can be applied, which also makes the surface more resistant to stains and easier to maintain long-term.
The surface tells the story
If a hardscape feels steady, looks sharp, and can be repaired without major drama, people notice. They may not know anything about base prep or joint sand, but they know the walk feels right.
That is why I keep coming back to pavers. The strongest paver benefits are not abstract. They are right under your feet, every time you cross your driveway pavers, head to the pool, or step out onto the paver patio. Whether you choose the timeless appeal of brick pavers, the versatility of concrete pavers, or the rugged beauty of natural stone, you are investing in a weather resistant surface that stands the test of time.
Ultimately, these paving stones elevate your outdoor living space by combining structural integrity with aesthetic charm. When you prioritize high-quality installation and material selection, you experience paver benefits that transform how you interact with your home every single day.
Water is honest. It goes straight to the lowest point, every time.
If your paver driveway drainage seems fine until a storm rolls through, the puddles are telling you where the system is failing. In most cases, the problem comes down to slope, settling, or water arriving from somewhere it should not. Effective water management is essential for preventing structural damage and ensuring the longevity of your driveway over time.
Once I know which one I am looking at, the repair stops being guesswork. That is where it makes sense to start.
Key Takeaways
Puddles indicate underlying issues: Standing water consistently appearing in the same spot after rain is a clear sign of poor driveway slope, a settled base, or external runoff rather than a problem with the pavers themselves.
Structure is primary: A paver driveway functions as a system where the base layer must be well-compacted and correctly graded to guide water away; surface pavers simply mirror the health of the base beneath them.
Identify the source: Effective repair starts by determining if the water is caused by gravity (incorrect pitch), structural failure (base settlement), or intrusion (downspouts or yard runoff), as each requires a different remedy.
Permanent fixes vs. patches: Adding extra sand or cleaning the surface is ineffective for deep-rooted drainage issues; true resolution often requires lifting the pavers to rebuild the gravel base to the correct grade.
What a puddle on pavers usually means
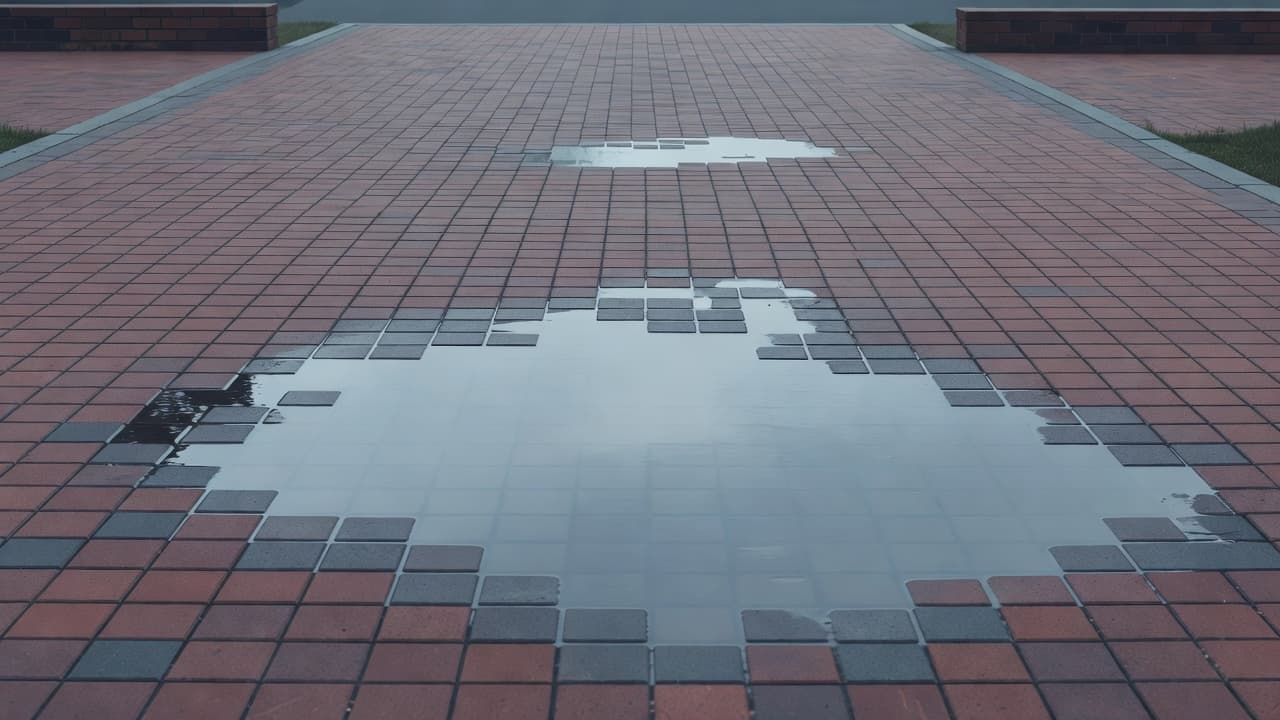
A paver driveway shouldn’t hold water for long. A damp surface right after rain is normal, but a shallow puddle that sticks around hour after hour is not.
When I see water pooling on the surface, I don’t assume the pavers themselves are the issue. Even the highest quality concrete pavers will fail to shed water if the pitch of the driveway is incorrect. I always look at the shape of the driveway first. A driveway should guide water away with a gentle pitch. If it has a dip, even a small one, water will collect there like it found a bowl.
Sometimes the problem is obvious. You can see a low spot in the middle of the drive, near the garage, or where cars usually turn. Other times, the surface looks fine until rain hits it. That is common with settled bases. The drop may be slight, but water does not need much room to accumulate.
Another detail matters here. Not all water on pavers means bad installation. If a heavy storm dumps rain fast, you may see temporary pooling caused by excessive stormwater runoff that simply exceeds the drainage capacity of the area. That is one thing. Water that lingers after the rest of the driveway dries out is entirely different.
If the same spot holds water after every storm, the driveway has a drainage problem, not bad luck.
I also pay attention to where the puddle forms. Water near the garage can point to poor pitch away from the house. Water in the tire path often means base settlement. Water along one edge can mean runoff from the lawn, roof, or a failing border.
The puddle is the symptom. The shape under it is the cause.
How a paver driveway should shed water
A good paver driveway works like a system, not just a pile of brick on dirt. The pavers are only the top layer, and what matters most is the structural composition beneath them and the overall grade of the installation.
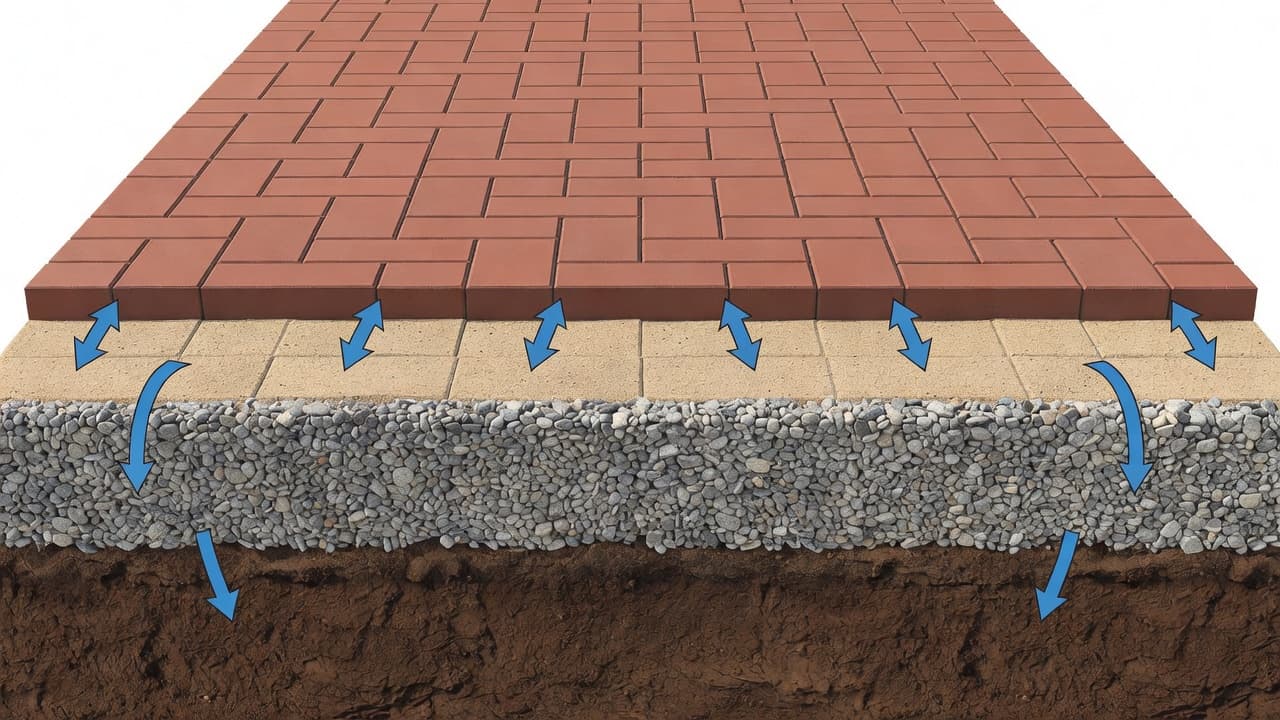
Water management typically relies on two specific processes: surface drainage, which directs runoff away from the driveway, and subsurface drainage, which manages percolation through the joints and into the ground below. While traditional systems rely on a sloped installation to shed water, modern permeable pavers are designed to allow water to pass directly through the joints into the layers beneath, reducing standing water issues significantly.
Under the pavers, there is usually a bedding layer of sand resting on a compacted gravel base. To maintain long-term stability, professionals often install a layer of geotextile fabric between the subgrade soil and this gravel base to prevent the layers from mixing. That base must be stable, well-compacted, and shaped to direct water effectively. If the base is uneven, the pavers above will mirror that problem. Even if the surface looks clean and well-laid, an improperly shaped base will still trap water.
This is where many homeowners get tripped up. Pavers are not a magic drain on their own. If the installer did not create the correct fall in both the base and the surface, the joints cannot compensate for the lack of gravity. Water will always seek the lowest point.
Sealer can confuse the picture as well. A sealed driveway often makes water bead more on top, which can make puddles easier to notice. However, sealer does not create a drainage issue by itself. If water is sitting in one area, there is almost always a low spot or an underlying path problem preventing proper flow.
I think of it like a shallow tray. If the tray is flat and slightly dipped, the water stays put. If the tray is tilted correctly, the water moves. A paver driveway is no different, as successful drainage is entirely dependent on a proper slope and the integrity of the layers beneath.
The common drainage problems hiding under the surface
Most driveway puddles trace back to a short list of causes. The trick is knowing which one you have, because the repair for each is different.
A surface that is too flat is one of the most common issues I see. It does not take much. A driveway can look level to the eye and still be wrong for drainage. If the pitch is too slight, or pitched the wrong direction, water slows down and stops.
Settlement is another big one. Over time, the base below the pavers can sink in spots. This often happens due to poor compaction, weak subsoil, heavy vehicle traffic, or age. In areas with high clay soil content, this base instability is especially common, as the soil expands and contracts, leading to uneven settling. Once the base drops, the pavers drop with it.
Then there is water coming from elsewhere. A downspout dumping onto the driveway, a yard that slopes toward it, or a neighboring slab sending runoff across the pavers can overload the surface. This excess water often accelerates soil erosion around the driveway edges, weakening the foundation. In those cases, the driveway may not be the only thing that needs attention.
This quick comparison shows how I separate one problem from another:
Problem
What I usually see
Drainage solutions
Poor slope
Wide, shallow puddles after most storms
Regrade and relay affected area
Settled base
A dip in one section, often in tire paths
Lift pavers, rebuild base, reinstall
Runoff from roof or yard
Water enters from edge or near downspout
Redirect water with channel drains or grading
Edge failure
Pavers shift outward, water gathers along edge restraints
Reset edge restraint and affected pavers
Surface buildup or heavy sealer
Water beads longer but only in slight low spots
Clean surface, check grade, reseal correctly if needed
The takeaway is simple. Standing water usually points to shape, support, or runoff, not the paver material itself.
I have also seen clogged joints and neglected surfaces make drainage worse. Dirt, algae, and old sand can slow how water moves through the joints. That is rarely the root cause of a deep puddle, but it can add to the problem.
When the fix is simple, and when it isn’t
Some drainage issues are small enough to handle without major reconstruction. Others need pavers lifted and the base rebuilt. The hard part is telling the difference before money gets wasted.
If the problem is minor surface buildup, a proper cleaning may help. If the issue is water dumping from a downspout, rerouting that downspout or installing catch basins or a French drain system can make a big difference. If a film-heavy sealer is trapping water visually, stripping and resealing the right way may improve how the driveway behaves.
But if the puddle sits in the same depression every time it rains, cleaning won’t solve it. Neither will adding more joint sand. That is when I start thinking about lifting that area, correcting the base, and relaying the pavers to the right grade.
Low spots near the garage deserve extra attention. Water against the house is a bigger concern than a puddle near the street. The same goes for any area where runoff crosses a walkway or reaches a pool deck.
A proper repair might include regrading, rebuilding part of the base, or implementing advanced drainage solutions. For heavy runoff, we may install a channel drain, a robust trench drain system featuring HDPE channel drainage, or dry well solutions for water that cannot be sloped toward the street. The right fix depends on where the water starts, not only where it ends up.
If you are tired of guessing, it is smart to Get a Free Quote and have the driveway checked before the settled area spreads. Small dips tend to grow, not heal.
What I do not recommend is topping a low area with extra joint sand under a few loose pavers and calling it done. That almost never lasts. If the support below failed, the support has to be rebuilt.
How I inspect a wet driveway before I talk repair
I like to inspect drainage as close to a rain event as possible. That tells me more than a dry driveway ever will. Fresh water marks show where flow starts, where it slows, and where it stops.
First, I look at the puddle itself. Is it isolated, or part of a larger drainage path? Is it in a tire lane, near an edge, or at a transition point? Then I check the surrounding grades, especially the lawn, curb, downspouts, and any nearby hard surfaces.
After that, I check for movement. Loose pavers, widening joints, leaning edges, and sunken bands often tell me the base shifted. A straightedge or level helps confirm what the eye misses. When these sunken areas appear, it is a clear sign that the structural integrity of the driveway has been compromised. In a standard installation, the compacted gravel foundation should remain rigid. However, if I am inspecting permeable pavers, I have to look closer at the jointing material, as the criteria change significantly if the joints become clogged and prevent water from reaching the permeable base system beneath.
Here are the signs that usually point to a base problem instead of a simple surface issue:
The same dip appears after every storm.
The pavers feel uneven when I walk or drive over them.
Water collects where the surface has also started to sink or shift.
I also ask one practical question: how long has this been happening? A new puddle matters more than an old one that has been unchanged for years. A sudden change can mean washout, erosion, or a developing failure under the surface.
That kind of inspection is what keeps a repair targeted. No guesswork, no patching the symptom while the real problem stays put.
Frequently Asked Questions
Can I fix a puddle by just adding more sand under the pavers?
No, that is only a temporary cosmetic fix that will fail quickly. If the base below has settled or the slope is incorrect, you must lift the pavers, properly re-compact the underlying base, and relay them to restore the correct grade.
Will sealing my driveway cause water to puddle?
Sealer does not cause drainage issues, but it can make existing puddles more noticeable by preventing water from soaking into the joints. If your driveway beads water and holds a puddle, the issue is a low spot or incorrect pitch, not the sealer itself.
Is it normal to see water on my pavers after a heavy storm?
A thin film of water that dries quickly is normal, but water that lingers for hours or days indicates a design or installation flaw. If the same area remains wet while the rest of the driveway is dry, you have a specific drainage problem that needs inspection.
How do I know if my driveway base has settled?
You can usually identify base settlement if you notice a consistent dip in a specific area, especially in the tire paths, or if the pavers feel loose and uneven underfoot. If these depressions appear alongside standing water, it is a strong indicator that the structural foundation has failed.
Conclusion
When a paver driveway holds water after rain, the surface usually points to a deeper issue. It may be a low spot, a settled base, or runoff coming from outside the driveway. Addressing these concerns is essential for effective stormwater management, as proper drainage protects your home foundation from moisture damage and erosion.
The strongest clue is consistency. If water keeps returning to the same place, the shape of the driveway needs attention. By resolving these drainage problems, you restore the curb appeal of your property and ensure the longevity of your investment.
A good-looking paver surface can still hide a drainage flaw. Once the grade and base are corrected, the puddles disappear. For those considering upgrades, installing permeable pavers offers an eco-friendly solution that encourages natural groundwater recharge and prevents future drainage headaches.
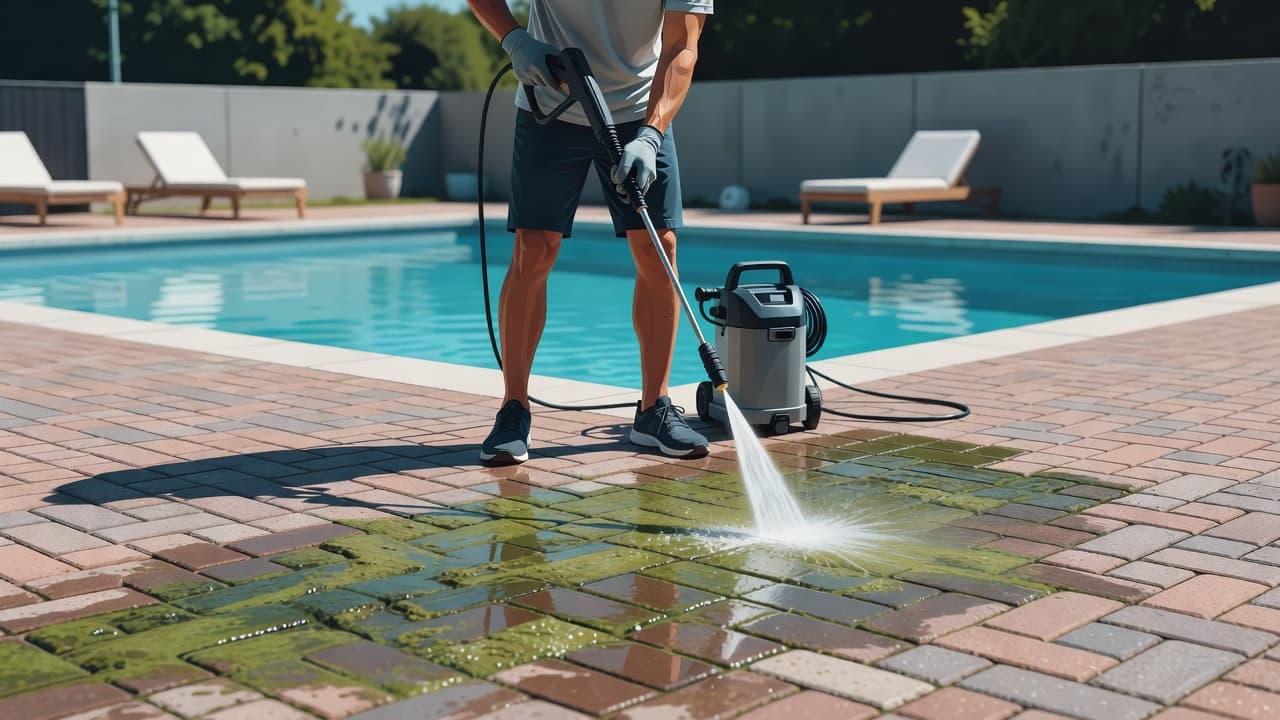
A slick pool deck can turn a relaxing backyard into a wipeout waiting to happen. When I see that green film creeping across my pool deck pavers, I do not think of it as just a cosmetic problem. I view it as a serious slip hazard.
Algae loves pool areas for obvious reasons, including water, shade, heat, and debris. The good news is that I can remove algae from pool deck pavers without tearing up the surface, provided I use the right method and a little patience.
Key Takeaways
Prioritize Safety: View algae on pool deck pavers as a significant slip-and-fall hazard rather than just a cosmetic eyesore.
Start Gentle: Always use the least aggressive cleaning method first, opting for mild detergents and nylon brushes over high-pressure washing to prevent surface damage.
Protect Structural Integrity: Avoid using high-pressure settings directly on joints, as removing the sand can cause pavers to shift and lose stability over time.
Maintain to Prevent: Regularly sweep away organic debris and ensure proper drainage to eliminate the moisture and food sources that allow algae to thrive.
Why algae keeps showing up on pool deck pavers
Algae does not need much to get comfortable. Give it moisture, a little shade, and some organic debris, and it moves in fast. Around pools, those conditions are common. Splash out keeps the surface damp, furniture creates shadows, and leaves break down in the joints.
I have noticed algae usually starts in the same spots. Corners that do not get much sun, areas near planters, or the strip along the waterline side of the deck are common trouble spots. On a natural stone or travertine pool deck, water can easily pool in these areas, creating the perfect environment for growth. Once it forms, the surface can feel slimy even when it does not look terrible.
That is what makes it tricky. Some homeowners wait because the pavers do not look that bad yet. But algae is not only a stain; it is a traction problem. Wet feet, sunscreen, and a smooth green algae film are a dangerous mix.
If my pool deck feels slippery under bare feet, I treat it like a safety issue first and a cleaning job second.
I also find it helpful to distinguish green algae from other common stains. Algae is usually green, dark green, or blackish in damp areas. Mold and mildew can look similar, but efflorescence is different; that chalky white residue is not biological growth. Rust and leaf stains also need their own specific treatments. If I do not identify the mess first, I can waste time using the wrong cleaner.
What I gather before I start cleaning
Before I try to remove algae from pool deck pavers, I get my supplies together. That keeps me from rushing, guessing, or grabbing a harsh product I do not need.
Here is what I like to have nearby:
A stiff-bristle brush, not a wire brush
A garden hose with a spray nozzle
A bucket for mixing cleaner
Rubber gloves and eye protection
A pH-neutral stone cleaner or a mild detergent
A pressure washer, only if I can use it gently
Plastic sheeting or extra water to protect nearby plants
I start by moving furniture, toys, and planters off the deck. Then I sweep up loose dirt and leaves. That step matters more than people think. If I scrub cleaner over grit and debris, I am grinding dirt into the surface instead of lifting algae off it.
If I am using any cleaner at all, I wet nearby landscaping with my garden hose first. That simple step helps protect roots and leaves from splash. I also read the product label before mixing. With pool decks, I do not take chances with random chemical combinations. Bleach and acidic cleaners should never meet, and stronger is not always better.
One more thing, I test a small hidden area first. Concrete pavers can react differently depending on age, color, and whether they have been sealed before. A quick test patch can save me from a much uglier problem.
How I clean pavers to remove algae without damaging them
When I set out to clean pavers on a pool deck, I do not go straight for maximum pressure. That is the fastest way to scar the surface, strip sand from joints, and turn a simple cleaning project into a costly repair bill. I always use the least aggressive method that gets the job done safely.
This is the order I follow to clean pavers effectively:
I wet the surface first. A damp surface helps the cleaner spread more evenly and keeps it from drying too fast in the sun.
I apply the cleaner based on the manufacturer label. If I am using oxygen bleach, I mix it with water as directed. If I use a store-bought algae cleaner made for masonry or pavers, I stick to those specific instructions.
I let the solution sit for a short time. Usually, a few minutes is enough to break down the growth. I never let the cleaner bake dry on the deck.
I begin scrubbing with a nylon brush. This scrubbing step is essential for porous stone surfaces like a travertine pool deck, as the texture often hides deep-seated organic growth. I put extra effort into the joints and textured spots where algae likes to hang on.
I rinse the area thoroughly. A garden hose is often enough after scrubbing. If I use a pressure washer, I keep the tip moving, use a wide fan spray, and stay at a safe distance from the stone.
I let the surface dry and check my work. Some stubborn patches may require a second round of treatment.
The biggest thing I watch with pressure washing is the joint sand. Interlocking pavers need that joint sand to stay stable. If you blast it out, the deck can loosen up over time. I always avoid pointing high pressure directly into the joints or holding the wand too close to one spot to protect the structural integrity of the patio.
For light algae, a brush and cleaner often do the job without power washing at all. For thicker buildup, gentle pressure can help after the cleaner has loosened the growth. That order matters. Cleaner first, pressure second, not the other way around.
If the surface was sealed in the past, I check it after cleaning. A failing sealer can trap dirt and create patchiness. If water soaks into some spots and beads on others, the old finish may be uneven. That does not always mean the pavers are ruined. It often means the deck needs a proper professional clean and a fresh coat of sealer after it fully dries.
Mistakes I avoid when algae is on brick pavers
I have seen pool decks get damaged by quick fixes more often than by the algae itself. The surface usually gives plenty of warning, but by then, the mistakes are already made. When you set out to remove algae from your pool area, your primary goal should be to clean the surface without compromising its structural integrity.
The first mistake is using too much pressure. While a pressure washer can help, it can also etch the pavers, rough up the face, or wash out joint sand if the setting is too high. Once that happens, the deck can start shifting or looking patchy.
The second mistake is grabbing the harshest chemical on the shelf. Straight chlorine bleach can lighten some pavers, harm nearby plants, and leave a stubborn chlorine residue that affects the color and safety of the stones near the pool. Acid based cleaners can be even worse if they are not specifically made for your material. I do not use any cleaning agent unless I know it is safe for the paver type and the surrounding landscape.
Another bad move is sealing over a dirty deck. Sealer locks in what sits underneath. If algae spores, moisture, or stains are still there, the problem does not disappear. It simply gets trapped.
I also skip wire brushes and metal scraping tools. They can scratch the face of brick or concrete pavers, which gives algae more surface texture to cling to later.
If I see sunken pavers, standing water, or joints that keep washing out, I know cleaning alone will not fix the whole issue. Keep in mind that mineral deposits can sometimes be mistaken for other stains and should be handled with specific products rather than the methods used for organic growth. Algae may often be the symptom, not the root cause.
How I keep the green film from coming back
Getting rid of algae is one job, but keeping it gone is the better one. I do not expect a spotless deck forever, especially in humid climates, but I can certainly slow down the rate of regrowth.
The simplest habit is regular sweeping. Leaves, dirt, and pollen hold moisture, and once they sit, they feed the problem. I also rinse off sunscreen spills, mulch, and anything else that builds up in shaded corners. Keeping the surface clean helps ensure it remains slip-resistant and safe for everyone walking around the pool.
Drainage matters too. If water puddles in the same area after rain or pool use, algae will likely return there first. Sometimes the fix is simple, such as clearing a drain, adjusting irrigation, or trimming plants to allow more sunlight. If you have gaps between stones, applying polymeric sand in the joints can prevent future growth and maintain the structural stability of the deck.
To provide a long-term defense, I seal the pavers once they are thoroughly clean and dry. Using a quality paver sealant reduces the absorption of water and organic debris, which makes routine washing much easier. When you choose to seal the pavers, you create a barrier that protects the stone and keeps the area looking its best. On older pool decks, professional cleaning and sealing often make a bigger difference than another round of DIY scrubbing.
I also stay ahead of the issue. When I spot the first green haze, I clean it immediately. Waiting for a thick, slick layer to form never pays off.
When I stop scrubbing and call a paver pro
Some pool decks need more than a simple cleaner and elbow grease. If you continue to struggle to remove green algae because it keeps returning in the same spots, I start looking for a deeper issue. That could be poor drainage, worn-out joint sand, broken edging, or pavers that have shifted enough to hold water.
I also call for help when the deck has stubborn staining, old sealer problems, or large sections that feel unsafe. A professional expert knows exactly how to clean pavers and restore surfaces without causing structural damage, which is a much smarter move than constantly chasing the same symptoms.
If I want the deck repaired or professionally treated, I go straight to a specialist and Get a Free Quote. A solid paver contractor can tell the difference between a simple algae cleanup and a deck that needs professional restoration.
Frequently Asked Questions
Can I use a pressure washer to clean my pool deck?
Yes, but you must use it with extreme caution and a wide-angle nozzle. Keep the pressure low and keep the wand moving constantly to avoid etching the stone or blowing out the joint sand.
Is it safe to use bleach to kill pool deck algae?
Avoid using straight chlorine bleach, as it can be harsh on surrounding landscaping, discolor certain paver materials, and leave behind stubborn chemical residues. Oxygen-based cleaners are generally a much safer and effective alternative for biological growth.
Why does the algae keep coming back after I clean it?
Persistent regrowth usually suggests a deeper issue like poor drainage, low sunlight, or failing joint sand that allows moisture to pool. Addressing the root cause, such as by applying fresh polymeric sand or trimming back vegetation, is key to long-term prevention.
Should I seal my pool deck pavers?
Sealing your pavers is an excellent way to create a barrier against moisture and debris, making future cleanings much easier. Just ensure the deck is completely clean and dry before applying any sealer, as trapping dirt or algae underneath will only make the problem worse.
Conclusion
A green pool deck is not something I ignore, even if the growth starts small. When I remove algae from my outdoor space using the proper techniques, I ensure the surface stays both clean and safe.
My rule is simple: start with gentle methods, clean the surface thoroughly, and do not hide bigger problems under sealer or wishful thinking. A backyard oasis should feel comfortable under bare feet, not slick, stained, or one step away from a dangerous fall. Taking the time to consistently remove algae will keep your home looking its best and protect the longevity of your pool deck pavers.
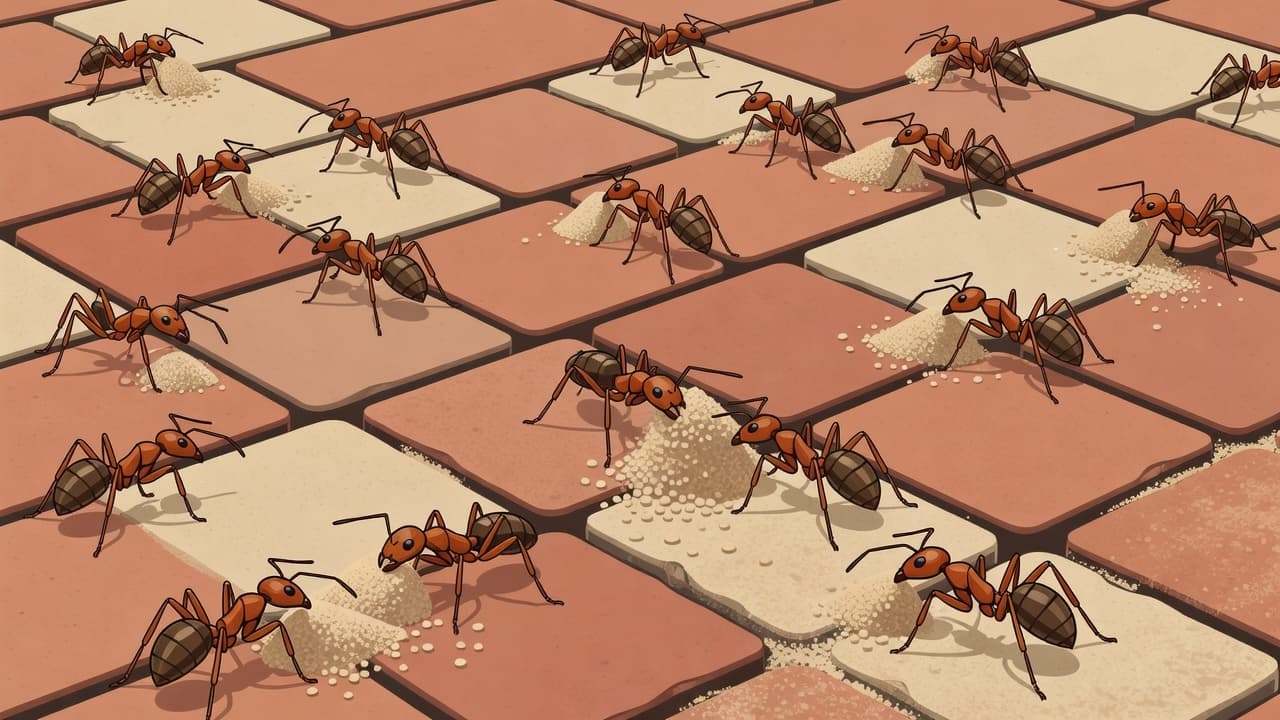
Those little piles of sand between bricks do not show up by accident. When I see ant hills between pavers on a paver patio, I do not only think about bugs. I think about loose joints, trapped moisture, and tiny gaps that turned a patio into easy housing.
If you are brushing the same mounds away every week, the pavement ants are telling you something about the surface under your feet. Once I know why they are there, the fix gets a lot less frustrating.
Key Takeaways
Ant hills between pavers are a symptom of structural weaknesses like washed-out joint sand, hollow voids, or shifting pavers rather than just a pest issue.
Pavement ants are opportunistic and utilize pre-existing gaps, moisture, and warm temperatures to build nests beneath your patio.
Simply sweeping away mounds is ineffective; you must address the underlying voids by cleaning and refilling joints with fresh material, such as polymeric sand.
Persistent ant activity, especially when paired with rocking or sinking pavers, may indicate a failing base or edge restraint that requires professional repair.
Effective long-term control combines targeted baiting to eliminate the colony with sealing the joints to prevent future entry.
Why ants pick paver joints in the first place
Pavement ants aren’t picky; they are opportunists. A paver surface provides them with protected paver joints, dry shelter, and loose sand they can move grain by grain. When I spot ant hills between pavers, I usually know the colony didn’t create the whole problem. It found a structural weakness that was already there.
Most paver systems have joint sand on top and a bedding layer underneath. If the sand in the cracks has thinned out, washed away, or never locked up properly, the joints become small, inviting tunnels. A pest article from The Bug Doctor makes the same point, noting that ants love tiny seams and protected gaps in outdoor stone work.
Straight, repeating joints act like a street grid. Once ants find one route, they can keep reusing it. I also see more tunneling activity where pavers meet a curb, a planter, or the edge of a pool deck. Those transitions often hide little voids, and little voids are all these insects need to establish a network. Worker ants perform this excavation tirelessly, moving grains of sand to expand their living quarters.
Small ant hills between pavers usually mean the joint has become easy to tunnel through.
Warm surfaces help too. Pavers hold heat, especially in sunny yards. That steady warmth speeds up ant activity, while the joint line gives them cover from wind, feet, and hose spray. Some ants barely leave a trace. Others push out enough sand to make the little mounds you notice first.
I see this a lot after joint sand breaks down over time. Once the surface crust is gone, ants do not have to do much heavy lifting. They are moving into ready-made seams. So, the hill itself is often excavated sand rather than a random pile of dirt. Think of it like sawdust under a workbench; the mess on top tells you exactly what is happening below.
What makes the hills show up faster
A few patio conditions make the problem worse. If I keep brushing away fresh piles in the same areas, I look for water, open joints, and movement first.
These are the triggers I see most often:
Patio condition
Why it increases ant activity
Worn or missing joint sand
It gives them easy entry and less resistance
Moisture below with a dry surface
It creates a comfortable nesting zone
Settling or shifting pavers
It opens hidden spaces under the surface
Debris in the joints
It adds food crumbs and cover
The pattern matters. Ant mounds or dirt mounds along one edge may point to a failing edge restraint. Mounds around a downspout or low spot often mean water is washing joint sand away. If they cluster near planters or along a driveway, roots and mulch may be feeding the traffic.
Rain plays a weird role. It can collapse part of a tunnel, then ants bring more material up as they reopen it, causing noticeable sand displacement. Dry weather can do the opposite, leaving the joint loose and easy to excavate. In Southwest Florida, pavement ants respond to this cycle of rain and sun, which can happen fast because the conditions trade off all season.
Pressure washing can play a part too. If old sand gets blasted out and the joints stay half-empty, the patio looks clean but the gaps are wide open. Ants notice those changes faster than most homeowners do. Food matters as well. A grill area with dropped syrup, grease, or pet food nearby can keep foraging lines active.
If ant hills keep showing up in one strip of pavers, I don’t call it a pest quirk. I call it a clue.
How to stop the problem and get rid of ants for good
Sweeping the mounds away only fixes the symptom. If the joints are open, ants will rebuild by tomorrow or next week. That is why ant hills between pavers can feel endless, even when you keep cleaning.
I start by focusing on the surface itself. Clean the joints thoroughly and check the integrity of your joint fill. If your patio uses polymeric sand and it has broken down, replacing it can make tunneling significantly harder for the colony. I also look for drainage issues, loose edges, and low spots that hold water. These problems invite ants and wear down the pavers at the same time. In some cases, persistent issues with shifting indicate a need for an open graded base to ensure proper water management.
For active infestations, effective baiting is often more successful than simple surface sprays. Using a liquid ant bait allows the colony to carry the treatment back to the queen, while applying ant dust or Talstar granules directly into the joints provides a longer-lasting barrier. You can see the trial-and-error side of that in this HomeImprovement discussion, where people talk through what helped and what did not. I treat pest control as one part of the answer, not the entire solution.
Applying a fresh sealer on top will not fix hollow spots below. If the base has started to shift, the ants are only the first thing you notice. When pavers rock underfoot, the joints keep emptying out, or the same strip settles after every rainy stretch, the surface may need professional repair rather than another round of treatment. That is when it makes sense to Get a Free Quote and find out whether the base, sand, or edge restraint needs professional attention.
Kill the ants if you need to, but remember to close the invitation too.
Frequently Asked Questions
Why do ant hills keep coming back in the same spot even after I sweep them away?
Ant hills return because the underlying cause—usually an open or empty joint—has not been sealed. The ants are living in a network of tunnels beneath your pavers, and until you refill those gaps with sand and eliminate the nesting site, the colony will continue to push material out of the same openings.
Is it enough to just use a standard insecticide spray on the joints?
Surface sprays typically only kill the ants you see on top, which does little to affect the queen and colony living deep underground. Baiting is much more effective because the worker ants carry the toxin back into the nest, providing a more permanent solution to the infestation.
How can I tell if my paver issue is just ants or a larger structural problem?
If your pavers are firm and level, the ants are likely just taking advantage of thin joint sand. However, if you notice the stones rocking, sinking, or shifting when you walk on them, it indicates a failure in the base or edge restraints that needs professional intervention beyond simple pest control.
The little mound is the clue
Those tiny hills are not random. They are usually a clear sign of loose joints, washed out sand, moisture, or shifting movement below the surface.
When I see ant hills between pavers, I read them the same way I read a stain on a ceiling. The mess itself is not the whole story. The same spot keeps sprouting the same little volcano because the gap is still open and inviting. If you consistently find ant hills between pavers in the same location, it is a sign that the environment is perfect for intruders.
Brush the mounds away for a quick cleanup, but understand that the issue often goes deeper than the surface. To truly stop the problem, you must address the established ant colonies living beneath the stones and seal the opening that made your patio such an easy place for them to move into.
Florida can humble a paver patio fast. One week the joints look full and clean, the next week rain has carved little trenches between the concrete pavers.
If I am choosing sand for any hardscape projects in Florida, I do not treat it like a minor detail. Polymeric sand usually provides better joint stabilization and a longer lasting result, while regular sand costs less up front but asks for more upkeep.
That does not mean one option fits every project. The right choice for your patio or walkway depends on the condition of the pavers, the weather exposure, and how much maintenance you are willing to live with.
Key Takeaways
Climate Resilience: Due to Florida’s frequent heavy rains, polymeric sand is the preferred choice for most homeowners because it creates a hardened, stable bond that resists erosion and washout.
Maintenance Savings: While regular sand is cheaper upfront, it requires constant maintenance to refill joints; polymeric sand offers better long-term value by inhibiting weed growth and discouraging ant tunnels.
Installation Precision: Polymeric sand is less forgiving than regular sand; it requires specific joint widths, perfectly dry surface conditions, and proper watering techniques to prevent a cloudy, hazy residue on the pavers.
Know Your Surface: Polymeric sand should only be used on structurally sound, stable paver installations. If your pavers are currently rocking or shifting, fix the underlying base before attempting to lock the joints.
Why Florida exposes weak paver joints
When I look at a paver driveway, walkway, or pool deck, I don’t start with the brick color. I look at the paver joints. Those spaces do more work than most homeowners think.
Joint sand helps lock each paver against the next one. It slows movement, helps spread weight, and cuts down on gaps where water, weeds, and insects can move in. If that sand keeps washing out, the whole surface starts losing support.
Florida is rough on loose joint sand. Heavy rain washout is the primary reason for sand loss, as storms frequently rinse it away. Sprinklers can keep it damp and unsettled, while intense heat dries it out until the next storm shifts it again. Ants love loose sand, too. Once they tunnel through the joints, the surface can start feeling hollow underfoot.
I think of joint sand as the zipper in the system. If the zipper opens, the whole thing starts looking sloppy.
That matters even more in Southwest Florida, where sudden downpours are common and concrete pavers take a beating from sun, foot traffic, and runoff. A patio does not have to be old to show it. I have seen newer installs look tired early because the wrong joint material was used, or because the right material was installed the wrong way.
So when people ask me about polymeric sand pavers, I do not hear a small product question. I hear a durability question. I hear a maintenance question. I hear, “How often do I want to keep fixing this?”
Polymeric sand and regular sand do different jobs
Regular sand is standard jointing sand. It fills the gaps, but it remains loose indefinitely, which is why homeowners often ask whether using regular sand between brick pavers is ever a good idea. Polymeric sand starts as sand as well, but it includes binders that firm up when water activates them.
Here is the plain-English comparison:
What changes
Polymeric sand
Regular sand
Material
Sand mixed with polymer binders, including high-performance options like Dominator polymeric sand
Plain jointing sand
After watering
Firms up in the joints
Stays loose
Resistance to washout
Better
Weaker
Weed and ant control
Better, but not perfect
Weaker
Upfront cost
Higher
Lower
Future touch-ups
Less frequent when installed right
More frequent
That chart gets to the point. Regular sand fills joints, while polymeric sand fills joints and then hardens enough to resist movement.
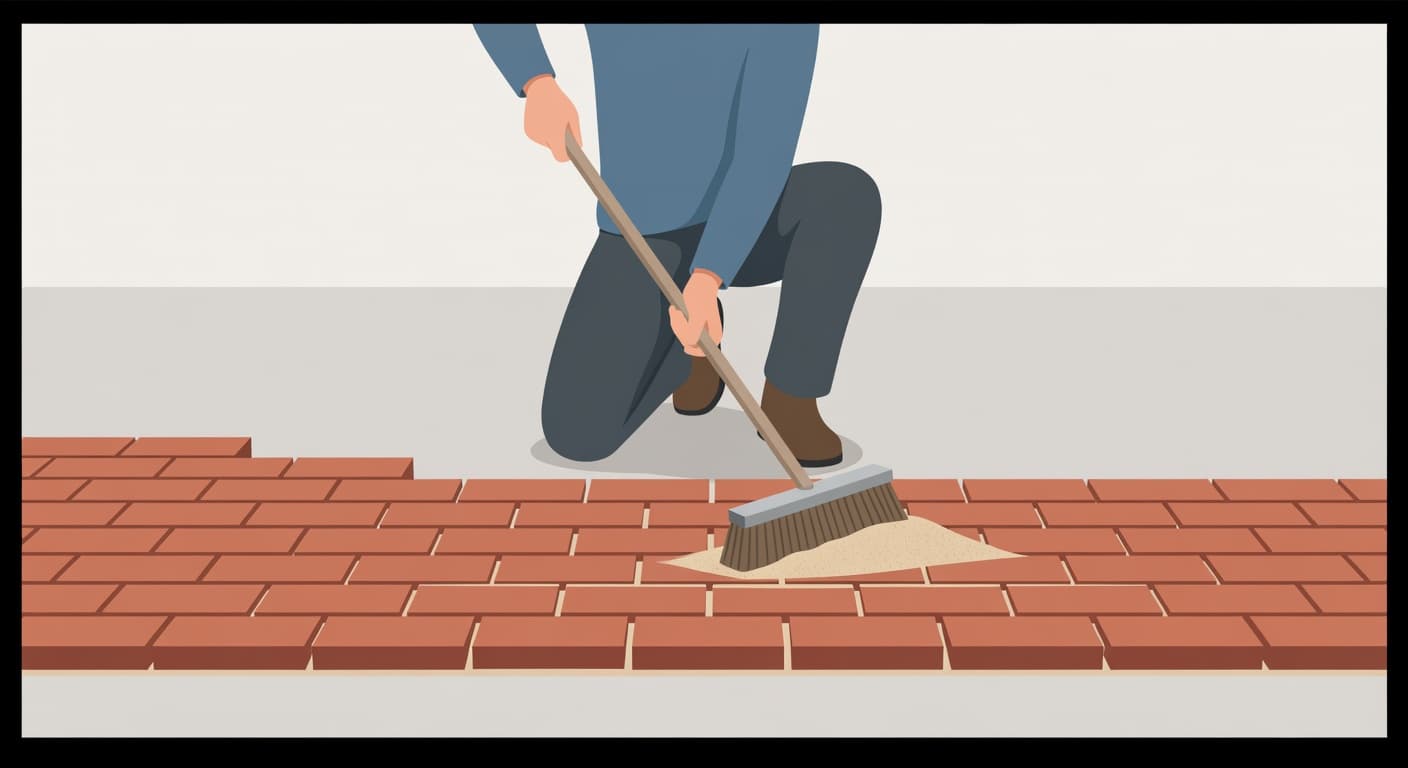
There is a catch, however. Polymeric sand is less forgiving during installation. To achieve the best results, you must ensure the correct joint width and joint depth for the material to bond properly. Furthermore, the paver surface must be bone dry before you begin the watering process. When activating the sand, use a light shower setting on your hose to avoid over-saturation, which can lead to rain washout effects or leave a cloudy haze on the surface. Before committing to a specific product, check available color samples to ensure the sand complements your existing concrete pavers.
Regular sand is simple. You sweep it in, compact it, and top it off when needed. That is part of why people still choose it. It is inexpensive, familiar, and easy to reapply.
Still, easy and better are not the same thing, especially in Florida.
When regular sand still makes sense
I do not think regular sand is useless. It still has a place, and pretending otherwise does not help anybody.
If you are working with natural stone or older concrete pavers that are loose or shifting, I usually do not want to lock those joints up too soon. That is like painting a wall before fixing the crack. If the surface needs repair, leveling, or reset work, regular sand can be the smarter temporary option because it is easy to remove and replace during the repair process.
Budget matters too. Some homeowners simply need the lower-cost route right now, especially on large-scale hardscape projects like a sprawling driveway or patio. Regular sand can get the joints filled and make the area usable again, even if it will not last as long as advanced alternatives.
Another case is a project with water issues that have not been addressed. If the area lacks proper drainage, no type of jointing sand is going to save the installation. Polymeric might hold better for a while, but it will not solve a bad base, a poor slope, or a constant washout path.
I also like regular sand when a homeowner knows they do not mind periodic maintenance. Some people are fine topping off joints every so often. If that is you, regular sand may not feel like a problem at all.
The issue is when homeowners choose it while expecting polymeric-level performance. That gap between expectation and reality is where the frustration starts.
Why polymeric sand usually wins on Florida pavers
For most Florida homes, polymeric sand is the better long-term play. I say that because of the local climate, not because the name sounds fancier.
Rain is the first reason. Loose sand disappears quickly during heavy storms. Polymeric sand provides superior joint stabilization, which locks the material in place and prevents the frustrating loss of sand that occurs after every heavy rain. That level of durability is essential for driveways and pool decks, where the combination of vehicular traffic and heavy runoff puts constant stress on the surface.
Ants are another big reason to make the switch. Plain sand gives them an easy place to dig, but the hardened surface of polymeric sand makes the joints a lot less inviting to pests.
Then there is the appearance. Full, firm joints make pavers look finished. They frame each brick cleanly and keep the surface from getting that tired, hollowed-out look. If you have ever seen a patio with empty joints and scattered weeds, you know how fast the whole area starts to feel neglected.
Weed control is a major benefit here as well. Polymeric sand significantly inhibits weed growth by closing off the loose, open gaps where seeds usually get a foothold. While nothing is completely impenetrable, this hardened barrier keeps your hardscape looking clean. For added protection, many premium sands now feature ceramic flex technology, which allows the joints to handle minor shifts without cracking. Once the sand has fully cured, applying a quality paver sealer can further protect the integrity of your paver joints against the elements.
Where homeowners get tripped up is assuming polymeric sand is magic. It is not. If the pavers are moving, the gaps are the wrong width for the product, or water drains poorly, the material can still fail.
If the joints keep emptying after every storm, the problem may be bigger than the sand.
That is why I recommend polymeric sand for areas that experience heavy pedestrian traffic and have been structurally soundly installed. In that setting, it earns its price and keeps your patio looking its best for years.
The install can make either option look bad
I have seen homeowners blame the sand when the real issue was the process. That happens all the time.
With polymeric sand, the surface has to be cleaned well before activation. Professionals often use a pressure washer to clear out old paver joints, followed by a leaf blower to remove lingering dust before starting the watering process. If you leave dust on the surface, it can turn into a stubborn white haze that ruins the look of your patio. Furthermore, the joints need enough depth for the material to grab and lock in place. The weather window matters too. In Florida, a pop-up afternoon storm can wreck the timing if the product has not set correctly.
Regular sand has its own weak spot. If it is not compacted and topped off properly, it settles fast and leaves shallow joints from day one. Ensuring the correct joint depth is vital for the product to remain stable against the elements. If the sand is thin, water gets in, ants move in, and the cycle starts over again.
This is also where old pavers need an honest look. If bricks are rocking, edges are chipped, or the pattern has started spreading apart, fresh sand alone will not fix the underlying problem. Re-sanding can improve the appearance for a while, but it will not restore a failing base or reset sunken sections.
If you are not sure whether you need re-sanding, repair, or a full reset in certain areas, it is worth getting another set of eyes on it. You can Get a Free Quote and have your paver joints, proper drainage, and general paver movement checked before spending money twice.
The best-looking paver projects usually are not the ones with the fanciest brick. They are the ones where the base is solid, the joints are filled correctly, and the sand matches the local conditions.
Frequently Asked Questions
Can I put polymeric sand over my existing old sand?
No, you should not simply pour new sand over old, loose material. The joints must be cleaned out to the proper depth using a pressure washer and leaf blower to ensure the polymer binders can create a strong, lasting bond with the paver edges.
Why does my polymeric sand have a cloudy white haze on top?
This is usually caused by leftover dust on the paver surface before the sand was activated or by using too much water during the rinsing process. Always ensure the pavers are completely clean of fine dust before wetting the joints, and use a light misting spray to activate the binders.
Is polymeric sand completely waterproof and weed-proof?
While it is highly resistant to water and weeds, no material is truly impenetrable. Over time, extreme conditions or structural movement may cause minor cracks, but it remains significantly more effective at preventing weed seeds from taking root compared to traditional loose sand.
Should I choose polymeric sand for a DIY project?
It is a great choice for DIYers, provided you follow the manufacturer’s instructions precisely regarding weather conditions and water application. If your paver surface requires extensive leveling or repair, however, you may want to consult a professional to ensure the base is solid before locking the joints.
The smarter pick for most Florida homes
When deciding how to finish your hardscape projects in Florida, the choice often comes down to long-term maintenance. For most homeowners, polymeric sand is the superior option because it provides essential joint stabilization. By locking pavers firmly in place, this product resists rain washout and significantly limits weed growth, ensuring your outdoor space stays clean and structurally sound throughout the year.
While regular sand remains a budget-friendly solution for temporary fixes, unstable surfaces, or projects awaiting future repairs, it lacks the durability required for our climate. If you want your polymeric sand pavers to look their best and hold up after the next heavy storm, the joints should be a priority rather than an afterthought. Investing in the right material now will save you from constant weeding and maintenance in the long run.
One hard storm, and the neat lines between your brick pavers can look hollow overnight. If you have seen that happen, the rain probably did not create the problem. Instead, the downpour acted as a catalyst that exposed a pre-existing weak spot through erosion.
When I see joint sand washout, I usually find the culprit is a combination of moving water, weak joints, or pavers that were already shifting. The missing sand is merely the symptom. The real answer is usually hiding in the way water moves across, through, or under the surface.
Key Takeaways
Rain acts as a catalyst: Heavy storms typically expose existing structural weaknesses, such as improper slope, poor drainage, or underfilled joints, rather than causing the damage themselves.
Sand is a structural component: Joint sand is essential for locking pavers together; when sand is lost, pavers become unstable and more susceptible to further erosion and weed growth.
Look beyond the surface: If your pavers shift, rock, or hold standing water, the issue is likely within the base layer, and simply replacing the sand will not provide a permanent fix.
Prioritize proper installation: Whether using regular or polymeric sand, ensure joints are filled to the proper depth and correctly activated to create a durable, stable surface.
Identify the root cause: Before re-sanding, check for concentrated runoff from downspouts or incorrect surface grading to prevent the cycle of washout from repeating.
Rain usually exposes a weak spot
I look at pavers as a system, not a row of individual bricks. The base matters, the bedding layer matters, and the edge restraints are critical for holding the perimeter in place. The sand in the paver joints matters more than most homeowners think.
Joint material is not there for looks alone. It helps lock neighboring pavers together, reduces side-to-side movement, and limits open space where weeds, ants, and water can get to work. When the paver joints stay full, the whole surface achieves the joint stabilization needed to act as a tight, strong unit.
Heavy rain changes the picture fast. Water does not sit politely on top of a patio or driveway; it runs downhill, drops into low gaps, and follows the easiest path out. If the material is shallow, loose, worn out, or never compacted well, that flow carries it away bit by bit. As moisture penetrates the surface, it works a lot like rinsing sugar off a plate.
A lot of people blame the storm alone, but I do not. A well-built paver surface usually handles rain far better than one with underfilled gaps or poor drainage. Here in Southwest Florida, a summer downpour can hit like somebody turned a hose on full blast. Even then, stable pavers with full joints hold up much better.
The joint material matters too. Standard regular sand can wash out faster than polymeric sand, which is designed to harden after proper activation. However, even high-quality material is not magic. If the pavers move, if the joints are too shallow, or if runoff crosses the same spot every storm, even the best sand can break down.
Rain is the stress test. The weak spot was usually there first.
That is why I do not treat missing joint sand as a random annoyance. I treat it like a clue.
The biggest reasons paver joint sand washes out
When I inspect a washout problem, I rarely find one single cause. Water needs a path, and sand needs a reason to let go. Once those two factors align, the joints empty out. The pattern of the damage usually reveals the root of the problem.
Cause
What the rain does
What you usually notice
Poor slope or poor drainage
Water sheets across the surface and scours the joints
Sand loss on the low side, standing water after storms
Downspouts or roof runoff
Concentrated water hits one area like a hose
Repeated washout near corners, edges, or splash zones
Joints not filled enough
Shallow sand lifts out due to improper joint width
Gaps appear quickly after one or two storms
Wrong sand or old worn-out sand
Fine loose particles move easily when saturated
Dusty joints, recurring loss after rain
Paver movement or weak edge restraints
Opening joints loosen the sand and invite more flow
Wider gaps, rocking pavers, spreading borders
Aggressive cleaning
The joints start weak before the storm arrives
Freshly cleaned areas lose sand first
That last point about cleaning surprises people often. Using a pressure washer can strip out a significant amount of joint material long before the rain shows up, leaving the surface vulnerable to the next storm.
I also pay attention to whether the problem is new or old. A brand-new patio featuring concrete pavers that loses sand after the first few storms often points to incomplete compaction, underfilled joints, or the wrong product. Conversely, an older driveway may suffer from poor drainage or simply lose sand because traffic, weather, and repeated freeze and thaw cycles have slowly worn the joints down over time.
Location matters too. If the washout sits below a downspout, I do not call it bad luck. If it keeps happening on the same downhill edge, I start looking at the grade and how water exits the hardscape. If the entire surface looks thin and dusty, the joints may never have been packed correctly in the first place.
Most of the time, joint sand washout is not one dramatic failure. It is a chain of smaller issues, and heavy rain simply ties them together.
How to tell if it’s only the joints, or the base below
Sometimes the fix is simple. If the pavers are flat, tight, and solid underfoot, the repair may stop at cleaning and re-sanding the paver joints. As long as you maintain the proper joint depth, this is usually just a minor maintenance task rather than a full rebuild.
I get more concerned when I see any of these signs:
Pavers rock, click, or shift when you walk on them
Bedding sand shows up at the surface, not just joint sand
Those clues point below the top layer. The base may be too thin, poorly compacted, softened by water, or slowly washing away at the edges. In that case, refilling the gaps helps for a while, but it won’t stop the movement that caused the loss.
If the pavers move, the sand isn’t the main problem anymore.
I also watch for how fast the sand disappears. If you refill the gaps and the next strong storm empties them again, don’t keep feeding the same spot more sand like a slot machine. That repeat pattern usually means runoff is concentrated, the slope is wrong, or the surface is flexing every time it gets wet.
Weeds and ants can make the mess look worse. While weed growth and active ant activity usually do not start the problem, they thrive in empty joints. Once they settle in, they loosen the area even more and trap moisture where you do not want it, which eventually compromises the structural integrity of the base.
When I separate a minor washout from a deeper structural issue, I save a homeowner time and money. The right repair depends on which of those two problems I am dealing with.
How I stop the washout cycle
I start with the cause, not the symptom. If water is pouring off a roof edge, running toward a low corner, or collecting at the border, I deal with that first. That may mean redirecting a downspout, adjusting the grade, adding drainage, or resetting a section that has settled.
If the pavers are stable, I clean the joints well and let the area dry fully. Then I refill the joints with the right material for the width and depth. In many cases, I prefer polymeric jointing sand because it holds better than loose sand when it is installed correctly. However, you must follow a specific process to ensure success.
The joints need enough depth. The pavers must be dry before you begin sweeping the polymeric sand into the gaps. On larger areas, I use a plate compactor to ensure the sand settles to full depth before the final fill. After sweeping, use a leaf blower to remove all excess dust from the surface, which helps prevent a messy polymeric sand haze from appearing once the product gets wet.
The activation process is critical. Use a hose set to a gentle shower setting to wet the area. Avoid under-watering, as the binder will not set properly, but be equally careful to avoid over-watering, which can wash the binder out before the curing time is complete. If you are diligent with the installation, polymeric jointing sand creates a durable, flexible bond.
If the pavers are loose or sunken, I do not hide the problem under fresh sand. I lift the affected area, correct the base, re-level the bedding layer, reset the pavers, and then refill the joints. That is the repair that lasts.
I also stay careful with pressure washing after the repair. Cleaning is fine, but blasting straight down into the joints is not. A good wash removes surface grime, but it should not excavate the patio. Applying a high-quality paver sealer can help protect the surface once the joints have cured, but remember that paver sealer does not replace solid drainage or a stable base.
If you would rather have somebody inspect the slope, drainage, and paver movement before the next storm, Get a Free Quote. A short site visit can tell you whether you need fresh joint sand, drainage correction, or a deeper reset.
Frequently Asked Questions
Why does my polymeric sand keep washing out?
If polymeric sand is washing out, it likely wasn’t installed with the correct activation process or the joints were not filled deep enough. Alternatively, constant water flow from a roof or poor drainage may be overwhelming the bond before it has a chance to fully cure.
Can I just pour new sand over the top of the old gaps?
Simply filling the gaps is a temporary fix that rarely lasts if the underlying cause—such as a shifting base or poor slope—remains. You must ensure the pavers are stable and the existing sand is cleaned properly before adding new material to ensure a secure bond.
Does pressure washing cause sand loss?
Yes, aggressive pressure washing is a common culprit for premature sand loss. Blasting water directly into the joints can easily strip away even high-quality sand, leaving your pavers vulnerable to the next heavy rainstorm.
How do I know if my paver base is failing?
Signs of base failure include pavers that rock or shift when walked upon, persistent low spots where water puddles, and borders that begin to spread or separate. If you notice these symptoms, the issue is structural and requires lifting the pavers to fix the foundation.
Conclusion
Heavy rain does not pick on healthy pavers. Instead, it finds weak spots, fast runoff, and movement beneath the surface.
This is why joint sand washout keeps returning until you address the underlying issue. If the pavers remain stable, simple re-sanding may be enough to restore the area. However, if the pavers rock, pond water, or if you notice your paver joints continuing to open in the same spot, your repair strategy must go deeper.
The missing sand is merely a symptom. Follow the path of the water, and the solution to your drainage problem will usually reveal itself.
Rain is supposed to make outdoor surfaces look richer, not chalky. So when a patio or driveway dries and a pale film shows up, I know why homeowners get concerned. This white haze on pavers is a common issue that affects both concrete pavers and brick pavers, and it is often most striking when it appears on dark colored pavers.
Most of the time, this discoloration is not a sign of structural damage. It is usually moisture moving minerals to the surface, though sealer trouble and hard water deposits can mimic the same look. I always want to identify the specific cause first, because applying the wrong cleaning method can make the surface condition worse.
Here is how I evaluate that cloudy, dusty look after a storm.
Key Takeaways
Efflorescence is the primary culprit: Most white haze on pavers is caused by efflorescence, a natural process where mineral salts rise to the surface, react with carbon dioxide, and leave behind a chalky white film.
The “Wet Test” is your best diagnostic tool: If the white haze disappears when the pavers are wet and reappears as they dry, it is almost certainly efflorescence rather than a permanent stain or product failure.
Distinguish between causes before cleaning: Not all white haze is the same; while efflorescence can often be brushed away or weathered out, sealer blush, hard water deposits, and polymeric haze require different removal techniques.
Avoid jumping to harsh chemicals: Always identify the root cause first, as using acid-based cleaners on the wrong surface or on trapped sealer moisture can cause permanent damage to your pavers.
The most common cause is efflorescence
When I see pavers turn white after rain, efflorescence is the first thing I suspect. This natural process occurs because concrete pavers contain water soluble salts. Materials like the bedding sand, base layer, mortar, and the soil beneath the surface can also harbor these minerals.
The process begins when rainwater migrates through the base materials, dissolving mineral deposits like calcium hydroxide and calcium oxide, also known as free lime. These dissolved minerals travel upward toward the surface through microscopic capillaries within the concrete. As the water evaporates, it leaves these minerals behind. Once they reach the surface, they react with carbon dioxide in the air to create a stubborn, chalky white film of calcium carbonate.
That is why the haze often seems to appear only after the rain has stopped. While the stones are wet, the color looks darker and more uniform. As they dry, the white residue becomes much easier to see. If you have ever noticed the haze vanish when the stones are wet, only to reappear as the sun hits them, that is a strong indicator of efflorescence.
In Southwest Florida, this cycle is especially pronounced. The combination of intense rain, high heat, and humidity creates a constant cycle of soaking and drying, which makes these mineral deposits appear far more frequently.
If the white film disappears when the pavers are wet and returns as they dry, I start with minerals before anything else.
Newer installations tend to show this more often. Fresh concrete products release more of these calcium-based materials early on, so the bloom can come and go for a while. The good news is that efflorescence is usually a surface issue and not a sign that your pavers are failing.
Other reasons pavers can look cloudy after a storm
Efflorescence is common, but it is not the only answer. I also see cloudy pavers caused by sealer whitening, sprinkler residue, polymeric haze from installation, and leftover dust sitting on the surface.
This quick side-by-side check helps me separate one problem from another:
Cause
What it looks like
Common clue
Efflorescence
Powdery, chalky film
Hides when wet, returns while drying
Sealer blushing
Milky or cloudy patches under the finish
Started after sealing or after rain hit too soon
Hard water residue
White spots or streaks
Strongest near sprinklers or runoff
Polymeric haze
Film or residue on paver surface
Usually appears after polymeric sand installation
Sand or dust residue
Loose, dusty film on top
Rubs off more easily than mineral bloom
Sealer blushing is one that fools a lot of people. If a paver sealer was applied before the stones were fully dry, or if humidity was high during application, trapped moisture can get locked beneath the coating. Then, when rain comes along, the surface turns milky and cloudy. That is a different issue than efflorescence sitting on top of the stone.
Hard water leaves a different pattern. I usually find it near sprinkler spray, downspouts, or edges where water runs and evaporates repeatedly. It looks more like spotting or thin crusty lines than a full dusty veil.
Then there is the issue of polymeric haze. If the polymeric sand was not rinsed off properly during the installation process, the fine binders can leave a cloudy residue. Similarly, simple jobsite dust can linger on the surface after a project is finished. Rain can redistribute these particles and make the pavers look pale for a short time. That kind of film usually brushes away much easier than true mineral haze.
The important part is this: not every white stain needs the same cleaner. Acid will not solve every cloudy patch, and on the wrong surface, it can do more harm than good.
How I tell the difference and what usually fixes it
I never start with the harshest product. I always begin with a few simple checks to identify the root cause of the white haze.
First, I wet a small area. If the haze vanishes when wet and returns as it dries, efflorescence moves higher on my list. Next, I rub the dry surface with a dark cloth. If powder transfers, I know the residue is on top of the paver. If the haze seems trapped under a glossy coat, I suspect a failed sealer. For new installations, keep in mind that some mineral deposits simply weather away over time with regular surface wetting from rain.
For light efflorescence, I start with dry brushing and a good rinse. If that is not enough, try a gentle vinegar dilution before moving to a stronger cleaning product specifically formulated for pavers. If you decide to use an acid-based cleaner, such as muriatic acid, always perform a test patch in an inconspicuous area first. This step is critical because not every paver reacts the same way, especially if the surface has already been sealed. Always follow manufacturer instructions closely to avoid damaging the joint sand or discoloring the stones.
I stay cautious with pressure washing. Used incorrectly, it can blast out joint sand and leave the surface looking pitted or rough.
Sealer haze is a different job. If moisture is trapped in or under the sealer, basic washing will not fix it. In these cases, you may need to apply a professional sealer stripper, allow the pavers to dry out fully, and then re-seal the area under the correct environmental conditions.
If sprinklers are feeding the problem, I adjust the spray pattern or reduce overspray. Otherwise, the white marks keep coming back like a coffee ring that gets redrawn every week.
When the haze covers a large area, returns after every storm, or showed up soon after sealing, I do not like guessing. That is the point where it makes sense to Get a Free Quote and have the surface checked by a professional before trying stronger chemicals.
Frequently Asked Questions
Is white haze on my pavers a sign that they are failing?
No, in most cases, a white haze is not a sign of structural damage or failure. It is usually a surface-level cosmetic issue caused by natural mineral deposits or external residue that can be cleaned or will naturally fade over time.
Can I just power wash the white haze away?
While power washing might temporarily remove the haze, it is often unnecessary and can be risky if done incorrectly. Using too much pressure can blast away the joint sand, leading to shifting pavers or creating pitted surfaces on the stones themselves.
How long will it take for efflorescence to stop appearing?
For new installations, efflorescence is most common during the initial curing phase. The mineral deposits will typically appear less frequently over time and often stop appearing entirely once the internal mineral content of the concrete and base materials stabilizes.
Should I apply a sealer to cover up the white haze?
It is never a good idea to seal over existing haze or moisture. If you apply a sealer over efflorescence or trapped moisture, you will lock the white film or “blushing” beneath the coating, making it much harder to clean and potentially ruining the finish of the pavers.
Final thoughts
That white film you notice after a rainstorm usually comes down to simple moisture and mineral movement rather than a ruined patio. In most cases, efflorescence is the primary culprit, and while the hazy appearance can be startling, it is rarely a sign of permanent damage.
It is helpful to keep the curing window of your project in mind, as new pavers are most likely to develop this cloudy haze during those first few months. Often, this mineral deposit will naturally fade or disappear on its own as the installation settles. My best advice remains the same: diagnose the source first, then clean second. When you can accurately distinguish between efflorescence, sealer blush, or hard water buildup, the fix becomes much simpler and the risk of damaging your stone drops significantly.