

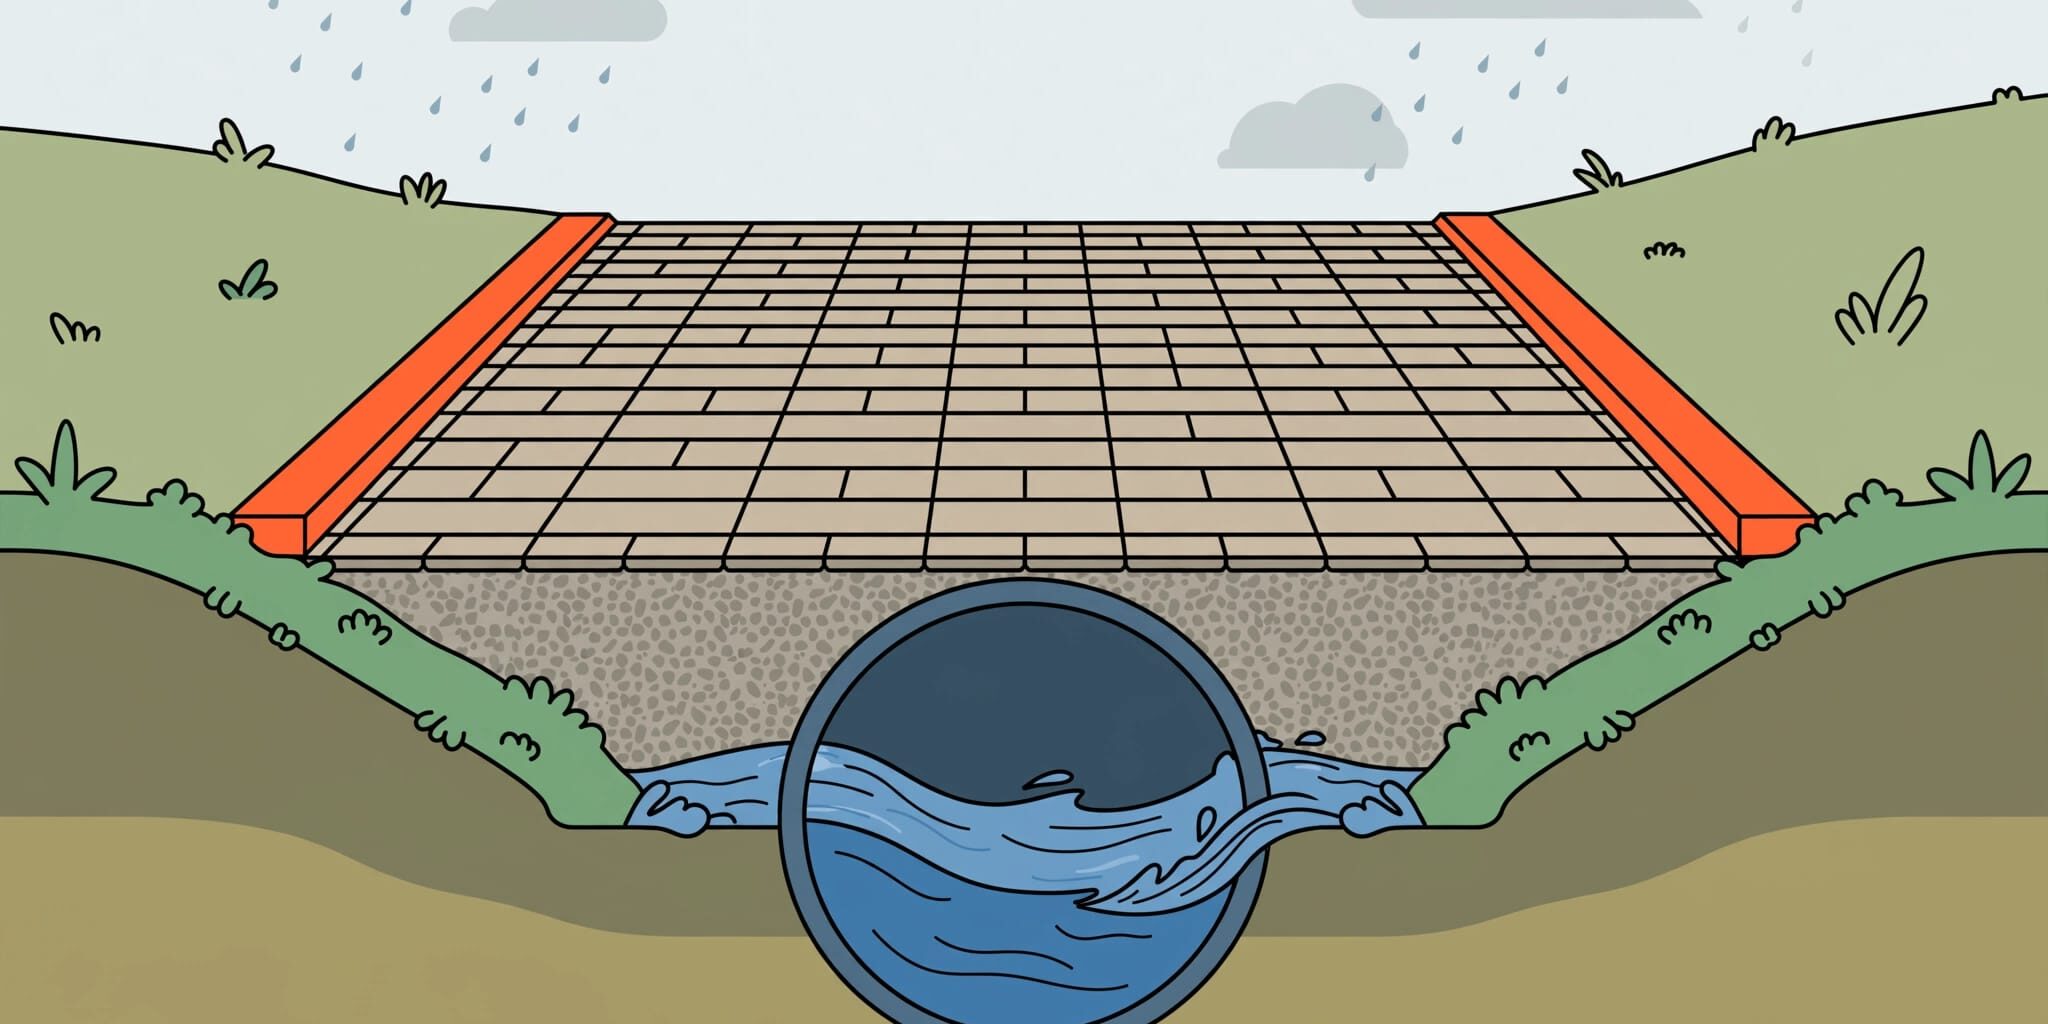
A paver driveway culvert carries roadside stormwater beneath your driveway so vehicles can cross without blocking the ditch. When a driveway crosses a flowing swale or drainage channel, that water needs a properly sized crossing, along with stable support beneath the pavers.
I put driveway drainage and base preparation first because a beautiful entrance won’t stay level if water washes away the material underneath. Start with the water path, then plan the pipe, vehicle loads, and finished driveway together.
Key Takeaways
- Keep roadside drainage open wherever your driveway crosses a ditch, swale, or stormwater channel.
- Size the pipe for upstream runoff, rainfall, land cover, and slope, rather than ditch width alone.
- Treat pipe bedding, required cover, compacted paver base, and edge restraints as separate parts of one installation.
- Inspect both pipe openings and the paver surface after major storms.
How a Paver Driveway Culvert Keeps Water Moving
A roadside ditch may look dry between storms, but it can carry runoff from several properties during heavy rain. Filling that ditch to build an entrance creates a barrier unless the crossing preserves the drainage route.
Water can collect upstream, flow over the driveway, or cut around its edges. Once that flow reaches loose backfill or bedding sand, erosion can leave unsupported pavers and low spots.
It maintains the driveway drainage connection beneath the entrance. Its inlet, outlet, and slope must work with the existing channel, while the driveway above provides dependable vehicle access.
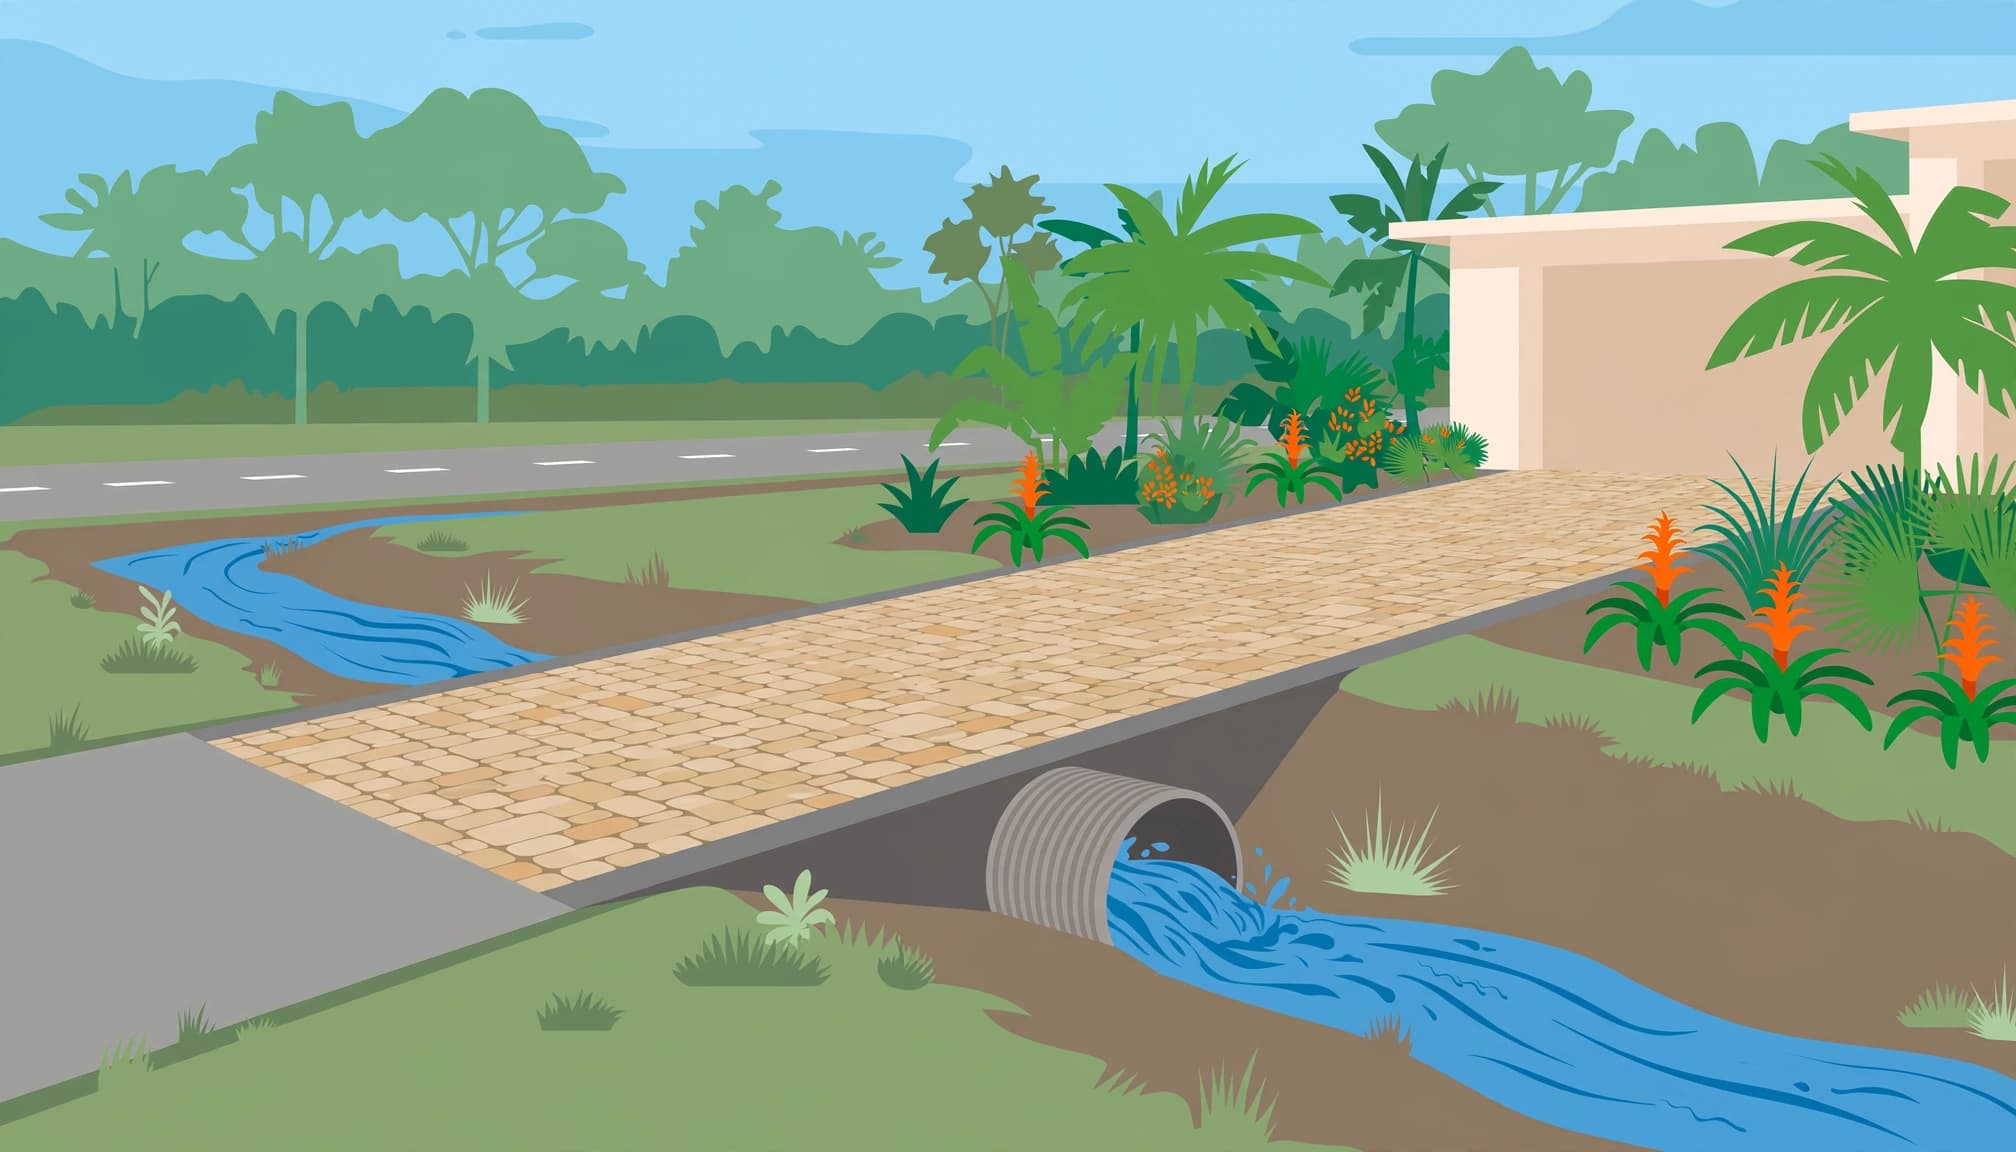
I recommend planning the street connection before choosing borders or patterns. The elevations and drainage details covered in our paver driveway apron guide belong in that same plan.
Size the Culvert Before Ordering Pipe
Start With Permits and Upstream Drainage
Most jurisdictions require a driveway or right-of-way permit before culvert installation, and replacement work can require approval too. Check requirements with your road department, since standards vary by jurisdiction. The permit may establish culvert size (inside diameter), length, material, and finished elevations.
Common local minimum diameters are 12, 15, or 18 inches, sometimes with a requirement to match the next upstream pipe. Greenville County, South Carolina, for example, specifies a 15-inch minimum inside diameter and an opening at least as large as the next uphill crossing.
That is a local example, not a Southwest Florida specification. An existing upstream pipe is useful information, but it doesn’t prove that the drainage system has enough capacity.
Account for Runoff, Slope, and Crossing Width
Culvert sizing depends on drainage area, rainfall intensity, land cover, and ditch slope. Roofs and pavement send water toward the crossing differently than open ground. Pipe sizing and its slope, inlet conditions, and allowable upstream water depth all affect capacity.
Residential culverts commonly fall between 12 and 18 inches, while larger drainage areas may need 24 inches or more. Visible ditch width alone cannot establish the correct size.
When capacity is uncertain, I favor evaluating the larger option rather than accepting the smaller one. Undersizing increases ponding and overtopping risk.
Length needs attention too. Some standards call for 20 to 24 feet plus side-slope tie-ins. It must extend far enough to support the driveway shoulders without leaving steep, unsupported edges.
Compare HDPE, Steel, and Concrete Culverts
Material choice should account for soil chemistry, installation conditions, required cover, and expected traffic loads.
These are the main differences homeowners should understand.
| Material | Cost tendency | Handling | Main consideration |
|---|---|---|---|
| Corrugated plastic (HDPE) | Generally economical | Lightweight | Requires controlled bedding and compacted backfill |
| Corrugated steel | Often moderate | Heavier than plastic | Corrosion exposure and specified gauge matter |
| Reinforced concrete | Usually higher installed cost | Heavy, requires lifting equipment | Strong load capability with the correct pipe class |
The right material is the one that fits the complete design. FHWA’s culvert material selection guidance treats service life and material selection as related decisions.
Corrugations stiffen flexible pipe walls and help resist buckling. That profile doesn’t make every corrugated product suitable for driveway traffic. Wall construction, steel gauge, soil support, and cover depth still control performance.
HDPE plastic doesn’t rust, but buoyancy and erosion can move a poorly installed pipe. A metal culvert made from corrugated steel can provide substantial strength, while aggressive soil or water chemistry, including unfavorable pH conditions, can accelerate corrosion.
Concrete is durable and available for demanding vehicle loads, but transport, lifting, and joint installation add expense. Properly specified HDPE can also carry heavy traffic. I wouldn’t choose between plastic and concrete by material name alone.
Build the Paver Crossing in the Right Order
Support the Pipe Before Building Above It
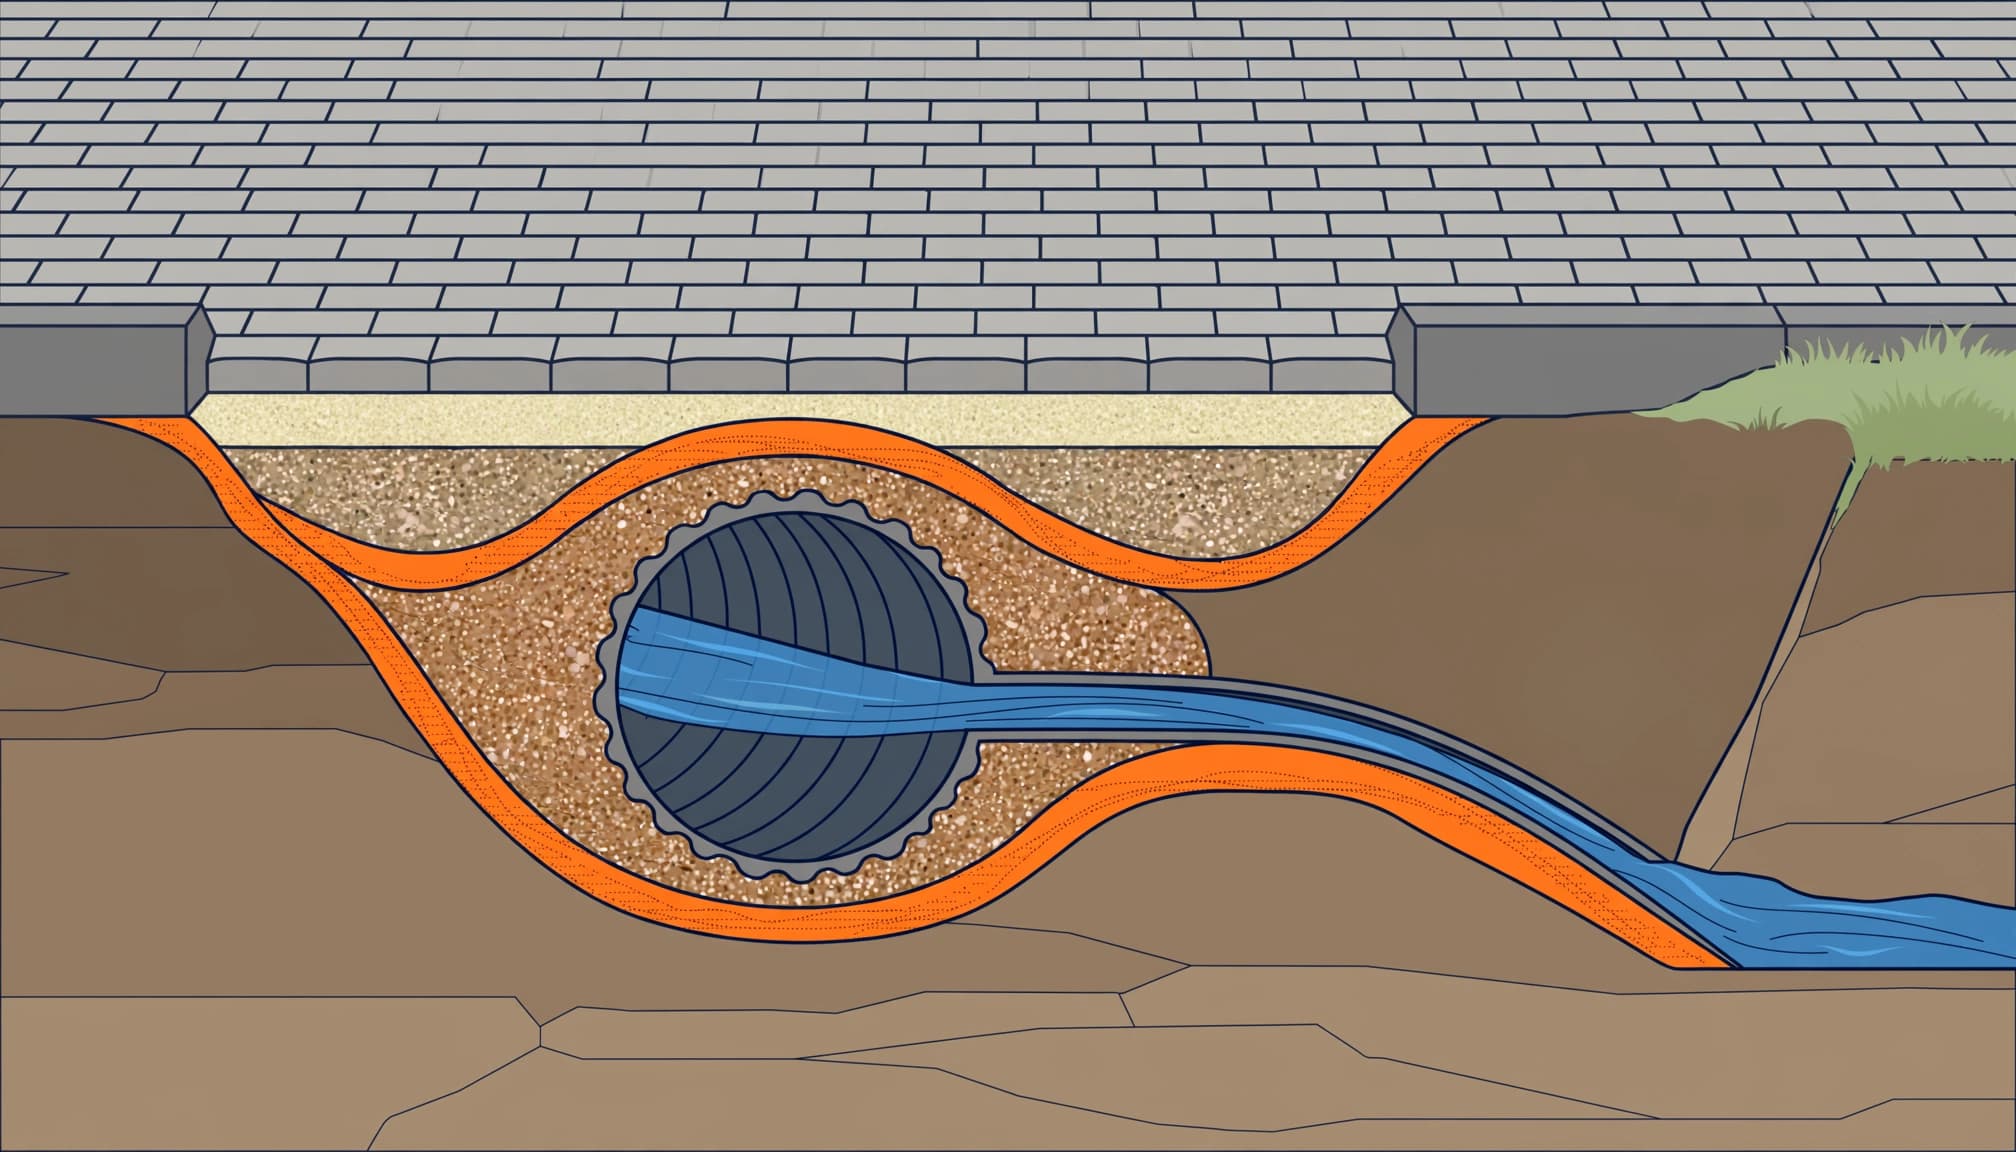
Culvert installation starts with stable ground and the correct elevations. Soft soil, standing water, or loose fill below it need correction before backfilling.
A sound installation generally follows this sequence:
- Establish the approved inlet and outlet elevations and locate underground utilities before excavation.
- Prepare the specified bedding and set the culvert pipe to the designed alignment and slope.
- Place suitable backfill beneath its sides and compact it evenly in controlled lifts.
- Complete the required cover before construction equipment or other vehicles cross.
FHWA’s plastic pipe culvert standard drawing illustrates why a plastic crossing needs a defined installation detail.
Build the Paver Base and Secure the Edges
Pavers can sit above a culvert when the full assembly provides the required pipe cover and pavement support.
For conventional residential concrete pavers, 6 to 8 inches of compacted aggregate is a common planning range. Weak soil or heavier traffic may need more. Paver thickness and bedding are additional, and those dimensions don’t automatically satisfy the pipe’s cover requirement.
I recommend proper paver site preparation with aggregate compacted in layers and a consistent bedding layer. Thick sand shouldn’t hide an uneven base.
Secure driveway paver edge restraints on dependable support, especially beside sloping shoulders. Keep downspout discharge away from those edges so roof runoff doesn’t wash out the finished work.
How Much Does a Driveway Culvert Cost?
Pricing depends on diameter, length, excavation, access, end treatments, and driveway restoration. Pipe-only pricing leaves out much of the job.
RevenueLab’s 2026 calculator estimates $25 to $45 per installed foot for 12- to 15-inch HDPE. Its 24-foot, 15-inch example totals $960 for pipe, excavation, and bedding.
Design Transition Studio gives a broader estimate of $1,800 to $4,500 for a 20- to 40-foot run of 24-inch HDPE. The different dimensions and work allowances make these planning figures, not directly comparable bids.
A paver crossing also needs an allowance for lifting existing units, rebuilding the base, resetting pavers, restoring joints, and securing edges. Headwalls, utility conflicts, dewatering, and erosion protection can increase the price.
I recommend a written estimate that separates the drainage work and paver restoration. The scope should identify pipe type, diameter, length, bedding, backfill, and what happens if excavation exposes unsuitable soil.
Inspect the Pipe and Pavers After Major Storms
A crossing serving one property is often the homeowner’s maintenance responsibility, although the road authority’s rules determine the arrangement.
After heavy rain, look at both openings for branches, grass clippings, sediment, and erosion. Watch for water backing up, soil washing around it, or a channel forming beside the driveway. FHWA’s guidance on unsafe drainage features also addresses roadside drainage hazards.
Inspect the pavers for loose units, widening joints, missing joint material, and settlement above the crossing. Those changes can point to lost support below.
Resetting sunken pavers won’t solve a crossing that keeps losing backfill around the pipe.
A crushed barrel or significant deformation needs replacement rather than a surface patch. Minor flexible-pipe deflection requires assessment against the product’s limits. Keep vehicles off a crossing with visible collapse, washout, or unsupported pavement.
Frequently Asked Questions
Do Permeable Pavers Remove the Need for a Culvert?
Permeable pavers manage rainfall entering their joints. A roadside culvert carries water arriving through the ditch, including upstream runoff.
FHWA explains how permeable surfaces manage stormwater. Our permeable paver driveway guide covers the open-graded base and compatible joint aggregate these systems require. Their drainage design still needs to preserve the roadside water route.
How Long Does an HDPE Culvert Last?
The Plastics Pipe Institute describes a minimum 100-year service life for HDPE in typical drainage applications. That is an industry association’s material expectation, not a guarantee for every driveway.
Installation quality, loading, abrasion, and surrounding soil conditions affect actual performance. A sound material cannot make up for missing bedding or inadequate cover.
Can a Homeowner Install the Crossing?
This work involves more than laying pavers. Excavation, utilities, drainage elevations, public right-of-way requirements, and vehicle loading all affect safety.
I recommend professional installation for crossings involving roadside drainage or uncertain ground conditions. Homeowners can handle routine debris removal from a safe position, but nobody should enter a culvert or excavate beneath an occupied driveway.
Keep the Water Path Open and the Driveway Supported
This crossing needs enough flow capacity, proper pipe support, and a well-built pavement assembly above it. Quality workmanship connects those parts without blocking the ditch or leaving weak driveway edges.
I put drainage and preparation first because they protect the finished surface you see every day.
For your Southwest Florida paver project, Get a Free Quote and discuss the entrance, drainage needs, and installation scope before work begins.