A paver patio can look simple until it is time to order materials, while driveways require even more planning. Buy too little, and your job stops halfway through. Buy too much, and you are left with unused pallets and unnecessary expense.
The good news is that you can calculate pavers with accurate measurements, a tape measure, and basic math. These formulas cover concrete pavers and provide a manual alternative to an online paver calculator.
Start with the finished surface’s square footage. Then calculate paver coverage, add a realistic waste allowance, and estimate the supporting materials.
All material quantities begin with the total project area, including pavers, gravel base, bedding sand, joint sand, and edging.
Key Takeaways
- Measure the finished paver boundary and calculate the total square footage by dividing irregular areas into rectangles, triangles, or circles as needed.
- Calculate paver quantities using the manufacturer’s coverage rate whenever available, or divide the project area by the square feet covered by one paver.
- Add a waste allowance based on the layout: typically 5 to 10 percent for simple work, 10 to 15 percent for moderate complexity, and 15 to 20 percent for complicated patterns and curves.
- Estimate the gravel base, bedding sand, joint filler, and edge restraints separately; paver waste does not automatically apply to aggregate quantities.
- Confirm drainage, slope, package rounding, delivery requirements, and a small reserve of matching pavers before ordering materials.
Start With Accurate Measurements
Never estimate a patio or driveway by looking at it. For example, a paver patio can look square but still have an extra two feet on one side, a curved border, or an area around a screen enclosure that changes the total.
Measure the planned finished paver boundary to determine the square footage, not the wider excavation or gravel base footprint. Write down every length and width in feet, then draw a simple sketch. It doesn’t have to look perfect. It only needs to show the shape and dimensions.
If a measurement is in inches, divide it by 12 before using an area formula. Don’t combine feet and inches in the same multiplication.
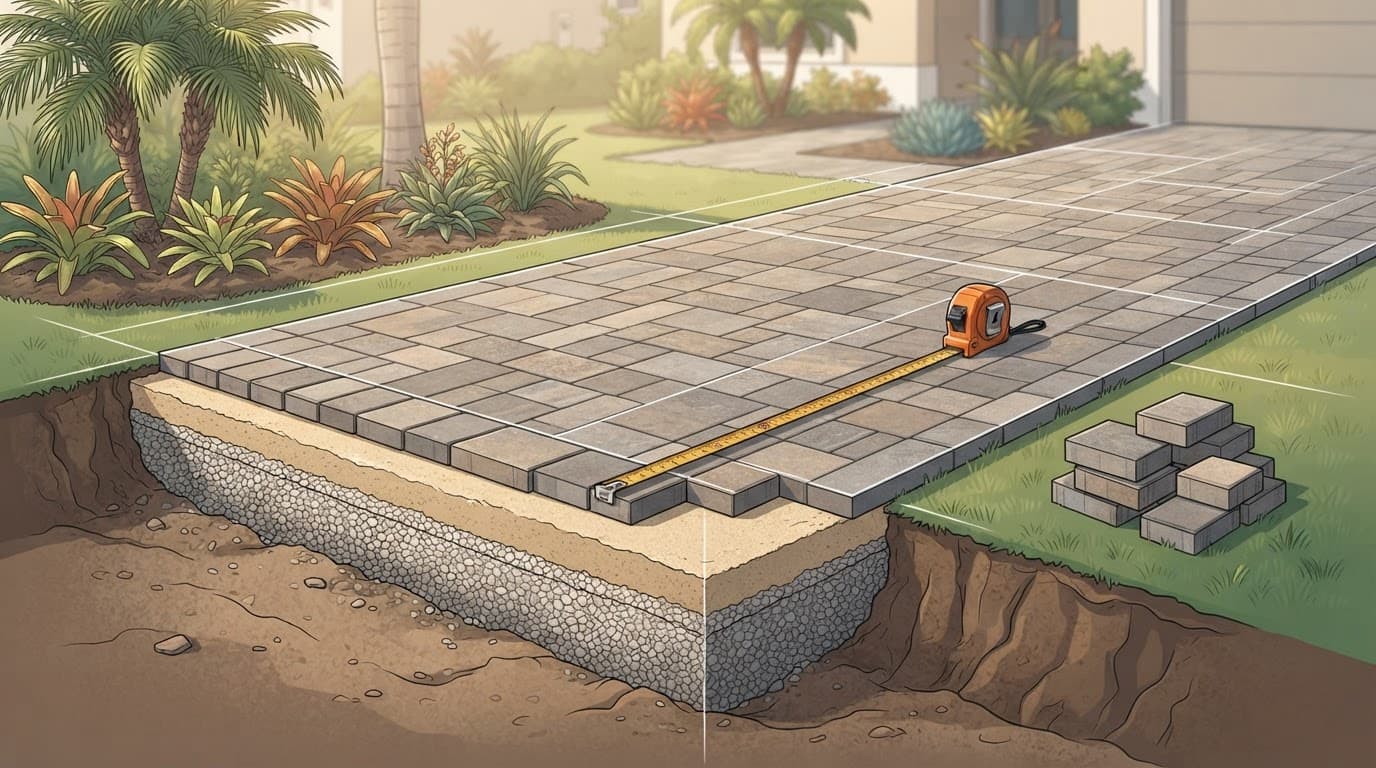
Measure Rectangular Patios and Driveways
For a square or rectangle, use this formula:
Length x width = square footage
A 10-foot by 10-foot patio is 100 square feet. A 20-foot by 30-foot driveway is 600 square feet.
Paver dimensions, including the brick size, affect the unit count, not the measured project area.
Measure each side anyway. Many driveways widen near the street or garage. Those small changes add up fast on a material order.
For a triangle, multiply the base by the height and divide by two. A 10-foot base and 6-foot height produce 30 square feet.
For a circle, use π x radius². The radius is half the diameter. A 12-foot-diameter circle has a 6-foot radius, so its square footage is approximately 113.1 square feet.
For a semicircle, calculate the full circle first, then divide the result by two.
Curves, L-shaped patios, and other irregular areas need to be split into smaller shapes. Divide the outline into rectangles, triangles, or circular segments. Calculate each part, then add them to find the total square footage.
For example, a 20-foot-by-12-foot rectangle plus an 8-foot-by-6-foot rectangle equals 288 square feet.
I also recommend marking the perimeter with marking paint or a garden hose before you order. It gives you a better view of the actual finished space, especially around landscaping, pool equipment, and walkways.
Before ordering, walk the perimeter once more. Measure both sides of any widening, and confirm that doors, pool equipment, steps, and drainage features are included or excluded deliberately.
A correct paver count starts with the finished surface area. Excavation width and base width are separate measurements.
These measurements give a patio paver calculator a reliable starting point, but it’s only as accurate as the dimensions you enter.
How to Calculate Pavers by Size
Once you know the project square footage and product details, use the manufacturer’s stated square-foot coverage per pallet or package whenever available. A paver calculator can perform the same division after you enter the area and product data.
The manufacturer’s coverage rate already accounts for nominal dimensions and typical joint spacing. A patio paver calculator still needs the correct product coverage rate, especially for modular systems.
This estimate covers pavers only, not the supporting gravel base. Natural stone pieces are often irregular, so order them by supplier coverage or actual module coverage instead of using a simple rectangular-unit formula.
Use the Single Paver Formula
Start with the paver size. Multiply its length by width in inches, then divide the result by 144 to convert the face area to square feet.
Paver length x paver width / 144 = square feet per paver
Next, divide the project square footage by the square feet covered by one paver. Round up to a whole paver or package before applying the waste factor in the next section.
A 4-by-8-inch brick size means 4 × 8 = 32 square inches. Then 32 ÷ 144 = 0.222 square feet per single paver. For a 100-square-foot patio, divide its square footage, 100 square feet, by 0.222. The result is approximately 450 pavers before cuts and waste.
The brick size describes the face dimensions, not the complete installed module. Real coverage can vary slightly when the joints or manufacturer’s nominal dimensions differ.
Here are common planning estimates for basic paver faces. For a simple running bond, this unit-rate estimate is usually reasonable:
| Face dimensions | Approximate pavers per square foot |
|---|---|
| 4 x 8 inches | 4.5 |
| 6 x 6 inches | 4 |
| 12 x 12 inches | 1 |
| 6 x 9 inches | 2.7 |
Use these figures as planning estimates only. Verify the manufacturer’s square-foot coverage per pallet, package quantity, nominal paver dimensions, and joint requirements before ordering.
Use Coverage Rates for Multi-Piece Patterns
A multi-piece pattern is different. Count each shape separately only when the supplier provides an exact breakdown.
Many patio paver systems come in bundled modules. One pallet may include several sizes that repeat in a designed pattern. For these systems, use the stated square-foot coverage per pallet and match it to the project square footage. Keep the pieces mixed as intended.
I always tell homeowners to verify the product coverage sheet before ordering. Concrete pavers may be listed under a nominal paver size, but actual manufactured dimensions can vary by product line.
Use the same product information when calculating bedding sand in the next section.
Add Extra Pavers for Cuts and Waste
Waste covers perimeter cuts, broken pieces, pattern alignment, corners, curves, and a small replacement stock. It isn’t material to discard casually; it is part of ordering accurately.
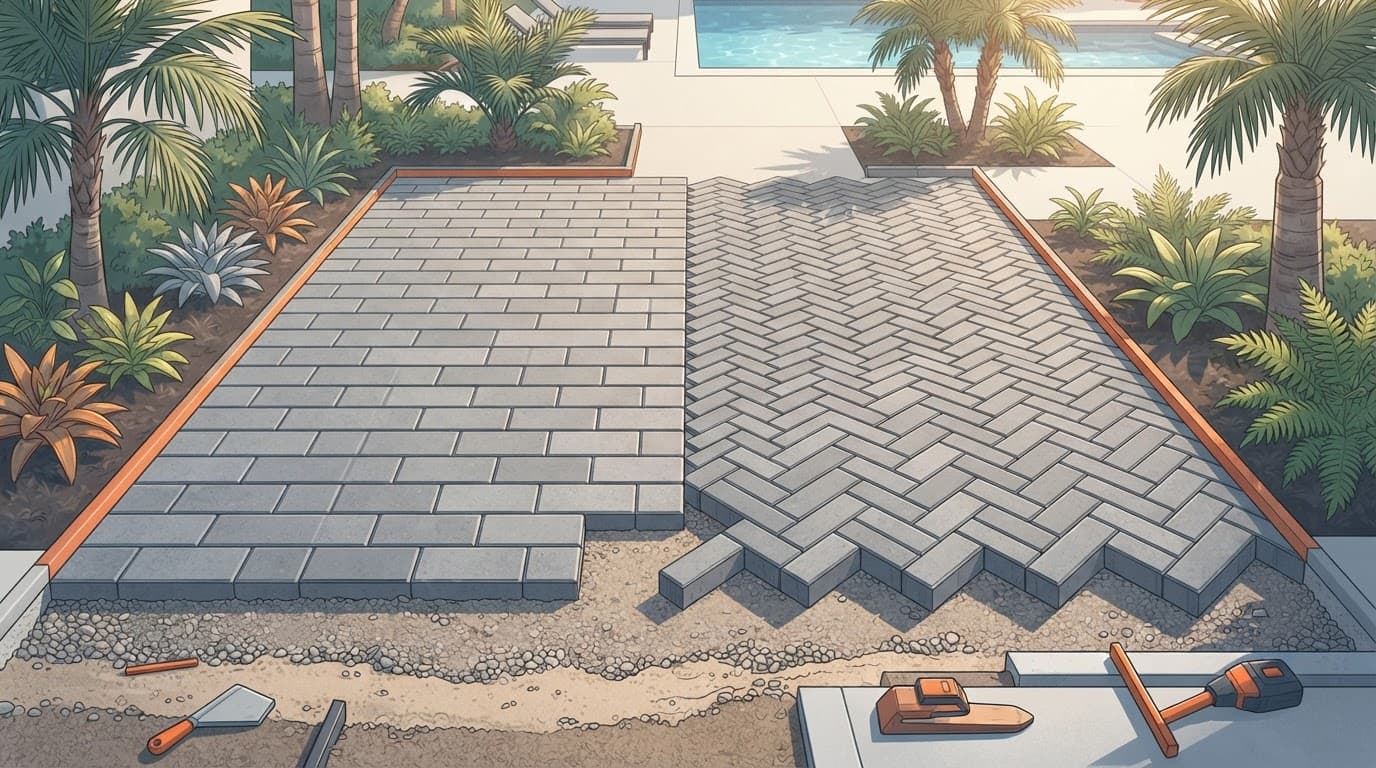
Your measured square footage sets the starting area, while layout complexity determines the allowance. Compare layout patterns before choosing an allowance, because simple, diagonal, circular, and custom arrangements cut differently.
A straight square patio in running bond needs less extra material than a driveway with a herringbone pattern, diagonal borders, and curved edges. Borders, soldier-course details, and edge restraints can increase the number of perimeter cuts. Consistent joint spacing and pattern alignment can also affect those cuts.
Match the Waste Factor to the Pattern
Use this formula: base paver quantity × (1 + waste factor) = order quantity. Round up to full packages or pallets.
For most projects, these allowances are practical:
- Add 5 to 10 percent for a simple rectangular patio or straight running bond.
- Add 10 to 15 percent when there are several corners, border details, or modest curves.
- Add 15 to 20 percent for a herringbone pattern, 45-degree layouts, circles, and complicated custom work.
For the earlier patio, its square footage requires 450 base pavers when using 4-by-8-inch pavers. At 5 percent, 450 × 1.05 = 472.5, so order at least 473 pavers or the next complete package.
For a 600-square-foot driveway using the same pavers, calculate 2,700 base pavers first. A 15 percent allowance gives 2,700 × 1.15 = 3,105 pavers. Round that total up to the next complete package or pallet.
A 90-degree herringbone pattern usually has fewer diagonal edge cuts than a 45-degree herringbone pattern. The 45-degree layout often creates more triangular cuts along the edge, so I plan more material for it.
Don’t apply the paver allowance automatically to the gravel base. Calculate aggregate quantities separately.
After the main waste calculation, keep about 1 to 2 percent of the base quantity as matching replacement stock, if package sizes allow. Sun, rain, tire marks, pressure washing, and years of use can change the appearance of installed pavers. A few original pieces can make a future repair blend much better.
Calculate the Gravel Base, Bedding Layer, and Joint Filler
Pavers are the visible finish, but the layers below them carry the load. A good-looking driveway can still sink, spread, or hold water if the supporting layers are wrong.
The Concrete Masonry and Hardscapes Association’s interlocking pavement guide gives useful technical information. It explains how pavers, bedding layers, joints, and support systems work together.
Find the Aggregate Volume
Start with this formula for the aggregate beneath the pavers:
square footage (area in square feet) x selected depth in feet = loose gravel base volume in cubic feet
Convert inches to feet by dividing the selected depth by 12. For example, 6 inches equals 0.5 feet.
Then divide cubic feet by 27 to convert to cubic yards.
For example, a 100-square-foot patio with a 6-inch gravel base needs:
100 x 0.5 = 50 cubic feet
50 / 27 = 1.85 cubic yards
Add roughly 10 percent for compaction, low spots, and grading. This gravel base allowance brings the estimate to about 2.04 cubic yards before rounding.
Round up to the supplier’s practical delivery increment.
A pedestrian patio often needs a 4- to 6-inch compacted aggregate layer. A driveway usually needs more support.
The appropriate base depth depends on soil, drainage, traffic, and vehicle weight.
For illustration, a 200-square-foot driveway has a 9-inch gravel base. That depth equals 0.75 feet.
200 x 0.75 = 150 cubic feet
150 / 27 = 5.56 cubic yards before allowance
This example isn’t a universal specification. Soft soil, clay, drainage problems, and heavy vehicles can require an engineered gravel base design.
Order gravel base material in the supplier’s stated delivery increment, and round up after adding the allowance. Suppliers commonly quote aggregate in cubic yards, so confirm whether the amount is loose or compacted volume.
Extend the compacted layers to a properly supported perimeter, because edge restraints need firm material beneath them.
Know Which Sand Goes Where
These materials do different jobs:
- Base aggregate is crushed stone or road base compacted under the pavers.
- Bedding sand forms a thin, even layer over the compacted aggregate.
- A bedding sand layer is typically about 1 inch thick after screeding.
- Polymeric sand fills the finished paver joints after installation and activates with water according to product directions.
Some suppliers call bedding material leveling sand. It supports and smooths the paver layer, but it doesn’t replace the compacted aggregate below.
To estimate this layer by volume, use:
square footage x 1/12 foot = cubic feet of bedding sand
Divide the result by 27 when ordering by volume.
For a 100-square-foot patio:
100 x 1/12 = 8.33 cubic feet of bedding sand
8.33 / 27 = 0.31 by volume
Screed the bedding sand evenly to its specified depth. Use leveling sand only when the product is specified for this layer.
For bags, check the supplier’s bedding sand coverage data, since bag counts may be more practical than volume calculations.
Before ordering, list the base aggregate, bedding material, and joint filler. Note quantities in cubic yards where applicable.
Don’t use extra bedding sand or leveling sand to correct a weak gravel base. If pavers rock, sink, or hold water, lift the affected area, rebuild the support, and compact it properly.
Belgard’s installation guidance also calls for a consistent bedding layer, rather than a thick layer used to correct poor grading.
Install polymeric sand only after the pavers are set. Follow the label for joint filling and water activation.
Plan the Perimeter and Drainage Before Ordering
Every paver field needs a restraint around the outside. Without it, traffic and weather can slowly push the pavers outward. Joints open up, the pattern moves, and edges begin to look rough.
Calculate and order edge restraints in linear feet by adding every straight side. Measure curved sections with a hose or flexible tape. Include patio borders, transitions, steps, and tight turns. Add the manufacturer’s allowance for overlaps and connectors. This is a linear-foot calculation, not square footage, because it measures the perimeter rather than surface area.
Keep Water Moving Away From the Home
In Southwest Florida, drainage can’t be an afterthought. Heavy rain can expose a low spot fast. I plan the finished surface and gravel base elevation for a controlled slope away from the home and nearby structures.
A general target is about a 2 percent slope where the site allows it. That equals roughly one-quarter inch of fall per foot, so a 20-foot run needs about 5 inches of total fall. Actual layout still depends on existing elevations, doors, property swales, and local drainage rules.
Before excavation, verify door thresholds, garage slabs, pool decks, screen enclosures, swales, and property boundaries. Check garage-to-street transitions on driveways, where repeated vehicle loads can expose elevation problems. Review transitions and drainage around walkways too.
If drainage problems appear during layout, revisit the gravel base preparation before excavation continues. Call 811 for utility locating before digging. Check city or county requirements too, especially if widening an entrance, changing drainage, or working near the right-of-way. Requirements can vary by municipality.
Estimate the Full Paver Project Cost
Material pricing is only one part of the budget. Use a simple formula: square footage × paver price per square foot. Then add estimated quantities and prices for the gravel base, bedding sand, joint filler, edge restraints, delivery, demolition, drainage, equipment, cutting, and labor.
Price polymeric sand as joint filler, not as bedding material. Product type and finish also affect pricing, so concrete pavers can have different unit prices from other surfaces.
Total the material costs separately from labor so you can see which items drive the budget. Price aggregate using the supplier’s actual delivered volume, since minimum loads and delivery fees can change the total.
Labor is the main variable in installation cost. A broad planning range is often $8 to $40 per square foot, but it isn’t a quote. Excavation depth, equipment access, pattern, demolition, soil, drainage, and material choice can all change the final amount.
Get an Estimate Based on the Actual Site
Start with two checks before ordering. Compare the online paver calculator’s area and coverage result with your manual worksheet. Verify the package or pallet coverage, then confirm the number of units or pallets required.
Multiply each material quantity by its unit price. Check whether delivery minimums, package rounding, or pallet rounding change the total.
For example, a 400-square-foot patio with 10 percent extra needs 440 square feet of pavers. At $6 per square foot, the pavers cost $2,640. If the gravel base requires 12 cubic yards at $55 each, add $660. Add $300 for sand and joint filler, $180 for edge restraints, and $250 for delivery. The material subtotal is $4,030 before labor and site work.
For product-specific coverage and installation details, Techo-Bloc installation guides can help confirm package quantities after you select a paver line.
Frequently Asked Questions
How do I calculate how many pavers I need?
Measure the finished surface area in square feet, then divide it by the square-foot coverage of one paver or one package. Add the appropriate waste allowance and round up to full packages or pallets.
How much extra should I order for paver waste?
Add 5 to 10 percent for a simple rectangular patio or running-bond layout. Use 10 to 15 percent for layouts with corners and curves, and 15 to 20 percent for herringbone, diagonal, circular, or custom patterns.
How do I calculate the gravel base for pavers?
Multiply the project area in square feet by the selected base depth in feet to find cubic feet. Divide by 27 to convert to cubic yards, then add an allowance for compaction, low spots, and grading.
How much bedding sand goes under pavers?
A typical bedding layer is about 1 inch thick after screeding. Multiply the project square footage by 1/12 foot, then divide by 27 if ordering the sand by cubic yards.
Do I need to plan for drainage when installing pavers?
Yes, the finished surface and supporting layers should be graded to move water away from the home and other structures. A general planning target is about a 2 percent slope, but existing elevations, thresholds, swales, property boundaries, and local requirements still need to be checked.
A Better Paver Calculation Prevents Expensive Problems
When you calculate pavers correctly, you plan more than the surface.
That plan includes a compacted gravel base, bedding layer, joint material, perimeter support, proper slope, and allowances for cuts. Use the detailed formulas, then complete this final check before ordering:
- Confirm the finished dimensions and square footage, then recheck rectangle and circle formulas and irregular-area additions.
- Compare the measured square footage with the supplier’s paver coverage rate.
- Verify the waste percentage matches the pattern and cut complexity.
- Confirm the base volume for the gravel base, and verify aggregate is ordered in cubic yards.
- Confirm bedding sand quantities, and ensure leveling sand is thin and even, not a fix for a weak base.
- Check the perimeter layout and confirm the edge restraints cover every exposed side.
- Verify the slope directs water away from structures and matches the plan.
- Confirm delivery rounding matches supplier increments and minimum-load requirements.
- Retain a small replacement reserve of matching pavers for areas where freeze thaw movement, weather, or repairs may affect the surface.
Good measurements help create a stable paver patio, while proper support keeps a driveway or other paved surface performing well.