

Meta Title: Florida Paver Installation Timeline: Prep to Cleanup
Meta Description: See how a Florida paver project moves from planning and base work to joint sand, cleanup, and long-term care.
A quality paver project in Florida depends on soil conditions, drainage, compaction, and strong edge support. Paver color and pattern matter, but they don’t keep the surface level through heavy rain.
I have seen patios and driveways look great at first, then settle after one hard rainy season because the base was rushed. This timeline covers planning, permitting, excavation, base preparation, drainage checks, paver placement, inspections, and cleanup. Here’s what homeowners should check before approving the work.
Key Takeaways
- Sandy Southwest Florida soil can support concrete pavers, but loose, disturbed, or washed-out ground needs more attention before the base goes in.
- The pavers are the visible layer. Excavation, compacted aggregate, leveling material, edge restraints, and joint sand hold the whole system together.
- Drainage should be planned before demolition. Water needs a controlled path away from the home, garage, pool enclosure, and neighboring property.
- A project may pause after rain. Wet soil that ruts, pumps water, or won’t compact shouldn’t be covered with pavers.
- Cleanup isn’t the last detail. The final inspection should include slopes, joints, borders, cuts, drainage flow, and any areas that feel soft underfoot.
A low paver is rarely only a low paver. Water movement, weak compaction, or failing edges below the surface are often the real issue.
Site Planning Starts the Florida Paver Project
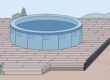
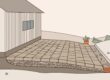
The first visit should focus on the property, not a paver sample board. The site plan should support outdoor living and identify whether the project involves paver patios, a pool deck, driveway pavers, or paver walkways. Access, use, and finished elevations must be resolved before paver installation begins.
Layout, access, and material choices
A driveway needs pavers rated for vehicle traffic. A pool area needs a finish that feels good under bare feet and offers dependable traction when wet. Natural stone can provide a different appearance when it suits the design.
Patio furniture, grill locations, gates, screen doors, landscape lighting, irrigation heads, and equipment access all affect the layout. These details also shape the broader hardscape installation and help define any custom paver services needed.
I also recommend homeowners check HOA requirements before materials are ordered. Driveway colors, borders, and layouts visible from the street can affect curb appeal and may need approval. Confirm material availability early, especially for selected colors, borders, coping transitions, and specialty patterns.
For a closer look at base layers, paver types, joint sand, and sealers, review these materials for durable brick pavers.
Permits, utilities, and finished elevations
Permit rules can change from one municipality to another. A driveway expansion may have different requirements than replacing an existing surface. I tell homeowners in Fort Myers, Cape Coral, Bonita Springs, Punta Gorda, Sarasota, and nearby areas to confirm local requirements before demolition.
Call Sunshine 811 before deeper excavation or work near utilities. Also, don’t drill into screen enclosure footings or move pool-cage anchors without qualified guidance.
The finished paver height matters. New pavers should meet doors, garage slabs, walkways, drainage areas, and pool coping without creating a trip point or pushing water toward the home. Grade changes may also require coordination around retaining walls.
Excavation Reveals What Is Under the Surface
Excavation is where the true condition of the yard becomes clear. Clean sand, shell, construction fill, organic soil, clay pockets, utility trench backfill, and old concrete edges can all appear on one property. Areas near grade changes, retaining walls, pool structures, or property transitions may require extra care.
Removing weak soil and old materials
The crew marks the planned perimeter and finished elevation, then removes the old surface and unsuitable soil. The excavation depth depends on paver thickness, planned base depth, traffic rating, drainage, and soil stability. Heavier traffic and driveway pavers typically require a stronger, deeper section.
A patio or walkway may begin with about 4 to 6 inches of compacted aggregate and a thin bedding layer. A residential driveway often needs a deeper section. Our brick paver driveway installation guide discusses a common approach of about 12 inches of excavation, 6 to 8 inches of compacted gravel, and 1 to 2 inches of sand.
Those are planning ranges, not one-size-fits-all measurements. Custom paver services must account for mixed fill, old concrete, utility backfill, and organic or soft soil. Project size, vehicle loading, drainage, disturbed soil, and actual site conditions control the final excavation and base design.
Managing sandy soil and soft spots
Sandy soil drains quickly, but it does not always hold its shape. Heavy rain can move fine material, soften the ground, and wash support away from the aggregate base.
The quality of soil compaction determines whether the subgrade holds firm without pumping, rutting, or losing its shape. Where soil is loose, mixed, disturbed, or likely to blend into the stone, geotextile fabric may be used for separation and filtration. It is not required under every paver project, and it cannot fix a bad drainage plan.

The Crushed-Stone Base Does the Heavy Work
The aggregate base supports the leveling layer and pavers. This base preparation takes time because it must be placed, shaped, checked, and compacted in controlled lifts.
Building the base in compacted lifts
Crushed stone or base gravel should go down in manageable lifts, often around 3 inches at a time. Each lift must be compacted with a plate compactor before the next one is added. Dumping the full base depth at once and compacting only the top can leave weak material below.
For a well-drained residential driveway, the Concrete Masonry and Hardscapes Association lists at least 6 inches of compacted base as a starting point. The interlocking concrete pavement guide also notes that concrete pavers provide rapid drainage and good slip resistance, which is useful around pool areas.
The base needs a firm, even feel before the next layer begins. Deep footprints, tire ruts, smearing material, or water pumping to the surface are warnings that the area is too wet or unstable.
Setting drainage before the leveling layer
Florida rain tests every slope. Good drainage solutions account for finished slopes, downspouts, garage thresholds, and pool enclosures. They should also protect foundations and neighboring properties from concentrated runoff.
At grade transitions, check retaining walls and areas where runoff could collect behind or beside a wall. Large driveways, turning areas, pool surrounds, or difficult grades may need custom paver services with a site-specific base and drainage design.
The 2020 Florida Building Code, Building, 7th Edition, allows a minimum 1 percent grade for paver-type decks. Review the Florida Building Code slope guidance and confirm the rules that apply to your exact property.
A laser level helps the crew check elevations throughout base work. I don’t wait until pavers are laid to find out water is heading in the wrong direction.
Weather, project size, soil moisture, material availability, and inspection findings can extend this phase. Work should pause until unstable or overly wet areas are corrected.
Bedding Sand Makes the Final Surface Even
Bedding sand is a leveling layer. It is not there to make up for a low base, cover deep dips, or correct unstable soil. If the base is wrong, the sand will not make it strong. Ordinary masonry sand should not replace the specified bedding material when the paver system calls for a different product.
Screeding a consistent sand layer
After the base is compacted and graded, a thin, consistent layer is placed over it. Many projects use about 1 inch, although the correct depth depends on the selected system and site conditions.
Screed rails and a screed board bring the sand to an even plane. Once this layer is prepared, avoid walking across it or dragging materials through it. Footprints and tire marks can create uneven pavers later.
Checking the surface before pavers arrive
Custom paver services often include unique layouts, curves, borders, and transitions. Before disturbing the surface, the installer should check grade, width, edge locations, and the first pattern row. A clean layout can prevent unnecessary cuts.
If Florida rain hits after the surface is screeded, the crew should inspect it and confirm elevations before pavers arrive. Standing water, washouts, or disturbed sand may mean that section has to be reworked before pavers are installed.
Laying Concrete Pavers and Securing the Perimeter
Once the base and bedding layer are approved, paver installation moves faster. Still, the visible pattern deserves careful work. Small layout errors can become wide cuts or uneven borders at the far end.
Setting the field and making clean cuts
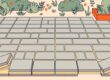
Pavers are placed from a stable starting edge, following the selected pattern and keeping joint spacing consistent. A herringbone pattern is often used in driveways because it handles vehicle movement well. Patios and pool decks may use more decorative layouts.
Custom paver services must account for curves, drains, steps, columns, coping, screen enclosures, and border widths. Cuts should be clean and properly fitted, with no narrow slivers along the edge.
Larger driveways or restricted-access pool areas may require staged material delivery and additional layout checks.
Edge restraints keep pavers from spreading
Secure edge restraints, anchored edging, curbs, or other approved support hold the outside units in place. Without a stable perimeter, pavers can creep outward, joints can open, and borders can separate.
This is one area I never treat as optional. Heavy turning traffic, slope, runoff, and tree roots can all put pressure on the outside edge.
Joint Sand, Compaction, and Cleanup Finish the Job
The final phase locks the surface together and leaves the property clean. It also shows whether the crew protected nearby landscaping, pool equipment, walls, and existing concrete.
Filling the joints the right way
Polymeric sand is swept into dry, clean joints after the pavers are set and compacted. It is then activated with water according to the product directions. The material hardens in the joints and helps limit weed growth, ant activity, debris, and washout. Masonry sand isn’t a substitute for the specified joint material in this application.
Don’t rush this step between storms. Polymeric sand needs dry pavers and dry joints before it is installed and activated. If pavers are rocking, the base needs repair first. Joint sand cannot correct movement below the surface.
Final compaction and site cleanup
A plate compactor, usually with a protective pad, seats the pavers into the bedding layer and helps settle the joint material. The crew should make the correct final pass with the plate compactor before checking for movement, open joints, chipped units, and uneven edges.
Cleanup should include removing extra sand, leftover stone, cut pieces, debris, and protective coverings. Nearby landscaping, pool equipment, walls, and existing concrete should remain protected throughout the process. Downspouts, drains, gates, doors, and irrigation should be checked before the project is signed off.

Weather Can Change the Installation Schedule
Florida’s subtropical climate brings intense sun, heavy rain, saturated soil, and fast-moving storms. The best schedule depends on weather and site conditions, not simply the month on the calendar.
Drying time matters after a storm
Light rain may slow material handling without stopping every task. Heavy rain is different. It can fill excavations, soften the subgrade, move bedding sand, and wash aggregate out of place.
I’d rather pause for a day than cover wet, unstable material with beautiful pavers. After a storm, the crew should inspect each layer before paver installation continues. Materials must be firm and dry enough to inspect and compact properly.
What homeowners should expect on timing
A straightforward patio may move through excavation, base preparation, paver setting, and cleanup without major delays. Project size, difficult access, demolition, drainage repairs, screened pool areas, and material availability can extend the schedule.
For larger or more complex work, custom paver services should include clear weather contingencies. Reworking washed-out sections can also add time before the crew resumes installation.
Ask your contractor what happens if a storm arrives after excavation. A clear answer should include site protection, drying time, subgrade and base inspection, drainage verification, and rework before pavers are installed.
Questions Homeowners Ask Before Work Starts
Can pavers be installed during Florida’s rainy season?
Yes, when the site is firm, drained, and dry enough for proper compaction. Work should pause if there is standing water, deep rutting, soft soil, or disturbed bedding sand.
How do I know the base is failing?
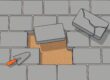
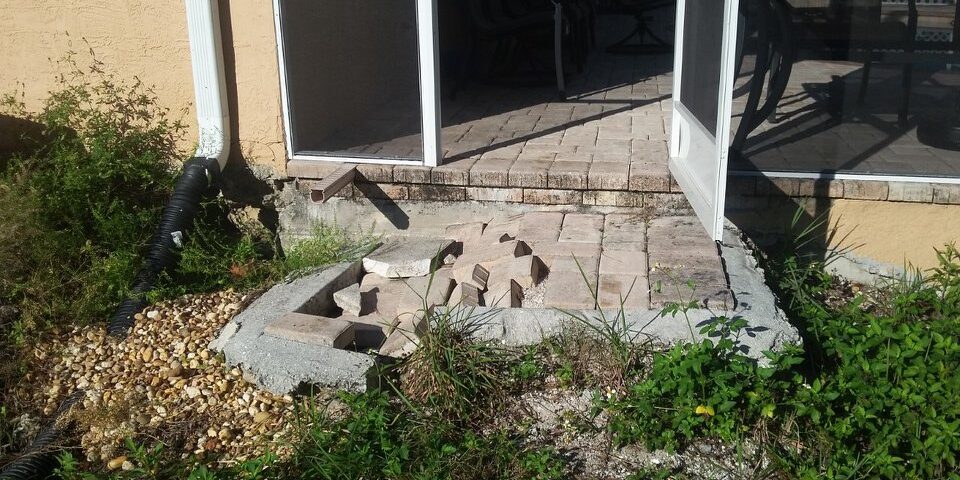
Watch for rocking pavers, low areas that hold water after storms, separating borders, open joints, or tire marks that sink. Adding loose sand under one paver is usually a temporary patch. The affected area may need to be lifted, rebuilt, compacted, and reset.
How often should pavers be sealed and maintained?
Sweep debris, manage stains early, and inspect the joints after major storms. Sealing schedules vary by traffic, sun, moisture, paver condition, and the sealer product. Driveways may need attention more often than a covered patio. These paver sealing and maintenance tips can help you spot wear before it becomes a larger repair.
A Strong Base Makes the Difference
A beautiful driveway, patio, walkway, or pool deck starts below ground. Proper excavation, compacted aggregate, controlled drainage, secure edges, and full joints give Florida pavers the support they need through rain, heat, and daily use. Durable construction also improves appearance and may support curb appeal and property value.
If you are planning paver walkways, driveways, patios, or pool areas, Get a Free Quote for a site review and clear estimate. Whether you need custom paver services or repairs for sinking pavers, I will review the base, drainage, access, material selection, project size, and desired finish before work begins.