


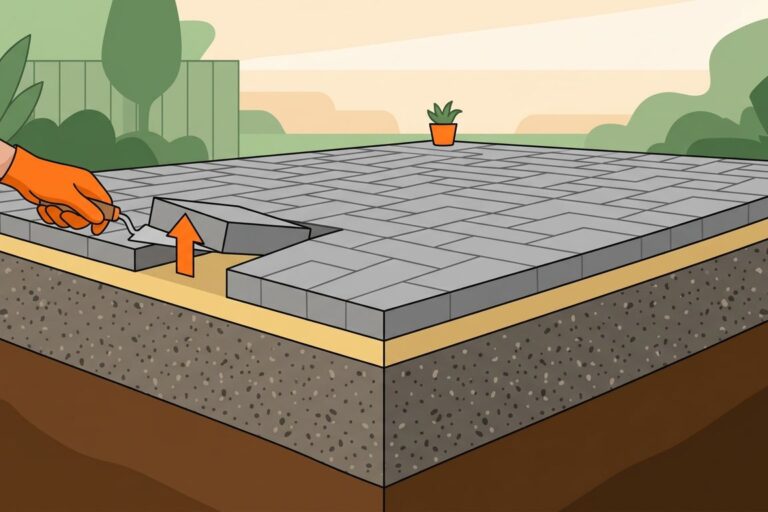
Paver Bedding Sand Depth: How Thick Should It Be?
The standard paver bedding sand depth is 1 inch, about 2.5 cm, over a properly compacted crushed-stone base. I recommend keeping that layer thin and consistent, because adding more sand gives the pavers more room to settle.
If you’re planning a paver patio, walkway, or driveway, the base underneath does the heavy work. Bedding sand helps position the pavers, but it cannot make weak ground strong.
Start with the right depth, then give each supporting layer the attention it needs.
Key Takeaways Before You Start
- Use approximately one inch of coarse concrete sand over a conventional compacted aggregate base.
- Pedestrian walkways commonly need 4 to 6 inches of compacted crushed stone underneath, with additional preparation where soil or drainage requires it.
- Rigid panel systems commonly use a 1/2-inch sand preparation layer, while polymeric sand belongs in the finished joints, never beneath the pavers.
I recommend treating the base, bedding, and joints as separate parts of the job. Each material has a purpose, and substituting one for another can lead to expensive repairs.
How Thick Should Paver Bedding Sand Be?
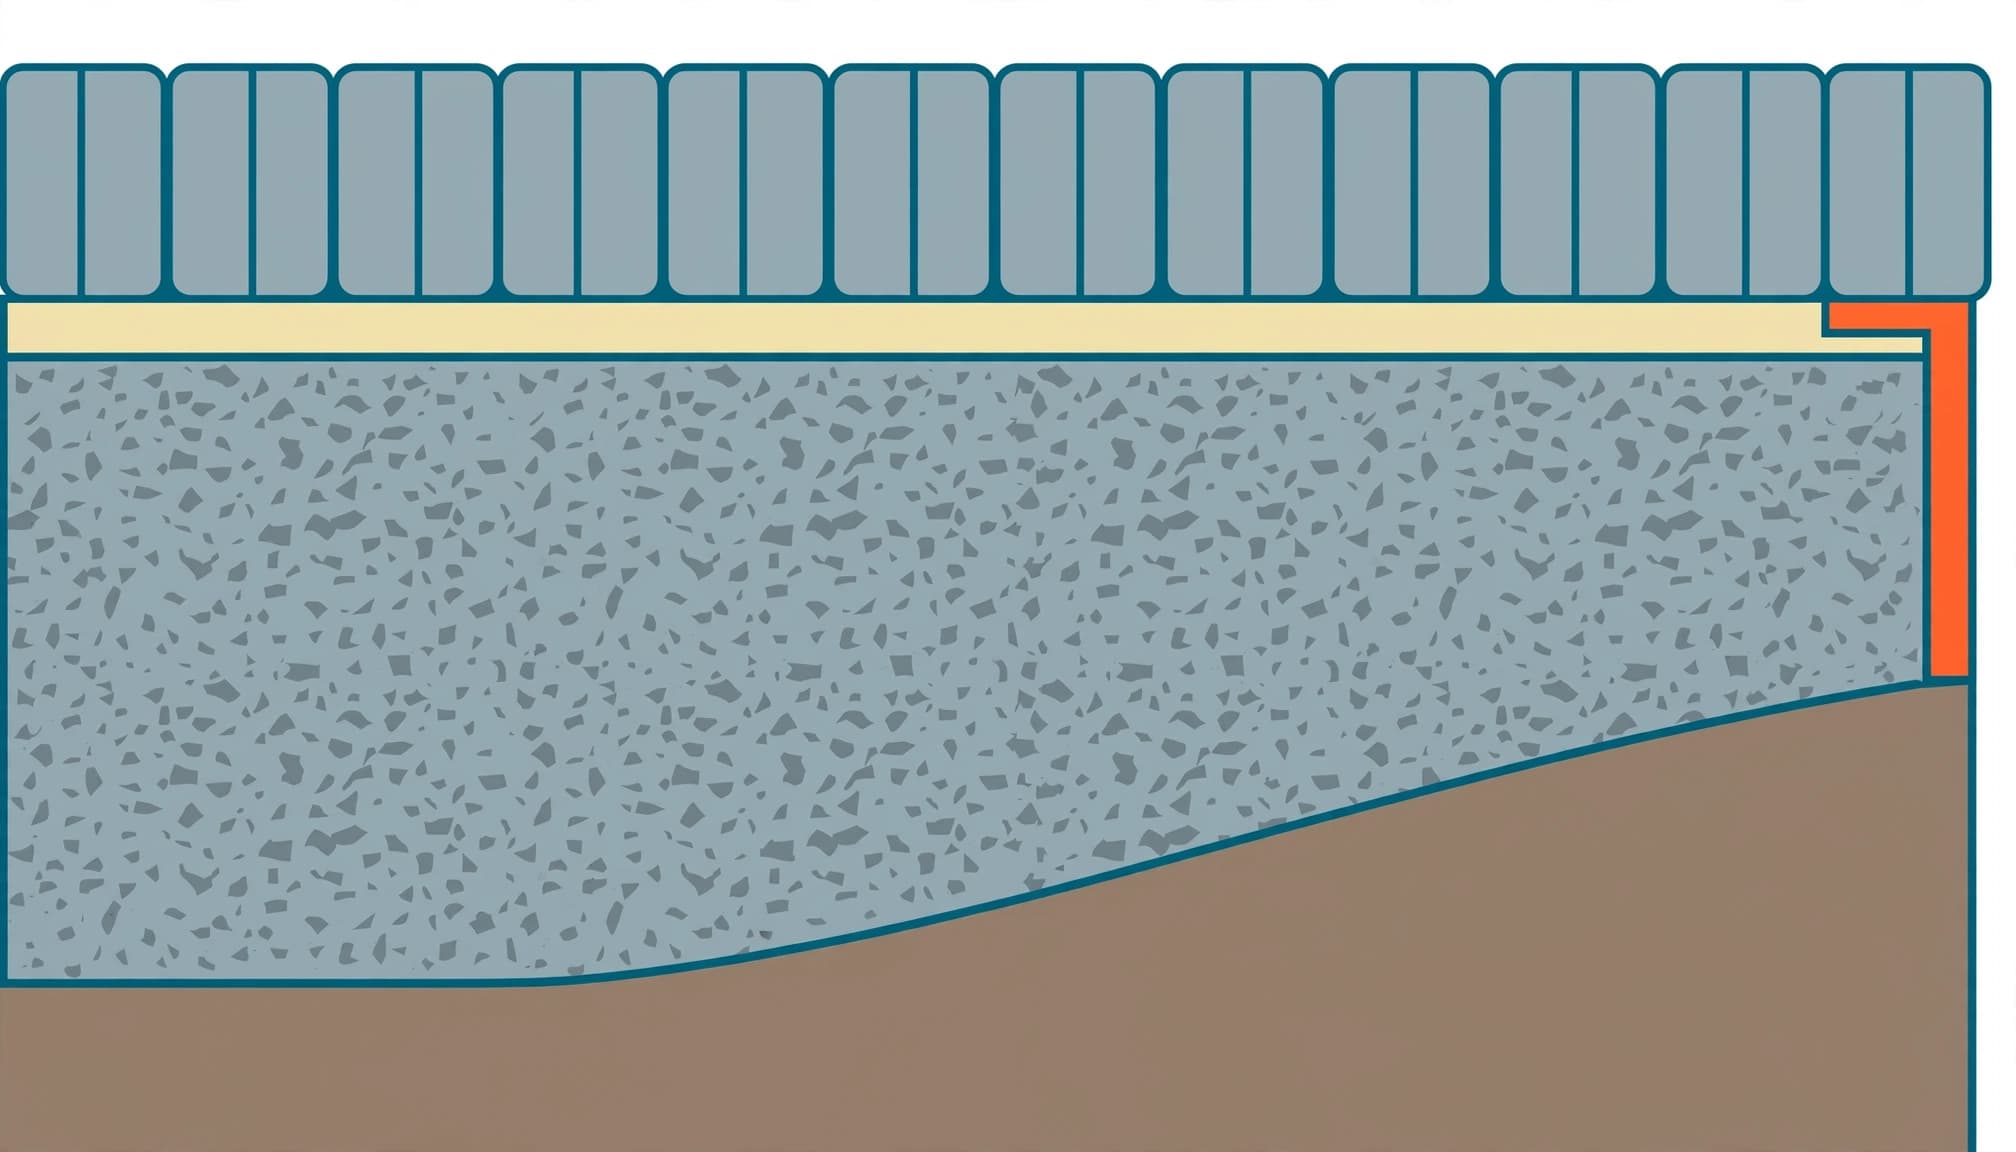
One inch over a compacted stone base
For a conventional sand-set installation, screed the bedding layer to approximately 1 inch before placing the pavers. Alliance’s Eurostone bedding specifications identify one inch as the maximum bedding thickness for the described assembly.
That measurement is separate from the compacted aggregate below and the paver thickness above. A deeper excavation doesn’t mean you should fill the extra space with sand.
I recommend correcting low areas in the aggregate first. A uniform bed provides more consistent support across the finished surface.
Rigid panels use a different assembly
The familiar 1/2-inch recommendation usually refers to sand preparation for paver base panels.
Brock PaverBase uses approximately 1/2 inch of sand beneath its panels for suitable pedestrian applications. Alliance Gator Base is designed to replace 6 inches of conventional crushed stone, but its panel assembly differs.
These systems aren’t interchangeable with a traditional gravel base. The half-inch figure describes a particular layer within a panel installation, not a universal replacement for conventional bedding specifications.
Choose the Right Bedding Material
Coarse concrete sand or approved bedding stone
Use coarse concrete sand meeting ASTM C33, or a specialized bedding product specified for the paving system. The CMHA aggregate-base specification identifies ASTM C33 gradation for bedding sand.
Fine play sand doesn’t have the particle structure needed for a stable setting bed. Mason sand, stone dust, and limestone screenings also aren’t automatic substitutes, particularly where they retain water or move beneath the pavers.
Some Alliance assemblies permit ASTM No. 9 stone. That is an approved material choice within those systems, not permission to use any small gravel.
Keep bedding sand separate from joint sand
Polymeric sand contains binders and belongs between the installed pavers. It cannot replace bedding sand.
The material under the pavers provides an even setting surface. Joint sand helps the finished units interlock and limits movement between them.
I recommend keeping these materials separate when ordering, too. A bag labeled “paver sand” can cause confusion when the homeowner needs bedding material but receives a jointing product instead.
Prepare the Base and Drainage First
Compact the aggregate in controlled lifts
Many pedestrian patios and walkways start with 4 to 6 inches of compacted crushed stone base. That means finished compacted depth, not the height of loose stone dumped into the excavation.
Place well-graded crushed aggregate in manageable lifts, commonly 2 to 3 inches with residential equipment, and compact each lift. Rounded pea gravel doesn’t lock together the same way.
Compact the perimeter firmly so the edge restraint has stable support. Our guidance on outdoor kitchen base preparation explains why firm support matters before the setting bed goes down.
If aggregate shoves, ripples, or develops deep ruts under equipment, stop and correct the condition. Covering it with sand won’t solve the problem.
Build the slope into the supporting layers
A common drainage target is approximately 2%, roughly 1/4 inch per foot, away from the house and other vulnerable structures.
Build that grade into the prepared soil and aggregate. Keep the bedding thickness consistent instead of making a wedge of sand to create the slope.
In Southwest Florida, heavy rainfall, saturated soil, and erosion deserve attention during planning. I want runoff directed toward a suitable drainage area, not against a screen enclosure or into an already-wet corner. Managing water beneath the paving also helps limit water-related stress during freeze-thaw cycles in climates that experience them.
How to Screed a Consistent Bedding Layer
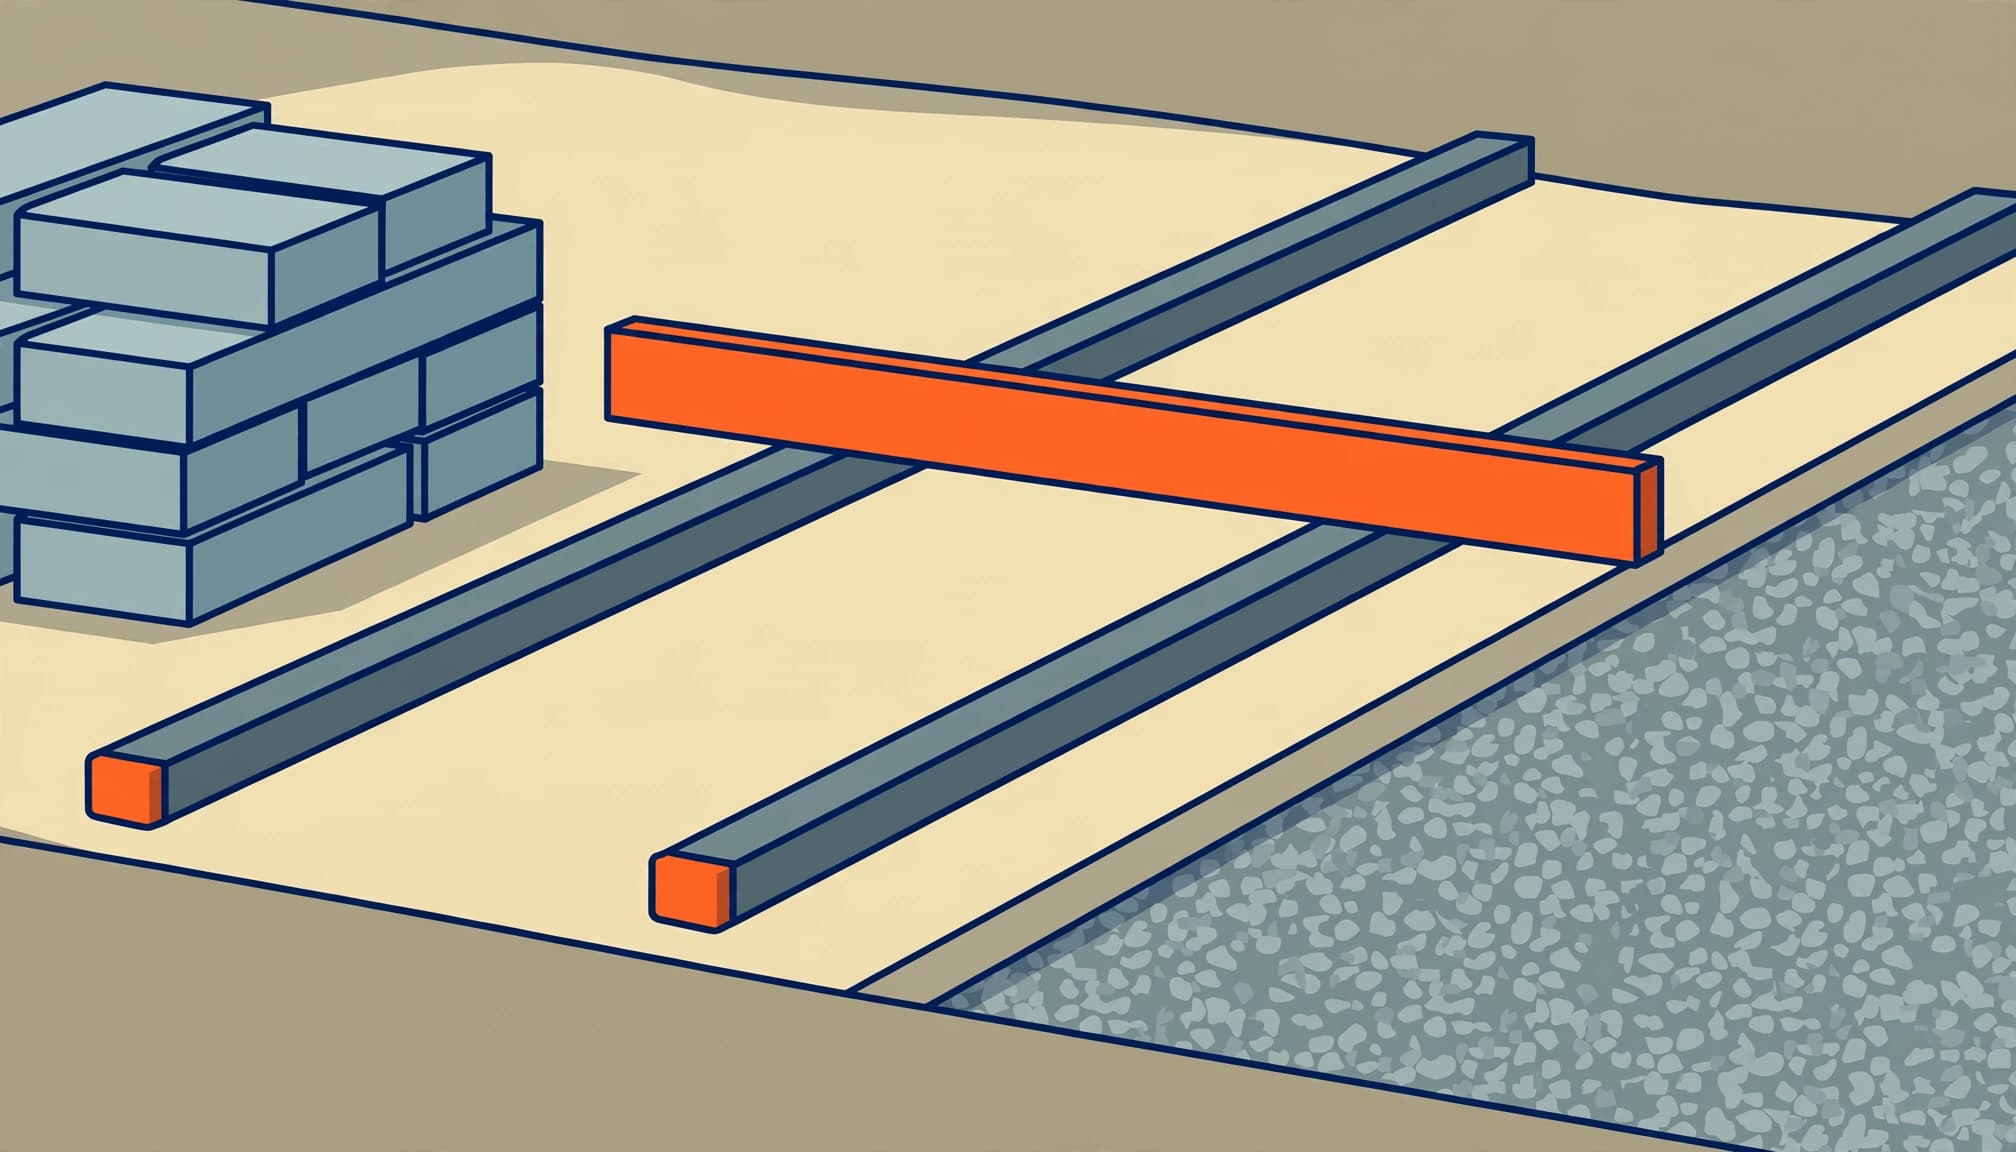
Screeding establishes an even setting bed. Take your time, because footprints, low spots, and uneven rail heights carry through to the pavers.
- Establish the finished surface elevation with string lines or a laser. Account separately for paver thickness, the nominal 1-inch sand depth, and the compacted base.
- Set two screed rails from the compacted aggregate at the intended sand-bed elevation. Measure their height above the aggregate in several locations.
- Spread the approved sand and draw a straight board across both rails. Keep the board resting on the rails throughout the pass.
- Remove the rails and fill their channels without disturbing the surrounding bed. Check the sand depth at several points and confirm it follows the intended grade, including any required slope.
- Lay pavers while working from an installed surface. Avoid walking on the prepared sand, and repair any disturbed area before covering it.
I don’t compact a conventional loose sand bed before placing the pavers. Seat the installed pavers afterward with equipment suitable for the paving product, using a protective pad where required.
The nominal 1-inch depth is measured in the screeded bed before pavers are placed. After seating, the sand may settle or compact, so its final thickness can be slightly less. It isn’t a separate fixed 1-inch measurement.
Don’t add extra sand to compensate for expected settling. If the sand needs to be substantially thicker to meet your string line, correct the aggregate elevation before laying pavers.
Secure a compatible edge restraint on firm supporting base. Loose bedding sand cannot provide dependable anchorage for the border.
How Much Bedding Sand Will You Need?
Calculate bedding sand by area and depth, separately from aggregate and joint sand.
For a 1-inch layer, multiply the square footage by 1/12 foot to get cubic feet. Divide that result by 27 for cubic yards.
A 200-square-foot patio needs approximately 16.67 cubic feet, or 0.62 cubic yard, before handling losses. If the material comes in 0.5-cubic-foot bags, that equals 34 bags before additional allowance.
Our paver material calculation guide covers these quantities alongside the surface materials.
I recommend allowing for handling losses in the order rather than making the installed bed thicker. Joint-sand quantities require a separate calculation based on joint width, depth, and paver dimensions.
Finish the Joints After Setting the Pavers
Fill the joints to the required depth
For conventional interlocking pavers, sweep polymeric sand into completely dry joints, compact it into place, clear surface residue, and activate it with water.
Fill the joints through the required depth, commonly at least 1-1/2 inches. Finish approximately 1/8 inch below the paver surface or chamfer, rather than leaving loose material across the face.
Choose jointing sand based on the product’s published joint-width range.
| Joint-sand product | Published joint-width range |
|---|---|
| Techniseal HP NextGel | 1/16 to 2 inches |
| SRW SimplyTough | 1/8 to 3/4 inch, up to one inch at intersections |
The HP NextGel product information identifies its width range. Neither product is bedding material, regardless of joint size.
Properly filled joints can help limit water entry and reduce weeds, but they don’t eliminate freeze-thaw risk or guarantee weed-free paving.
Respect drying, temperature, and traffic limits
The pavers, joints, and sand must be completely dry before installation. SRW’s SimplyTough installation guidance advises waiting 24 hours after rain.
Alliance G2 sands have a 32°F minimum application threshold. Techniseal NOCO, a no-compaction joint product, requires temperatures above 50°F for 48 hours after installation.
Techniseal HP NextGel and SmartSand require keeping vehicles off the new surface for 48 to 72 hours. These are product-specific restrictions, not one universal cure time for every polymeric sand.
I recommend planning the joint work around a suitable weather window. Rushing wet joints can create surface residue, poor bonding, and unnecessary cleanup.
Common Questions About Sand Under Pavers
Is 2 inches of bedding sand too much?
For the conventional 1-inch assemblies discussed here, yes. A 2-inch layer gives the pavers more opportunity to settle unevenly.
Lift the affected area and correct the aggregate elevation. Adding joint sand above the pavers won’t repair excessive bedding depth underneath.
Does a driveway need thicker bedding sand?
A driveway needs stronger structural support, not a deeper loose setting bed. Residential driveways commonly use 6 to 8 inches of compacted aggregate, with more support where ground conditions or loads require it.
The setting bed generally remains about one inch. Vehicle-rated pavers, proper compaction, and restrained edges also matter.
Do permeable pavers use ordinary bedding sand?
Permeable systems use a different supporting assembly, often with clean, angular bedding stone and open-graded aggregate.
Ordinary fine sand can restrict infiltration. Our permeable paver driveway guide explains how those drainage layers differ.
What happens if bedding sand is skipped?
In a conventional sand-set assembly, omitting the specified bedding layer leaves uneven support beneath the units. Pavers can rock, shift, and settle at different heights.
Water can collect in the resulting low areas, and the surface may need early repair or complete reinstallation.
A Thin Bedding Layer Starts With a Strong Base
For conventional pavers, keep the bedding layer at approximately 1 inch over a firm, properly graded aggregate base. Consistent thickness matters more than adding extra sand.
I recommend putting your effort into soil preparation, compaction, drainage, and perimeter support. Those details protect the finished surface long after installation.
For help with your patio, walkway, or driveway, Get a Free Quote from Platinum Pavers of SWFL. I welcome the opportunity to help you plan a durable installation.