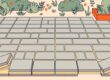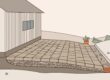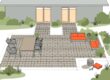



A paver patio can look perfect when it is installed and still start moving months later. In Southwest Florida, the issue is often hidden below the pavers, where maintaining a stable paver base in sandy soil becomes a difficult challenge as the ground shifts, washes away, or loses support after heavy rain.
I have inspected uneven paver surfaces, rocking pool deck pavers, and separating borders in Fort Myers, Cape Coral, Bonita Springs, Punta Gorda, and Babcock Ranch. While the surface damage is easy to see, the real repair usually starts with a detailed assessment of the base materials and the unstable soil beneath them.
Key Takeaways
- Sandy soil drains quickly, but it can also shift when water moves through it.
- A stable paver base requires proper excavation, an approved gravel base for structural integrity, thorough compaction, and secure edge restraint.
- Adding loose sand under a sunken paver is usually a temporary patch.
- Downspouts, pool runoff, irrigation, and disturbed fill can weaken a paver base.
- A lasting repair corrects the support below the pavers, which helps to prevent shifting and ensures long-term stability rather than just fixing the visible low spot.
Why Southwest Florida Sand Creates Paver Base Problems
Southwest Florida has many sandy sites, but not every property has the same soil conditions. Some yards contain clean beach-like sand. Others include shell, construction fill, clay pockets, organic material, or soil that was disturbed during home and pool construction.
That difference matters. Clean sand can drain well, but it has little natural binding strength. When the particles are loose, water can move through them and carry smaller material with it, a process known as base migration. Heavy rain can also saturate the ground below a patio or driveway, especially where drainage is poor.
I often compare sandy soil to a container of dry sugar. It can hold its shape while packed, but once the material starts moving, the surface loses support. Pavers depend on the patio foundation beneath them to spread weight evenly. If a section of that support disappears, the pavers begin to settle, rock, or separate.
The soil around a new pool is another concern. Excavation can disturb the original ground, while the soil placed back around the pool may not have the same density as untouched areas. A paver deck installed over recently disturbed soil needs careful preparation and compaction.
Homeowners can review general mapped soil information through the USDA Web Soil Survey, but a map cannot show every change made during construction. I still inspect the actual site, drainage patterns, paver movement, and base condition before recommending a repair.
Sandy soil is not automatically bad for pavers. It simply requires the base to be prepared correctly and protected from water movement.
What Happens When the Base Loses Support
The first sign may be a single paver that rocks under your foot. After that, the problem can spread through the surrounding area. Once one paver moves, the joints open, water enters more easily, and nearby pavers can lose their support as well.
I look for several common warning signs:
- Low spots in a driveway, walkway, or patio
- Pavers that feel loose or soft after rain
- Gaps between border pavers
- Uneven pool deck sections
- Joint sand that disappears quickly
- Pavers that tip or rock under foot traffic
- Water collecting in one section after a storm
- Uneven paver surfaces that develop over time
A soft feeling after rain usually means the base or soil has absorbed water and lost firmness. It does not mean the pavers themselves are weak. The issue may be a saturated bedding layer, a void below the base, or water entering beside an edge.
Drainage from a roof can create the same concern. A downspout that releases water beside a driveway may slowly wash fine material away, which is why installing proper drainage solutions is often necessary to protect your hardscape. Pool splash-out, irrigation spray, and water running toward a screen enclosure can also add pressure to a weak area.
Tree roots and utility work create other problems. A trench repaired with loose fill may settle differently from the surrounding soil. Roots can lift pavers, while an unsupported edge can allow the outer row to spread outward.
A cracked or sunken paver is often the symptom. The unstable soil or base below it is usually the cause.
Sealing the surface may improve color and help protect the joints, but sealer cannot rebuild missing support. I need to find out why the pavers moved before I decide how much of the area to repair.
How I Build a Stable Paver Base on Sandy Soil
A long-lasting installation starts before the first paver is placed. I begin by checking the layout, the planned use, nearby structures, and the way water moves across the property. A driveway carries more weight than a walkway, and a pool deck has different edge and drainage concerns than a patio.
The first step is removing unstable material. I do not build over loose organic soil, soft fill, buried debris, or material that cannot be compacted properly. The excavation depth depends on the project and site conditions, so I do not use one number for every property.
When sandy soil is loose or contaminated with other material, a geotextile fabric may be appropriate. While some contractors opt for standard landscape fabric, a heavy duty geotextile fabric helps keep the soil and aggregate from mixing, though it is not a replacement for proper base preparation. The right material depends on the subgrade and the water conditions.
I then place a suitable compactable gravel base made of crushed stone in controlled lifts. The base cannot be dumped in one deep layer and expected to compact evenly. Each lift needs the right moisture, and I use a plate compactor to compact layers of the stone until the surface is rock solid. You must compact thoroughly to ensure stability. On tight edges, corners, or small repair areas, hand tamping may also be needed.
The goal is a firm, even foundation that does not move under the expected load. I check the grade as I work, because a level-looking surface can still send water toward a home, screen enclosure, or low section of the yard.
The bedding layer comes after the compacted base. I use a layer of concrete sand for this bedding layer, which is not the same as the structural paver base. It is used in a thin, even layer to help set the pavers, not to correct a deep low spot or replace missing aggregate.
Once the pavers are placed in a sand set installation, whether using standard concrete units or natural stone pavers, I use edge restraints where the layout requires them. Without strong edges, traffic and water can slowly push the outside pavers apart. The border often holds the entire pattern together, especially on driveways and pool decks.
Finally, I use a plate compactor on the installed pavers and fill the joints with appropriate sand. The joint material helps lock the pavers together, but it cannot correct a weak foundation below them.
Protecting the Base With Drainage and Maintenance
Good drainage does not mean water should disappear anywhere it wants. The objective is controlled water movement, with the finished paver surface maintaining a proper slope for drainage to direct runoff away from buildings and vulnerable edges.
I check downspouts, irrigation heads, pool overflow areas, and low sections near screen enclosures. If water pours across a joint or collects along a border, I address those drainage solutions before resetting the pavers. Otherwise, the same movement can return after the next period of heavy rain.
Homeowners should also watch what happens during storms. Look for channels forming beside the pavers, exposed aggregate, washed-out joint sand, or new puddles. These details often show where the base is losing material.
Regular maintenance helps, but it must be done carefully. Sweeping leaves and dirt keeps organic material from building up in the joints. Replacing lost joint sand with polymeric sand can help lock the pavers together and stabilize the surface, though I do not recommend filling a deep void with sand and calling the job finished.
Pressure washing also needs care. Excessive pressure can remove your polymeric sand and expose the edges of the pavers. The National Park Service guidance on cleaning masonry explains why harsh cleaning methods can damage masonry surfaces, and the same basic caution applies to paver maintenance.
I prefer a controlled cleaning method, the correct nozzle, and a test area before washing the full surface. If the pavers are already loose, cleaning first may make the movement worse by removing more joint material.
Sealing should happen only after the surface is clean, dry, and structurally sound. A sealer can help with staining and maintenance, but it cannot stop settlement caused by sandy soil, ineffective drainage solutions, or poor compaction.
Repairing Sunken Pavers in Sandy Soil
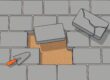
When I repair a settled area, I remove more than the one paver that looks low. I usually lift the surrounding pavers so I can inspect the bedding layer, aggregate, edge restraint, and soil below.
If the base is firm and the problem is limited, the repair may involve resetting the pavers and replacing the joint sand with polymeric sand to ensure long-term stability. If I find a void, loose fill, or wet material, I remove that material first. Then I correct the grade, add suitable base material, compact it in layers, and reset the pavers to match the existing pattern.
I don’t recommend adding a pile of sand under one loose paver. That often creates another soft spot because the added material has not corrected the void or compacted the foundation. The paver may look level for a short time and start rocking again after rain or traffic.
Matching replacement pavers also matters. Color changes over time because of sun, dirt, wear, and sealer, so a new paver may not match an older one perfectly. I check size, shape, texture, and the surrounding pattern before replacing damaged pieces.
Some sections need more than a targeted repair. Wide settlement, repeated border separation, or a driveway that keeps rutting can point to a larger base problem. In those cases, repairing only the visible low spot wastes time and money.
I have worked in Southwest Florida since 1998, and my approach is simple: inspect the cause, explain the repair, and complete only the work the area needs. If you are seeing movement around your driveway, patio, walkway, or pool deck, you can Get a Free Quote so I can evaluate your paver base in sandy soil and address any drainage issues before the damage spreads.
Frequently Asked Questions
Why do my pavers settle even though the soil feels firm?
Even if the surface feels solid, sandy soil can experience “base migration,” where fine particles wash away under the weight of water or heavy traffic. This creates small voids beneath the paver base that eventually cause the surface to sink, rock, or separate.
Can I just add sand under a sunken paver to fix the level?
Adding loose sand under a single paver is typically a temporary patch that does not address the underlying foundation failure. Because the added sand lacks the density and structural integrity of a compacted aggregate base, it will likely settle again, leading to further instability in the surrounding area.
Why does water collecting near my patio cause the pavers to move?
Excess water from downspouts or poor drainage saturates the sandy soil, reducing its load-bearing capacity and causing it to shift. When water flows beneath the pavers, it can erode the base material, leading to the low spots, gaps, and loose borders often seen after heavy rainstorms.
Is a heavy-duty geotextile fabric necessary for every paver installation?
Geotextile fabric is a valuable tool to prevent the mixing of subgrade soil and your gravel base, but its necessity depends on the specific site conditions. While it is not a replacement for proper excavation and compaction, it provides extra stability in areas with loose or contaminated sandy soil.
Conclusion
Sandy soil can support beautiful, durable pavers, but the foundation must be prepared to manage moisture and earth movement. Proper excavation, compacted aggregate, controlled drainage, strong edges, and correct joint sand all work together to prevent shifting and ensure long-term stability.
When pavers sink in Southwest Florida, I do not treat the low spot as the only problem. I check what is happening underneath the surface, because a quality installation remains the best way to maintain a stable paver base sandy soil.