

A crack beside your pool enclosure is not always a simple concrete problem. Screen enclosure footings and nearby pavers often move differently, especially after excavation, heavy rain, drainage changes, or poor base preparation.
I see this concern often around pool decks, patios, and lanais. Sometimes the paver only needs to be reset. Other times, the footing, soil, or drainage has to be corrected first. The visible crack is only showing you where the movement reached the surface.
Key Takeaways
- Screen enclosure footings and the surrounding pavers move independently, which often causes them to settle at different rates.
- Factors like poor excavation, unstable soil, lack of edge support, and improper water drainage can lead to damaged pavers near your enclosure.
- While minor surface cracks are often cosmetic, widening gaps or shifting screen posts indicate a structural issue that requires a professional inspection.
- Simply resetting the pavers without addressing the underlying footing or drainage problems will likely result in the damage returning shortly.
- A successful, long-term repair requires evaluating the enclosure, foundation, paver integrity, joint sand, and surrounding grade as one integrated system.
Why the Footing and Pavers Move Differently
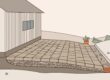
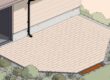
Most paver surfaces are built as flexible systems. The pavers sit over bedding sand and a compacted base, with joint sand and edge restraints helping hold everything in place. A screen enclosure footing is different. It is a rigid concrete footer that carries the enclosure posts and acts as a structural foundation to transfer those loads into the ground.
That difference matters. When the soil under the footing settles, the concrete may crack or pull against the surrounding pavers. When the paver base settles, the pavers may sink while the footing stays in place. The two surfaces meet at the edge, but they do not always move together.
Southwest Florida weather adds more stress. Heavy rain can soften soil, wash fines out of an unprotected edge, or expose a weak spot in the base. Dry periods can also cause soil to shrink in some areas. The result may be a small gap, a rocking paver, or a diagonal crack beside the pool cages.
I also look at how the footing was installed. If an enclosure was added after the original pavers, workers may have removed pavers and dug through the base. If that area was not rebuilt and compacted correctly, the ground around the new footing can settle later.
A rigid footing beside a flexible paver surface is a little like a heavy step next to a soft mattress. Each part responds to pressure in its own way. The joint between them is where the problem often becomes visible.
For code and permitting questions, I recommend checking the Florida building requirements or speaking with the local building department. Screen enclosure requirements can vary by project and location.
Common Causes of Cracked Pavers Near a Screen Enclosure
The first cause I check is disturbed soil. Digging for a concrete footer removes part of the existing base. Even when the concrete footing is installed correctly, the soil beside it can remain loose if it was not placed back in compacted layers. Pavers over that area may sink or separate from the footing.
Poor edge support creates another common problem. Pavers need a firm border to keep the outside units from spreading. If the footing edge replaces an old restraint but leaves a narrow strip of loose sand, those pavers can move under foot traffic, pool furniture, or repeated water flow.
Drainage is also a major concern. Water may run toward the enclosure because of the patio slope, roof runoff, a downspout, or a low spot in the concrete deck. When water stays near the footing, it can soften the supporting soil. In some cases, it carries soil away and leaves a void beneath the pavers.
Roots can lift pavers near patio enclosures. A tree or large shrub does not need to touch the screen structure to affect the surface. Roots can push upward, while decaying roots can leave hollow areas below the base.
Heavy loads may add stress as well. A screen enclosure is lightweight, but aluminum frames, posts, doors, roof framing, and attached sections still transfer forces into their supports. A poorly supported footing may settle under those loads. The nearby pavers then show the movement first.
Finally, pool deck movement can spread into the enclosure area. Concrete decks can crack or settle because of soil conditions, water, or construction changes. If pavers were installed over or beside a moving deck edge, the pavers may crack, separate, or become uneven even when the individual stones are not defective.
Signs the Problem Is More Than a Surface Crack
Not every crack requires a large repair. Hairline cracking in a concrete footing may stay stable, especially when the screen posts remain straight and the nearby pavers are level. I do not recommend judging the structural stability of the installation by the crack alone.
Look at the entire area. Are the pavers sinking on one side of the footing? Do several joints open in a line? Does a post lean, shake, or move when the screen door closes? Is the footing pulling away from the pavers? These details tell me more than the width of one crack.
Watch what happens after rain. Standing water, soft joints, or a spongy feeling under your feet can point to drainage or base problems. If the pavers feel solid when dry but move after heavy rain, water is likely affecting the support below.
Some warning signs deserve prompt attention:
- A screen post is no longer plumb or the enclosure door drags.
- The footing has a widening crack, a visible separation, or a displaced section.
- Pavers next to the footing are rocking, sinking, or breaking at the edge.
- Joint sand has washed away and open voids are visible.
- Water collects beside the pool cages after normal rainfall.
- The anchoring systems, including hardware like tapcons, show signs of shifting or loosening.
- The same area has been repaired before and moved again.
I also check nearby pool tile, coping, concrete joints, and door thresholds. Movement rarely stops at one material. If the pavers are uneven and the enclosure post has shifted, patching one crack will not solve the full issue.
A crack is a symptom. The real repair starts below the paver surface and around the footing.
How I Inspect and Repair the Area
I begin by checking the enclosure posts, doors, fasteners, and footing line. I want to know whether the structure is stable before removing any pavers. I also look for water paths, low areas, missing edge restraint, and signs that soil has washed from beneath the base.
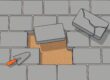
If only a few pavers have moved, I carefully remove those units and enough surrounding pavers to inspect the bedding layer. Pulling one stone and adding loose sand underneath is usually a temporary fix. The new sand may wash out or compact unevenly, and the paver can start rocking again.
The base needs to be corrected before the pavers go back. That may involve removing loose material, replacing it with a suitable concrete footer base material, compacting it in controlled layers, and rebuilding the bedding surface. The exact repair depends on what I find below the stones.
If the footing has undermined the pavers, I may need to rebuild the thick edge of concrete and install proper support beside the concrete. If drainage is sending water toward the enclosure, the grade, downspout discharge, or drainage path must be addressed. Otherwise, a clean reset will not last.
Matching is important too. Replacement pavers should fit the existing color, size, texture, and pattern as closely as possible. Because we often work with custom installations, I do not want a strong repair line standing out across an otherwise clean pool deck. Existing pavers can often be reused when they are still in good condition, which helps maintain the original appearance.
After resetting the pavers, I check the joints and replace missing sand. Polymeric sand can help stabilize joints when the surface and weather conditions are suitable, but it cannot repair a weak base or stop water coming from below. Sealing may help protect the finished area later, but the pavers must be clean, dry, and properly repaired first.
For large areas, repeated settlement, or a footing that has moved, I recommend a full inspection before anyone starts patching. You can Get a Free Quote and have the pavers, footing edge, and drainage reviewed together for your patio enclosures.
What Homeowners Should Not Do
The quickest repair is often the one that creates another problem. Pouring concrete over a cracked paver edge may trap water, raise the finished surface, and make future access to the enclosure more difficult. Adding loose sand under one rocking paver does not correct a washed-out base.
Pressure washing also needs care. A strong nozzle can remove joint sand and expose the bedding below. Once enough sand is gone, the pavers lose part of the support that keeps them locked together. A fan tip, controlled pressure, and proper distance are safer than blasting one joint until it looks clean.
I do not recommend drilling into the footing or moving screen posts without knowing how the enclosure was built. Screen enclosures rely on specific concrete anchors to provide necessary uplift protection, and these posts must withstand high winds or even hurricane winds. Altering these connections without professional guidance can compromise the structural integrity of the frame. A footing may support more than one section of the structure, and changing one post can create stress elsewhere.
Before any digging, homeowners should also use the Sunshine 811 service to locate underground utilities. Following these safety regulations is essential, as pool equipment lines, electrical wiring, irrigation, and drainage pipes may pass near the paver area.
If water is the concern, document the area after rain. Take pictures of standing water, note where it enters, and watch how long the surface stays wet. That information helps identify the cause faster than looking at a dry patio alone.
How to Prevent Future Paver Damage
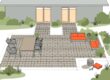
Good preparation is the best protection when installing new patio enclosures beside pavers. Whether you are adding an extension for extra living space or installing a system for insect protection, the project relies on a solid perimeter footer to provide stability. The footing area should be planned with the finished paver height, drainage slope, access points, and edge support in mind. The base around the excavation needs proper compaction before the pavers are replaced.
Keep roof water away from the footing whenever possible. Downspouts should discharge in a controlled location, not directly beside the enclosure or into the paver joints. Make sure irrigation heads are not spraying the footing line every day.
Routine maintenance helps as well. Sweep in new joint sand when gaps begin to appear, remove leaves that hold moisture, and repair small low spots before they become large voids. If the pavers feel loose, do not wait until someone trips or the screen door stops working.
When hiring a contractor, ask whether the quote includes removing and resetting pavers, repairing the base, checking drainage, replacing joint sand, and matching damaged units. It is also essential to verify that your contractor is licensed and insured. For larger projects, always confirm if the work requires professional engineering and permits. A clear scope protects your property and prevents an inexpensive surface repair from hiding a larger foundation problem.
Frequently Asked Questions
Why do my pavers keep sinking next to the screen enclosure even after I fix them?
Often, the base beneath the pavers was never properly re-compacted after the footer was installed. If the soil remains loose or water continues to wash out the bedding sand, the pavers will continue to shift regardless of surface repairs. A lasting fix requires excavating the area and building up a stable, compacted base before replacing the pavers.
Is a small crack in the screen enclosure footing a major structural concern?
Not necessarily, as minor surface cracks in concrete can be cosmetic due to natural thermal expansion. However, if you notice the enclosure posts leaning, the screen door dragging, or the footing visibly pulling away from the patio, it suggests deeper structural movement. These signs indicate the enclosure is shifting and require a professional inspection to ensure stability.
Can I just pour concrete to bridge the gap between my pavers and the footing?
Applying extra concrete to fill gaps is generally discouraged because it creates a rigid, non-flexible bond that can crack quickly as the two systems move independently. This can also trap moisture against the enclosure and complicate any future maintenance or repairs. It is better to address the underlying drainage or base stability issues to prevent the gap from forming in the first place.
Do I need a permit to repair or adjust the pavers near my screen enclosure?
Generally, minor paver resetting does not require a permit, but any work involving the modification of the structural footer or the enclosure itself likely will. Because screen enclosures are engineered to withstand high wind loads, tampering with the foundation or anchoring system requires professional oversight. You should always consult your local building department to confirm the specific requirements for your area.
Conclusion
Cracked pavers beside a pool enclosure usually point to movement, water, disturbed soil, or weak edge support. Because the footing and paver system respond to environmental changes differently, repairing only the visible crack may not provide a permanent solution.
I always inspect the enclosure, concrete support, paver base, joints, and drainage as one integrated area. The lasting repair is the one that corrects the support below the pavers rather than the one that only hides the crack for a short time. By prioritizing subsurface improvements, you ensure the structural stability of your patio for years to come.