


Pergola Post Footings: Plan Before Paver Installation
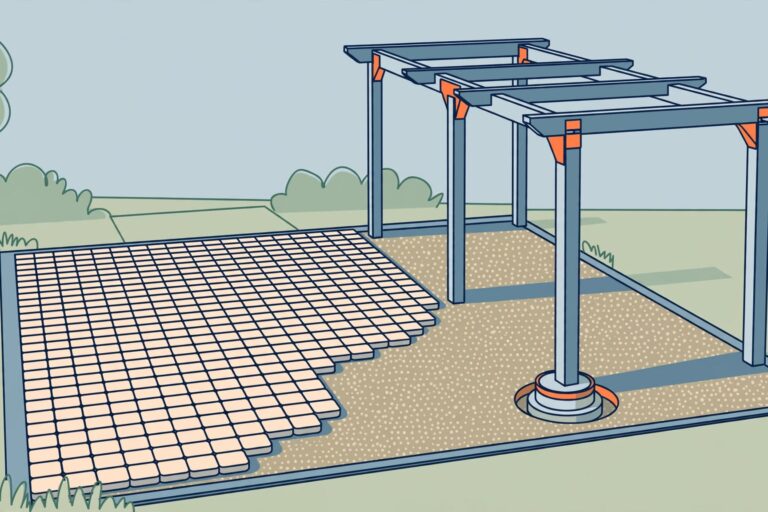
Pergola post footings should be planned and installed before the paver patio is finished. Plan post centers and footing dimensions around the patio footprint and excavation limits before installing the finished surface. Account for drainage fall and paver-base preparation too. Fastening a pergola to individual pavers won’t provide dependable anchorage.
I recommend planning the pergola and patio together because post locations, finished heights, and drainage all affect the installation. Quality preparation protects the structure and helps prevent loose pavers around the posts. Start with the layout and support below ground before choosing the finished pattern.
Key Takeaways
- Install structural footings before finishing the paver base and surface.
- Match footing depth, size, and anchorage to site bearing conditions, structural loads, frost where applicable, and wind exposure.
- Keep wood clear of trapped moisture, and rebuild compacted support around each footing before laying pavers.
Plan Post Locations Before Patio Excavation
Set the footprint and leave usable space
I recommend marking the patio perimeter and every pergola post before excavation begins. Include the actual post width and base hardware, rather than marking only a center point.
Walk through the layout with your furniture arrangement in mind. Chairs need room to pull out, gates need clearance, and walking routes shouldn’t squeeze between a post and the pool edge.
Complete the required permitting and HOA approval before work begins. Contact Sunshine 811 before digging, and arrange separate locating for private underground lines.
Establish finished heights before digging
The finished patio elevation controls where the pier and post base meet the paving. That height must work with door thresholds, pool coping, wall drainage openings, and the planned drainage outlet.
Our guide to paver installation preparation covers these early layout decisions. I put them ahead of the paving pattern because correcting an elevation after installation means taking finished work apart.
How Deep Should Pergola Post Footings Go?
The quarter-post rule has limits
There isn’t one footing depth suitable for every pergola. Burying a quarter of the post is a rough rule sometimes borrowed from fencing and fence posts, not a way to size a pergola foundation.
One design discussed on The Brew Cabin used posts about 2.8 meters long with only 0.5 meter buried. That’s roughly 18% of the post length, less than one-fifth. A quarter would be 0.7 meter.
Those measurements describe a buried-post arrangement. A timber post mounted above a concrete pier needs a different foundation detail. Foundation depth, rather than the timber length underground, becomes part of the structural design.
Soil, frost, and post height control depth
Depth decisions depend on soil quality, the condition of the excavation, post height, and the loads carried above. Loose fill and disturbed ground deserve particular attention.
The IRC foundation provisions address footing support and frost protection. Where freezing occurs, frost depth affects foundation design. Southwest Florida projects still need adequate bearing and wind anchorage without the same freezing concern.
I also separate pergola foundation depth from patio base depth. A compacted paving base supports the walking surface; it doesn’t automatically provide a structural foundation for posts. Our guidance on paver bases in sandy soil explains why the ground underneath deserves attention.
Give Wind Loads Proper Support
An open timber pergola carries downward load from its own weight. Compared with a solid panel fence, its open sides generally present less continuous surface to the wind.
That comparison has limits. Rafters, louvers, shade fabric, privacy panels, and added roofing change how wind acts on the structure. In Southwest Florida, I wouldn’t use an open-sided appearance as a reason to reduce anchorage.
The buried-post lever analogy helps explain sideways movement: ground level acts as the fulcrum, while resistance farther down the hole helps oppose rotation. This fulcrum-and-lever comparison illustrates movement, but it doesn’t calculate footing capacity. Soil strength and footing geometry affect that resistance.
Proper bracing reduces frame movement and can make a pergola behave more like a self-supporting frame. It doesn’t remove the need to transfer uplift and lateral force into the ground.
Bracing can stiffen the pergola above ground while the foundation still needs anchorage against sliding, rotation, and uplift.
Choose the Footing Type Before Digging
The foundation choice should suit the pergola and property. I recommend having the structural detail settled before the paving crew builds around it.
These footing types handle support in different ways.
| Footing type | Where it can fit | Main consideration |
|---|---|---|
| Isolated concrete piers or pads | Individual pergola posts | Size and reinforcement depend on loads and soil. |
| Strip footings | Linear trellis or arbor layouts | Continuous excavation affects nearby paving and drainage. |
| Raft or structural slab | Designs needing a larger supporting foundation | An ordinary patio slab isn’t automatically suitable. |
| Screw piles or helical anchors | Engineered installations, including constrained sites | Capacity depends on the system and ground conditions. |
| Composite bearing pads | Compatible post-foundation systems | Separate lateral and uplift resistance is needed. |
Round forms such as Sonotubes in the 12- to 18-inch range, with designed rebar reinforcement, are common examples of pier construction. Those dimensions aren’t a recommendation for every pergola.
For composite pads, the limitation matters. FootingPad’s evaluation report identifies the pads as bearing supports, not components for resisting lateral or uplift loads.
Dig the Hole Shape Shown in the Foundation Detail
A hole that looks deep enough can still have inadequate bearing area. I recommend following the designed bottom width and shape, and removing loose material before the pour.
The Brew Cabin discussion described round holes about 2 feet deep, tapered from 11 inches across at the top to 7 inches near the bottom. This tapered bottom provides less bearing area than an 11-inch bottom. It shouldn’t become a standard simply because an auger or hand digging produces that shape.
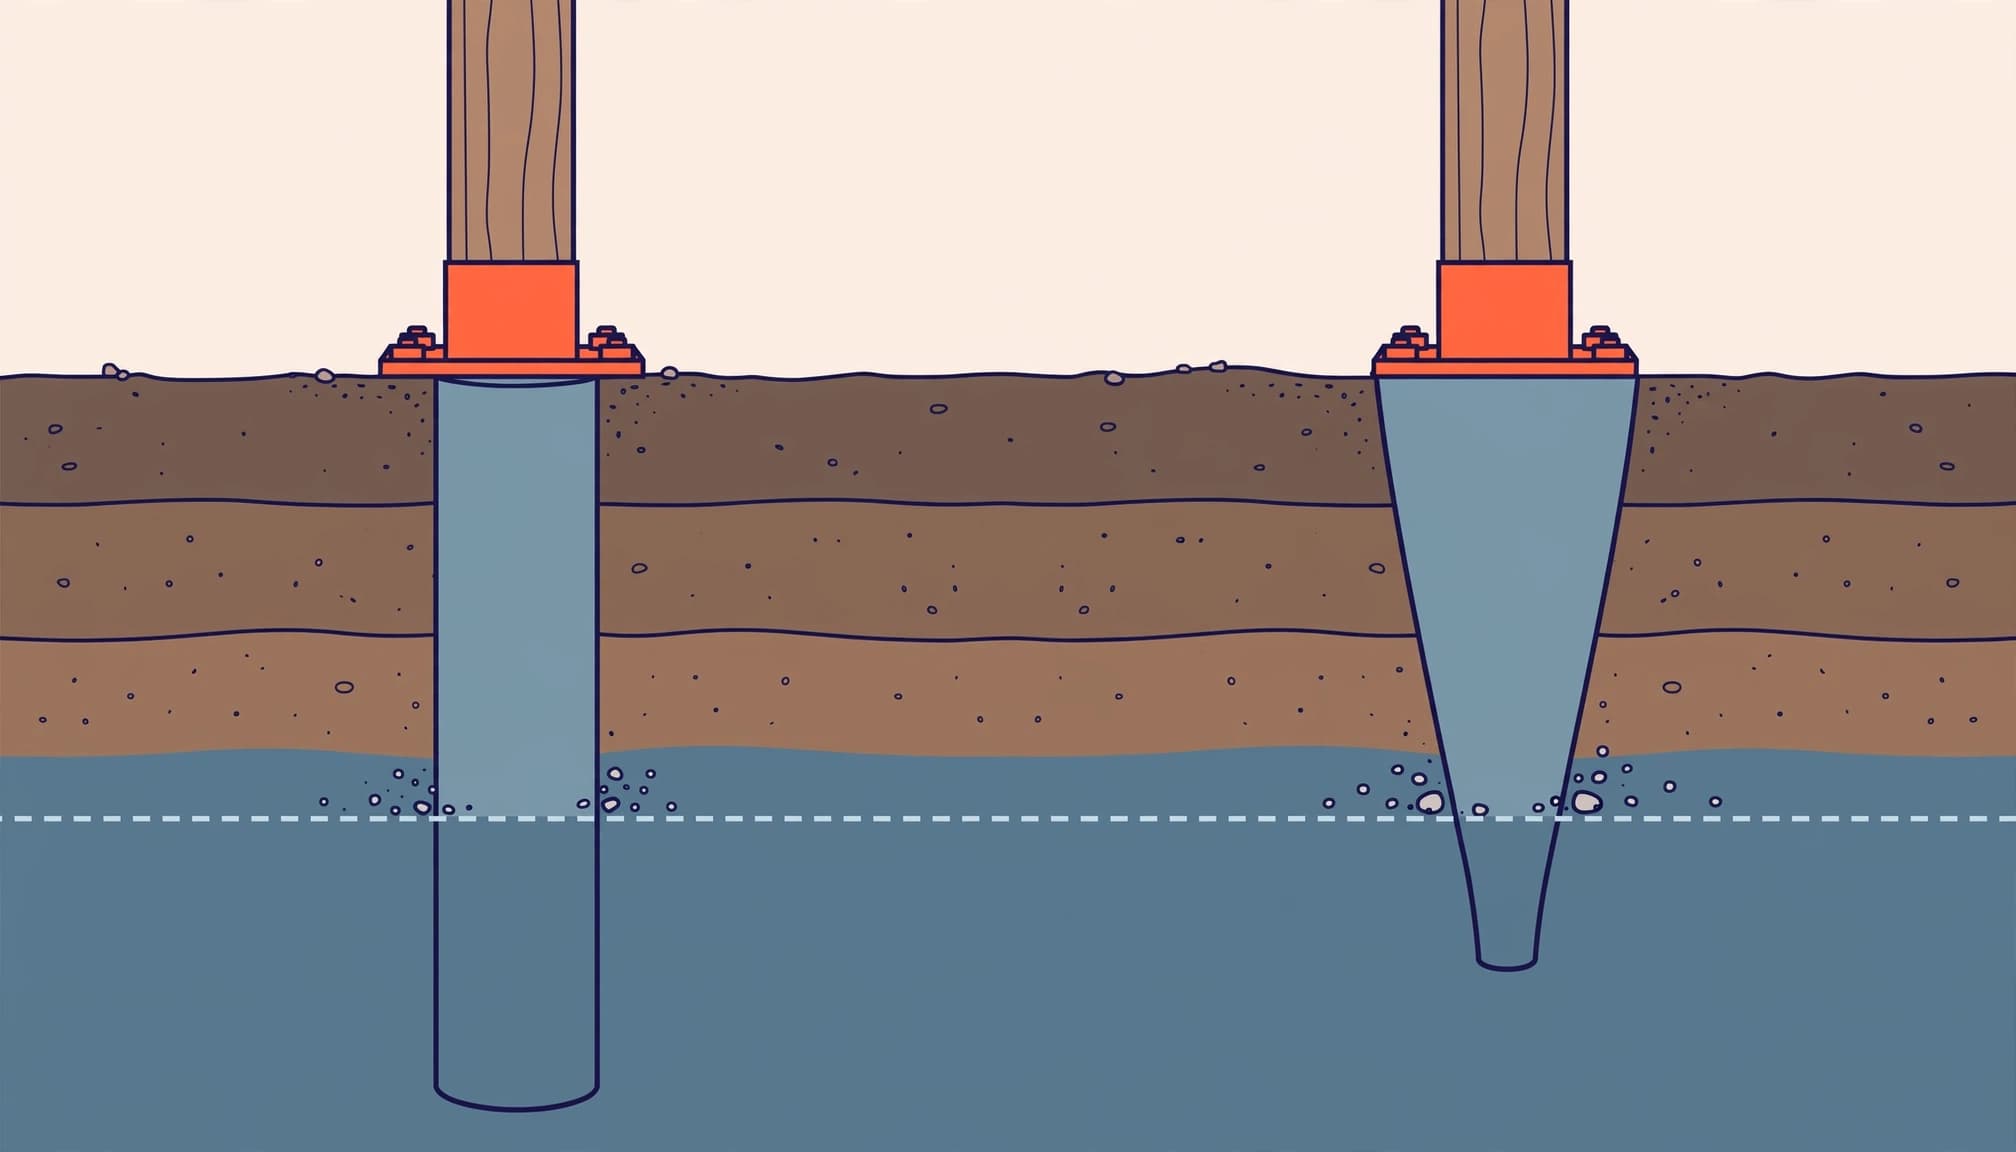
Suggestions in that discussion included digging deeper, adding a couple of bags of Postcrete per hole, fitting a spike to the post end, or wedging bricks against well-compacted hole sides before pouring.
I wouldn’t substitute those additions for a foundation detail. Extra bags don’t automatically correct insufficient width or weak ground, and loose bricks aren’t designed reinforcement. A spike also needs a suitable structural role; its presence alone doesn’t establish anchorage capacity.
Keep Timber Clear of Wet Paving
For a pier installation, I favor a specified metal post base that holds timber above the pier and finished paving. That separation helps reduce prolonged wetting at the wood end.
The connector must also suit the required loads. A simple standoff bracket doesn’t automatically provide enough resistance to frame rotation, so the post base, bracing, anchors, and foundation need to work together.
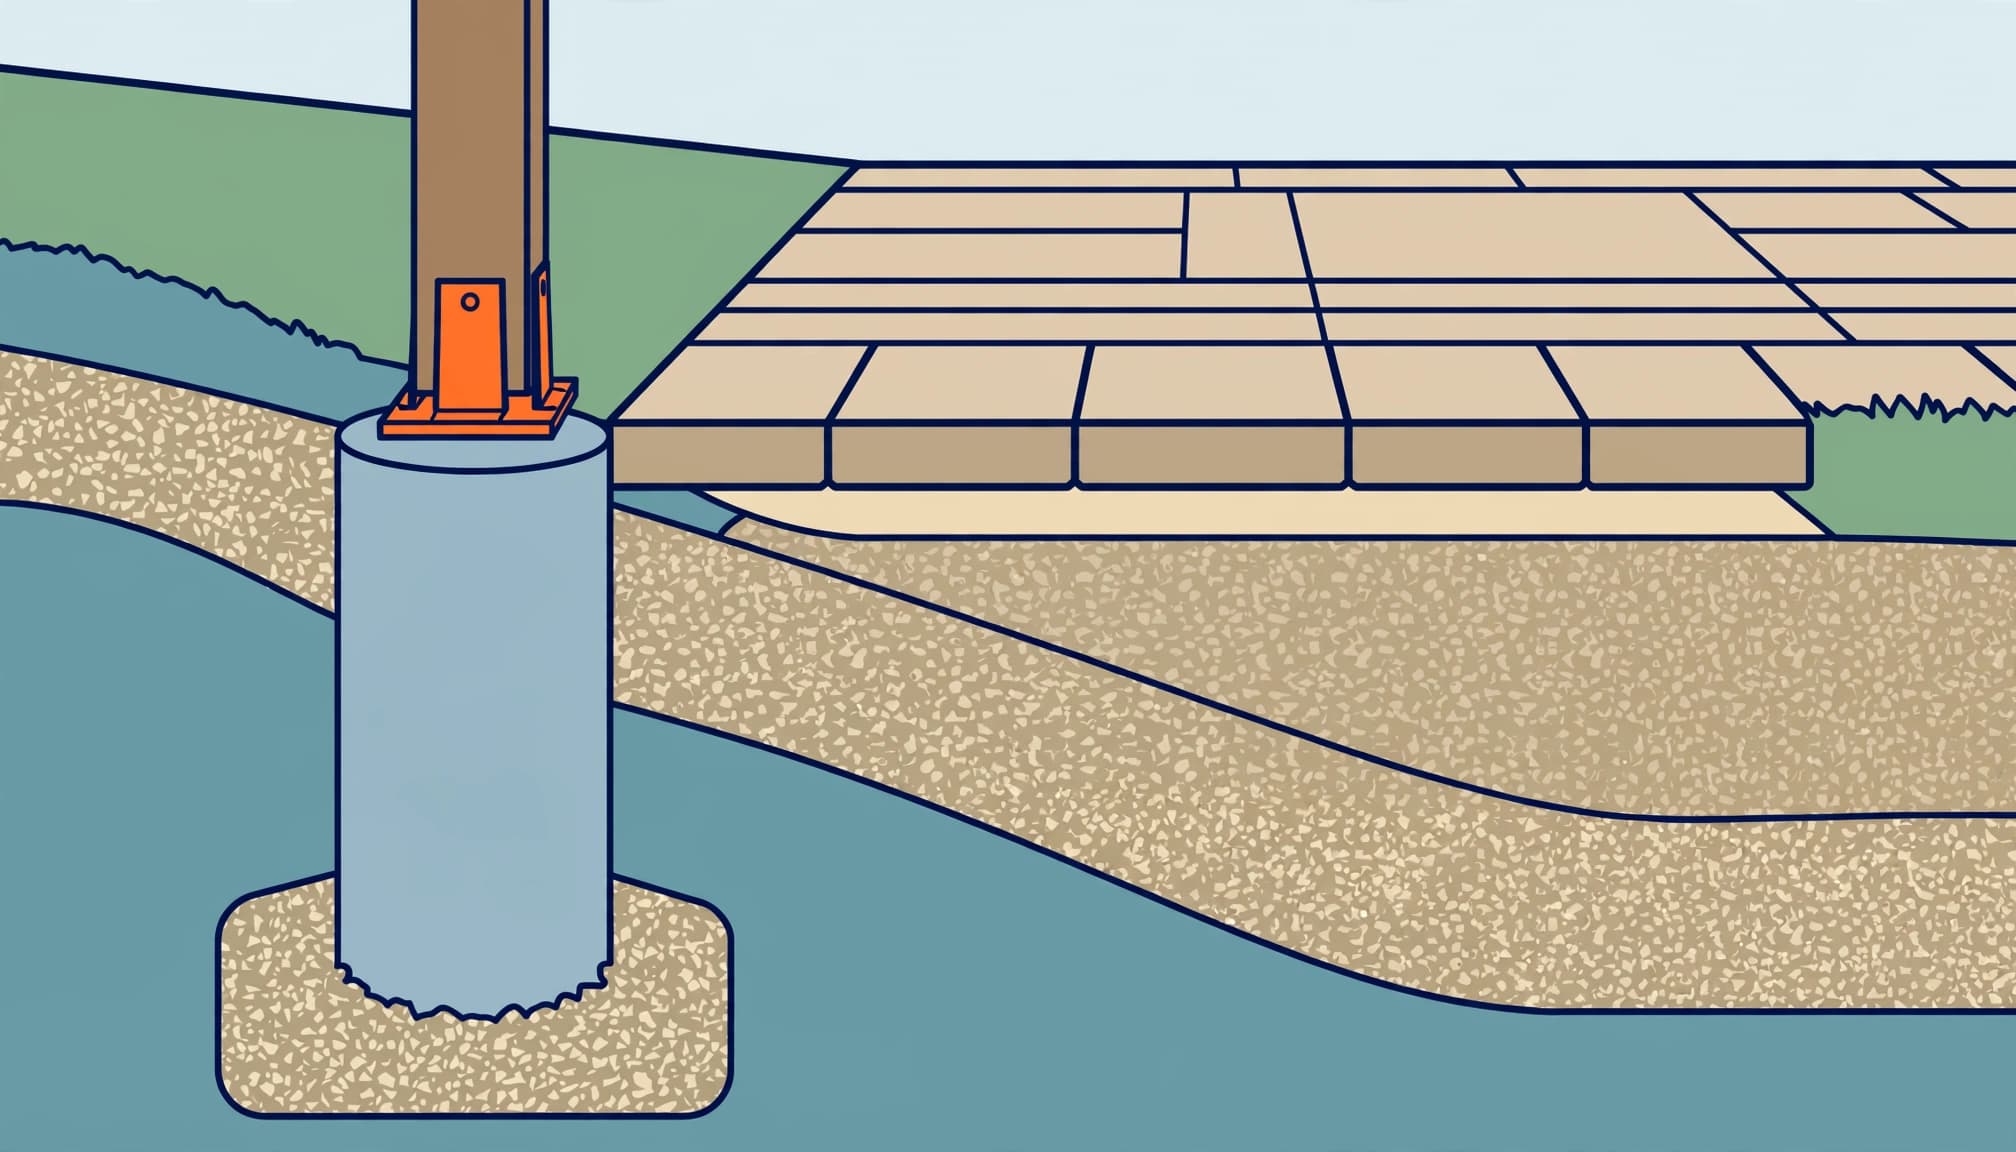
Keep mulch, garden earth, and thick joint material away from the timber. Don’t raise pavers around a post until the wood sits in a pocket that holds rainwater.
I plan the water route at the same time. Our paver patio drainage guidance explains how finished elevations, base preparation, and a suitable outlet work together. Water shouldn’t collect beside the footing or discharge against the house.
Finish the Footings Before Building the Paver Surface
The installation sequence matters. Digging structural holes through a finished patio disturbs the bedding and aggregate, and repairing the area later adds work.
I recommend this order:
- Establish post centers, finished paver elevations, drainage routes, and the structural foundation detail before excavation.
- Excavate the post holes and construct the footings, including specified reinforcement and anchors. Complete required inspections before covering the work.
- Let each footing reach its specified strength before loading it, then restore disturbed ground and aggregate around it.
- Install consistent bedding, cut pavers around the foundation detail, and complete edge support, compaction, and compatible joint filling.
Keep excavated earth, roots, and construction debris out of the structural paver base. Place suitable aggregate in controlled lifts and compact each lift.
Common pedestrian patio planning ranges include 4 to 6 inches of compacted aggregate and roughly 1 inch of bedding sand. Ground conditions and the selected paving system may require a different assembly.
Build the drainage fall into the subgrade and aggregate. Thick bedding sand shouldn’t hide low spots or replace missing base material.
Before finishing, I want the cuts supported, the hardware accessible, and the surrounding pavers firm underfoot. A neat surface shouldn’t hide loose backfill beside a footing.
Frequently Asked Questions
Is Hanson PostFix better than Blue Circle Postcrete?
I wouldn’t choose between Hanson PostFix and Blue Circle Postcrete by brand name alone. A post fix concrete product must meet the specified foundation requirements.
Neither product replaces adequate footing dimensions, reinforcement where required, or proper placement and curing. A quick-setting fence-post approach shouldn’t be assumed suitable for a structural pergola pier.
Can composite pads replace poured footings?
They can be part of a compatible foundation system, but they aren’t a complete anchoring solution by themselves. FootingPad’s installation instructions include preparing a level, compacted bottom.
The complete system still needs the lateral and uplift resistance required for the pergola. I recommend professional structural design where those forces aren’t addressed by an approved assembly.
What goes around a 4×4 post before setting it?
That depends on whether the post is designed for burial or mounted above a pier. I favor a designed above-pier connection where practical, rather than wrapping ordinary lumber and assuming it’s protected.
For an embedded-post design, the timber’s suitability for that exposure and the complete installation detail matter. A 4×4 size alone doesn’t establish adequate structural capacity.
Build Solid Support Before the Finished Surface
A durable patio under a pergola starts with coordinated preparation. Set the structural footings first, protect the wood connection, and restore firm paving support around every excavation.
I put that work ahead of the final appearance because dependable support and controlled drainage help keep your outdoor space looking good.
For your Southwest Florida patio project, Get a Free Quote and contact us for a free consultation and estimate. Let’s plan the paver installation around the pergola foundations before work begins.